
Notification Center — Complete Guide
Install and run the WooCommerce notification center 2.0: bell placement, design, announcements with live preview, targeting and scheduling, automations, order updates, My Account, blocks, REST API and troubleshooting.
Overview
DataFirefly Notification Center adds a bell with an unread badge to your WooCommerce store. It opens a clean panel with your announcements, offers with a copy button, new products with their price, blog posts and, for customers with an account, the progress of their own orders.
Version 2.0 is a complete redesign: dashboard, composer with a live preview, audience targeting, scheduling, automatic notifications, personal order updates, a Notifications tab in My Account, two Gutenberg blocks and eight languages. It is accessible, page-cache friendly and compatible with HPOS and block themes.
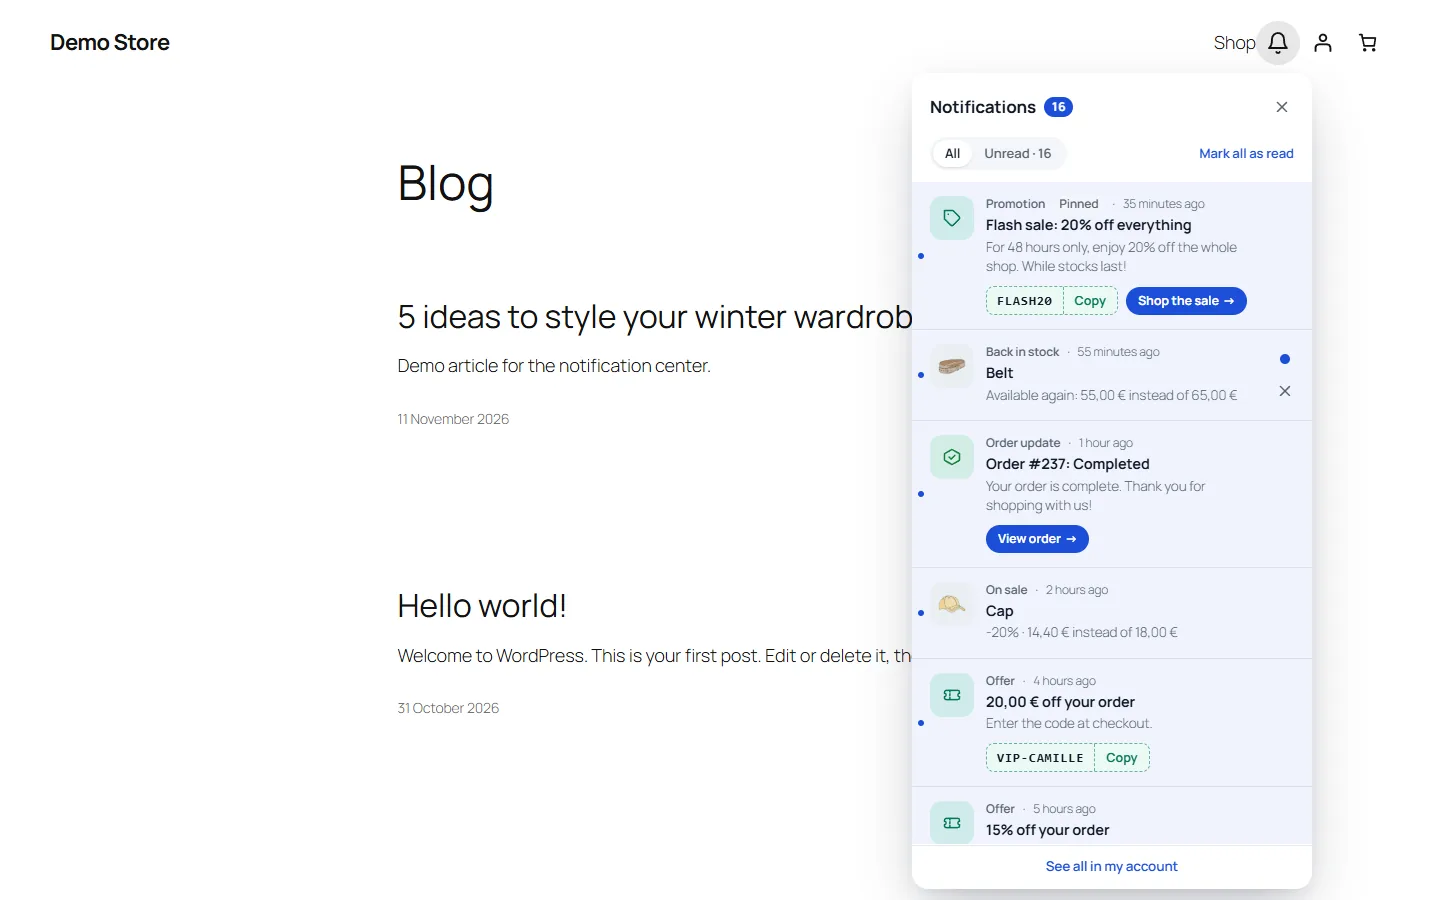
In short: install, open Notifications > Dashboard and follow the four-step guide. With a block theme such as Twenty Twenty-Five, the bell is already in your header.
Installation and update
- In Plugins > Add New > Upload Plugin, choose
df-notification-center-2.0.0.zip, then activate DataFirefly Notification Center. - Open Notifications > Dashboard.
Requirements: WordPress 6.4 or later, PHP 7.4 to 8.5. WooCommerce 8.2 or later is needed for products, offers, order updates and the My Account tab; announcements and blog posts work without it.
Updating from 1.x
Upload the new zip and choose Replace current with uploaded. Your notifications, click counts, settings and the read states of your customers are kept; a backup of the 1.x settings is stored. Texts of product, coupon and post notifications are now written when they are displayed, so old prices with HTML entities are fixed by themselves. The new personal notifications (orders, notes, welcome) stay off until you turn them on in Notifications > Automations.
Dashboard and setup guide
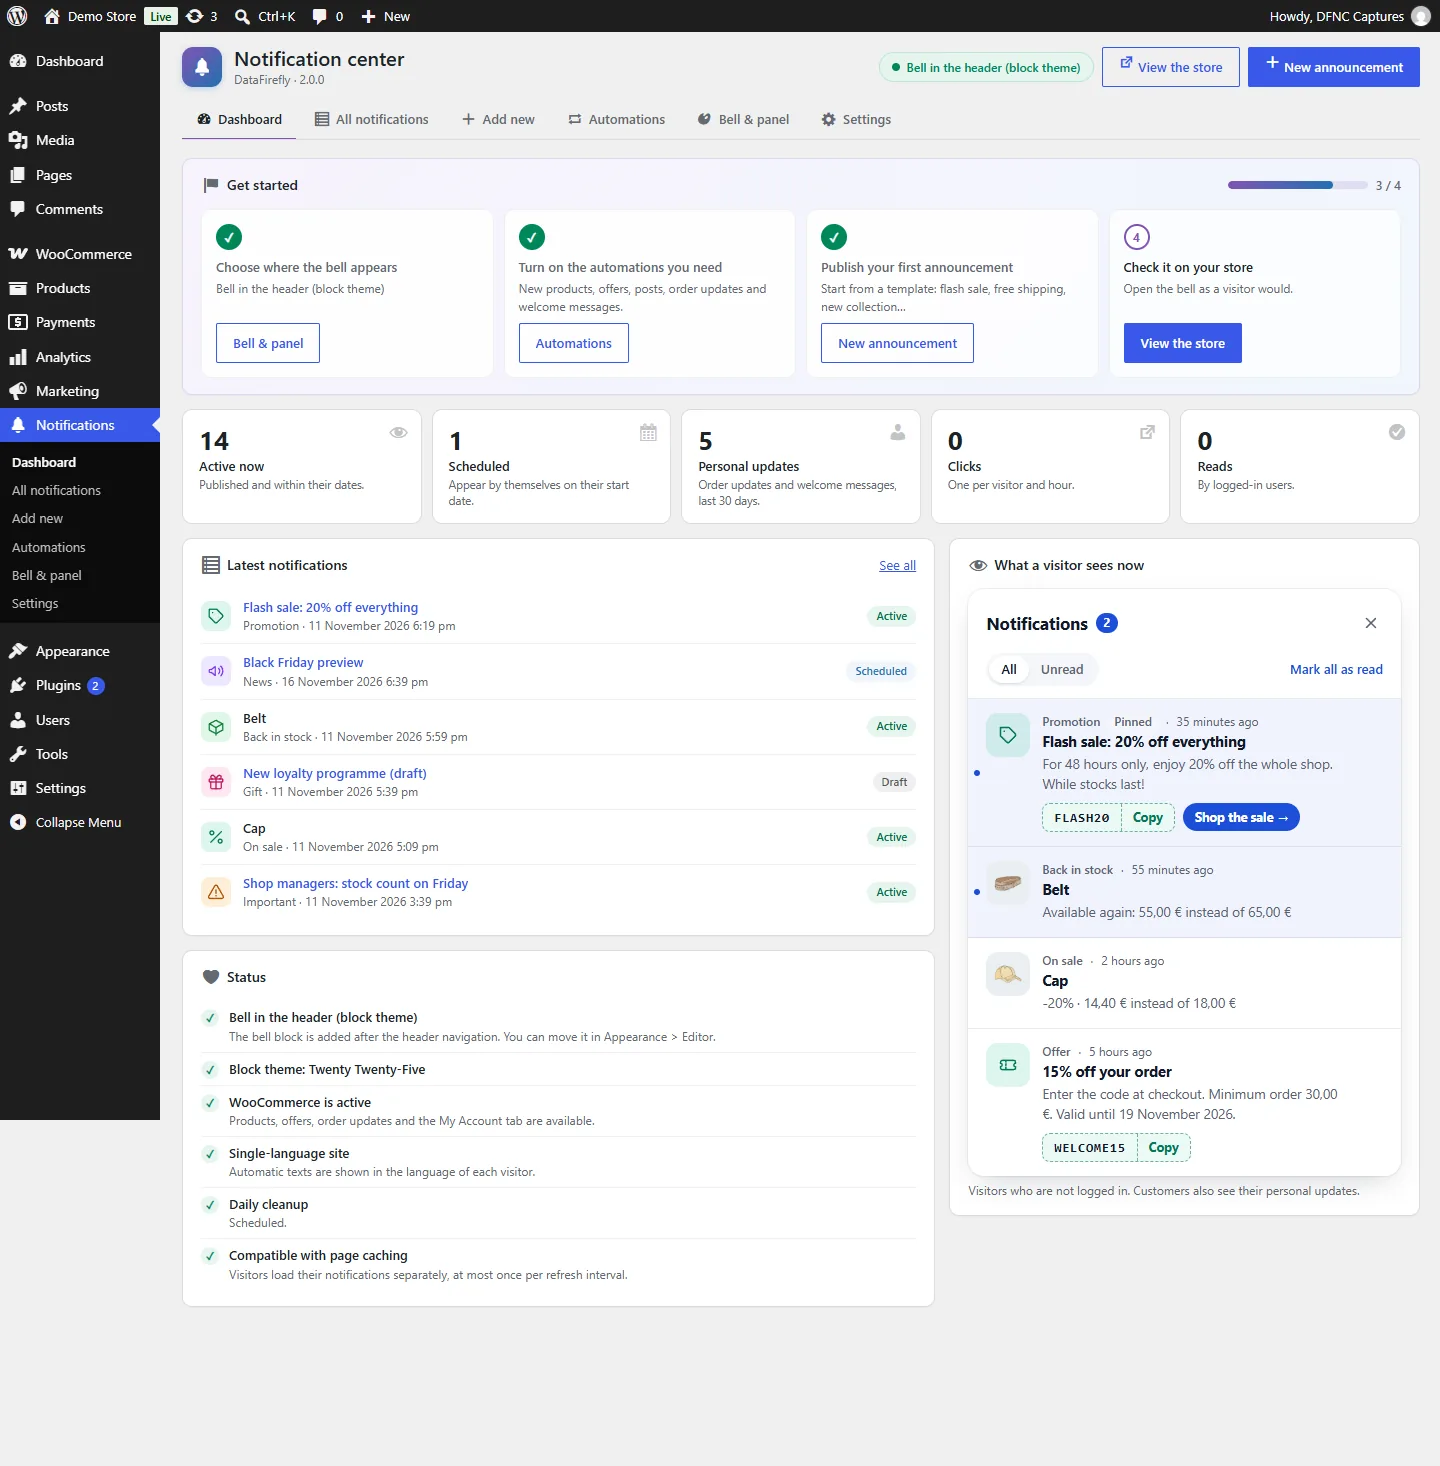
The dashboard shows a four-step guide (where the bell appears, automations, first announcement, check on your store), five figures (active, scheduled, personal updates over 30 days, clicks, reads), the latest notifications with their status, a status of the installation and a preview of what a visitor who is not logged in sees right now.
Where the bell appears
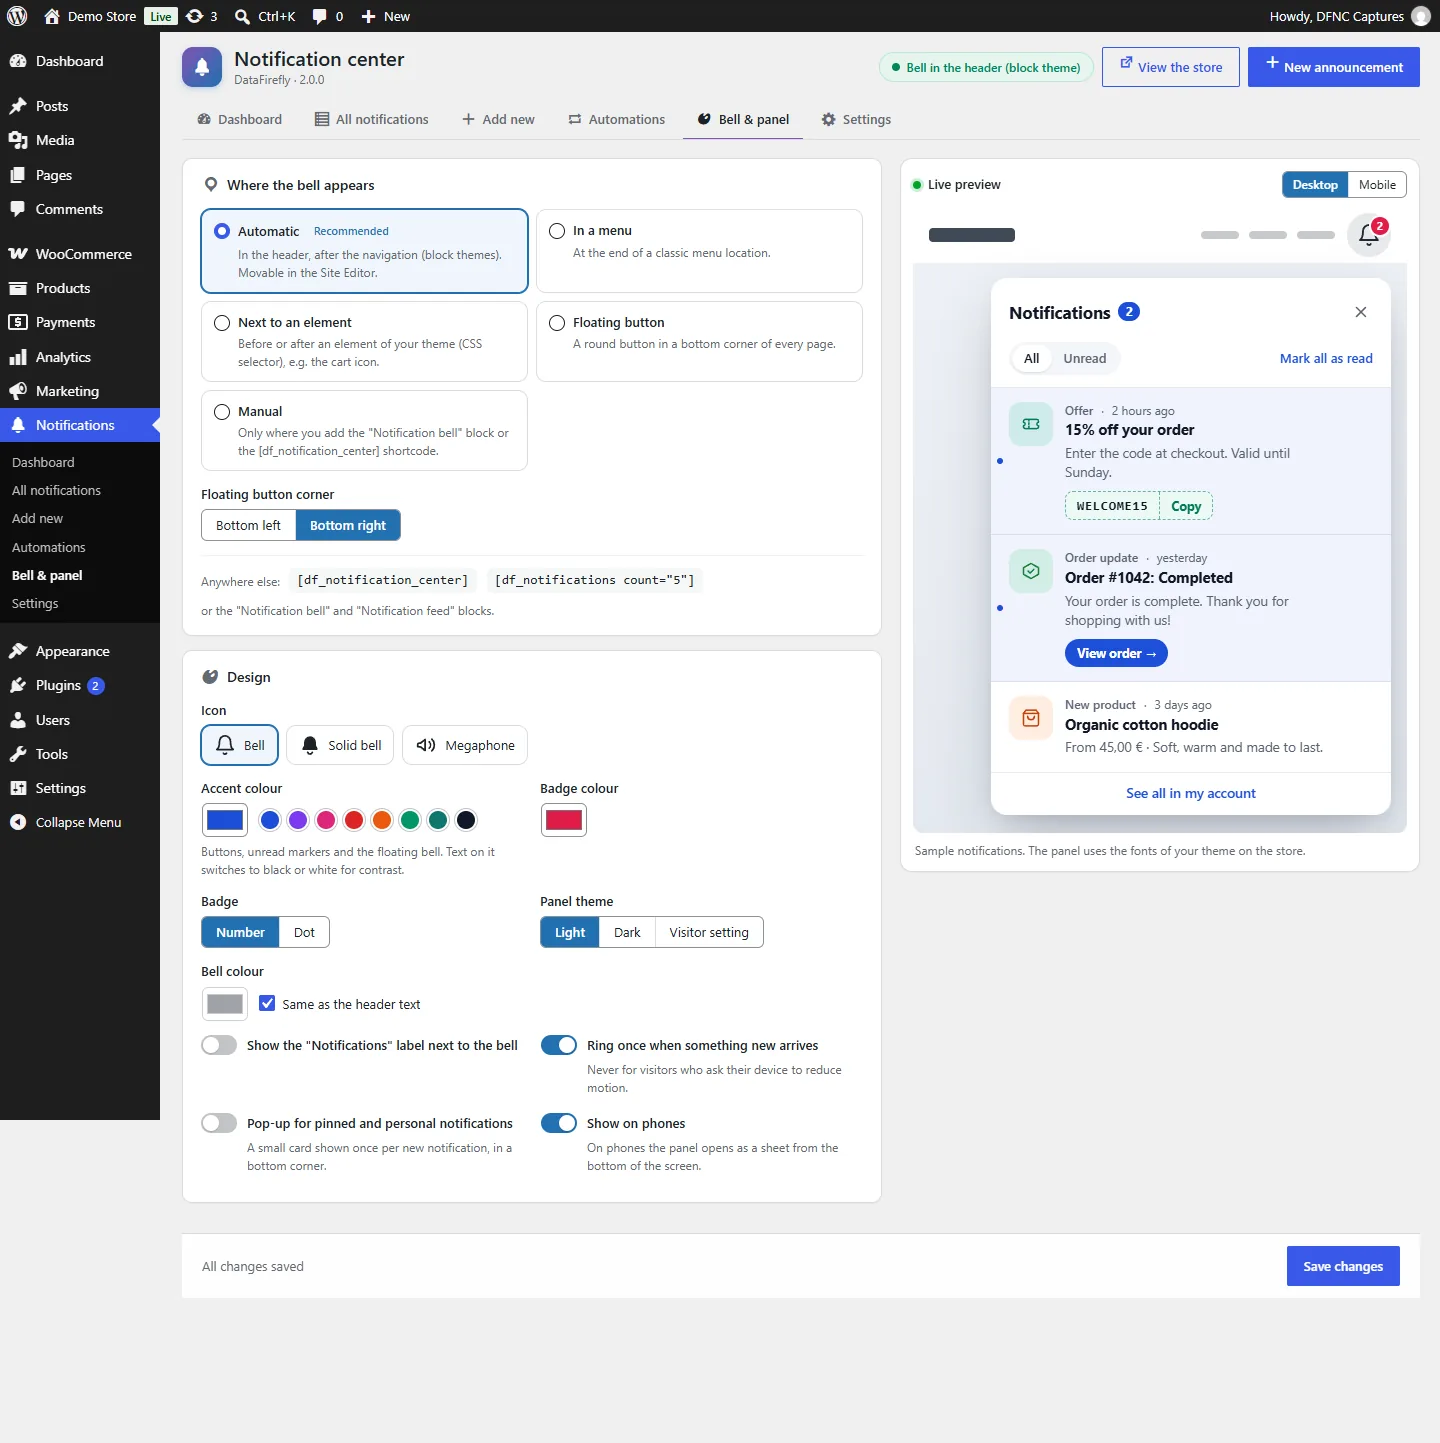
Choose the placement in Notifications > Bell & panel. The live preview on the right shows the result.
- Automatic (recommended): with a block theme, the “Notification bell” block is added to the header after the navigation, before the account and mini-cart icons; you can move or remove it in Appearance > Editor. With a classic theme, the bell goes at the end of the main menu; if no menu is assigned, a floating button is shown instead.
- In a menu: at the end of the classic menu location you choose.
- Next to an element: before or after an element of your theme, given by a CSS selector (for example the cart icon). If the element is missing on a page, a floating bell is shown instead.
- Floating button: a round button in the bottom left or right corner.
- Manual: only where you add the block or the
[df_notification_center]shortcode.
The header pill of the plugin screens and the Tools > Site Health test tell you whether the bell is visible with your theme and settings.
Bell and panel design
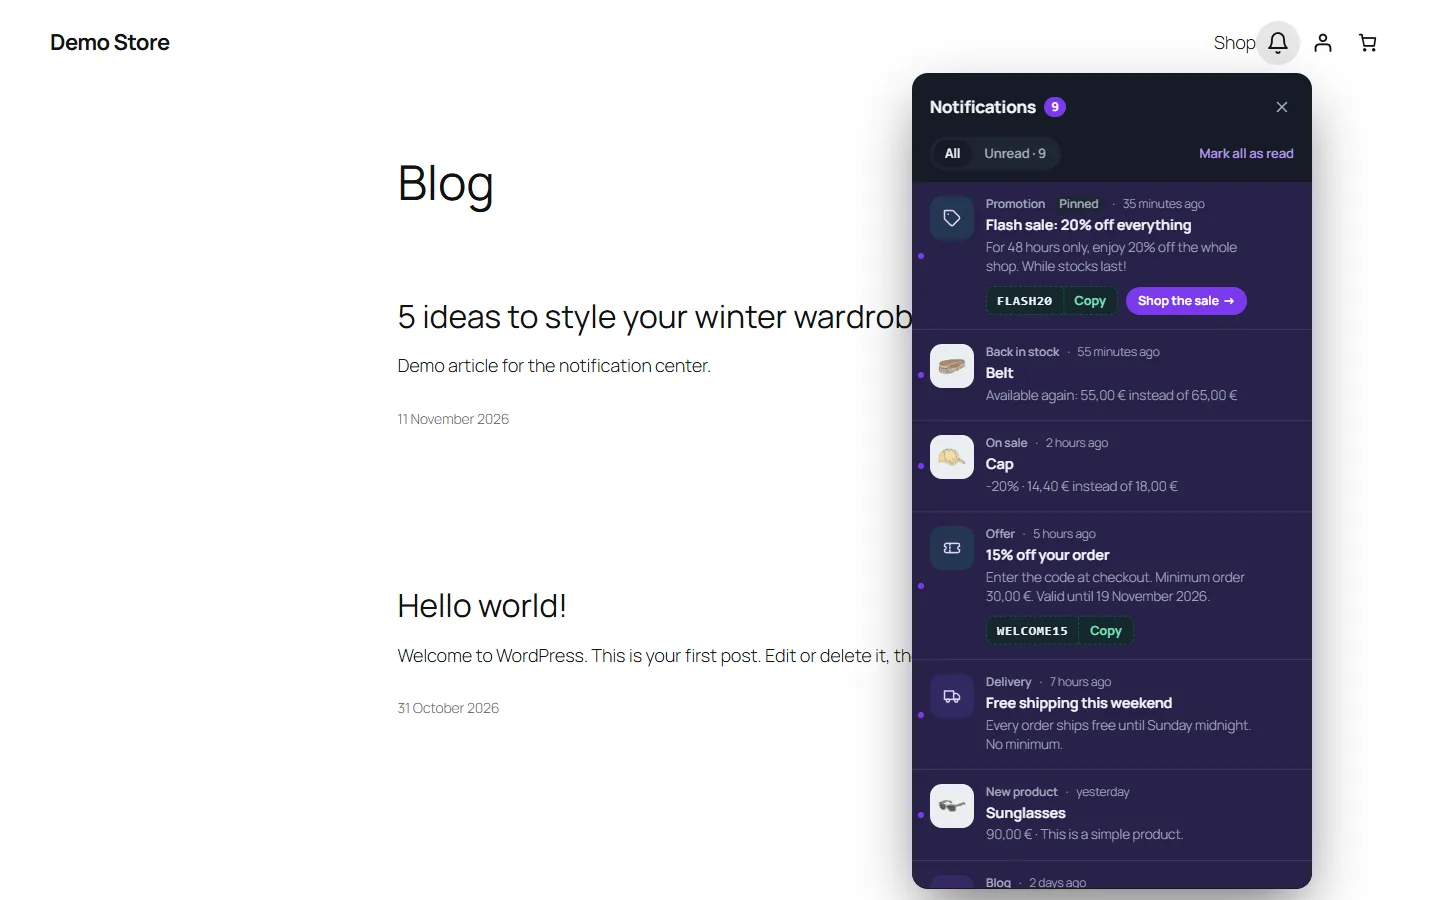
Choose the bell icon (bell, solid bell, megaphone), the accent colour (eight suggestions; the text on it switches to black or white for contrast), the badge colour, a number or a dot, the panel theme (light, dark or the visitor’s device setting), the “Notifications” label, a single ring when something new arrives (never for visitors who reduce motion), the pop-up for pinned and personal notifications and the display on phones.
Creating an announcement
Open Notifications > Add new. Start from one of the eight templates (flash sale, free shipping, new collection, gift with purchase, event, delivery delay, opening hours, thank you) or from scratch, then:
- choose a style (information, promotion, gift, delivery, news, event, good news, important);
- write the title and the message (counters show the length);
- add a link and a button text, a promo code (shown with a copy button) and an image;
- choose the audience: everyone, logged-in users, visitors who are not logged in, users with a role, specific users (search by name or email) or customers who have ordered; with Polylang or WPML, a language;
- set the schedule: show from, hide after (site time zone), pin to the top;
- click Publish (or Schedule when the start date is in the future) or Save draft.
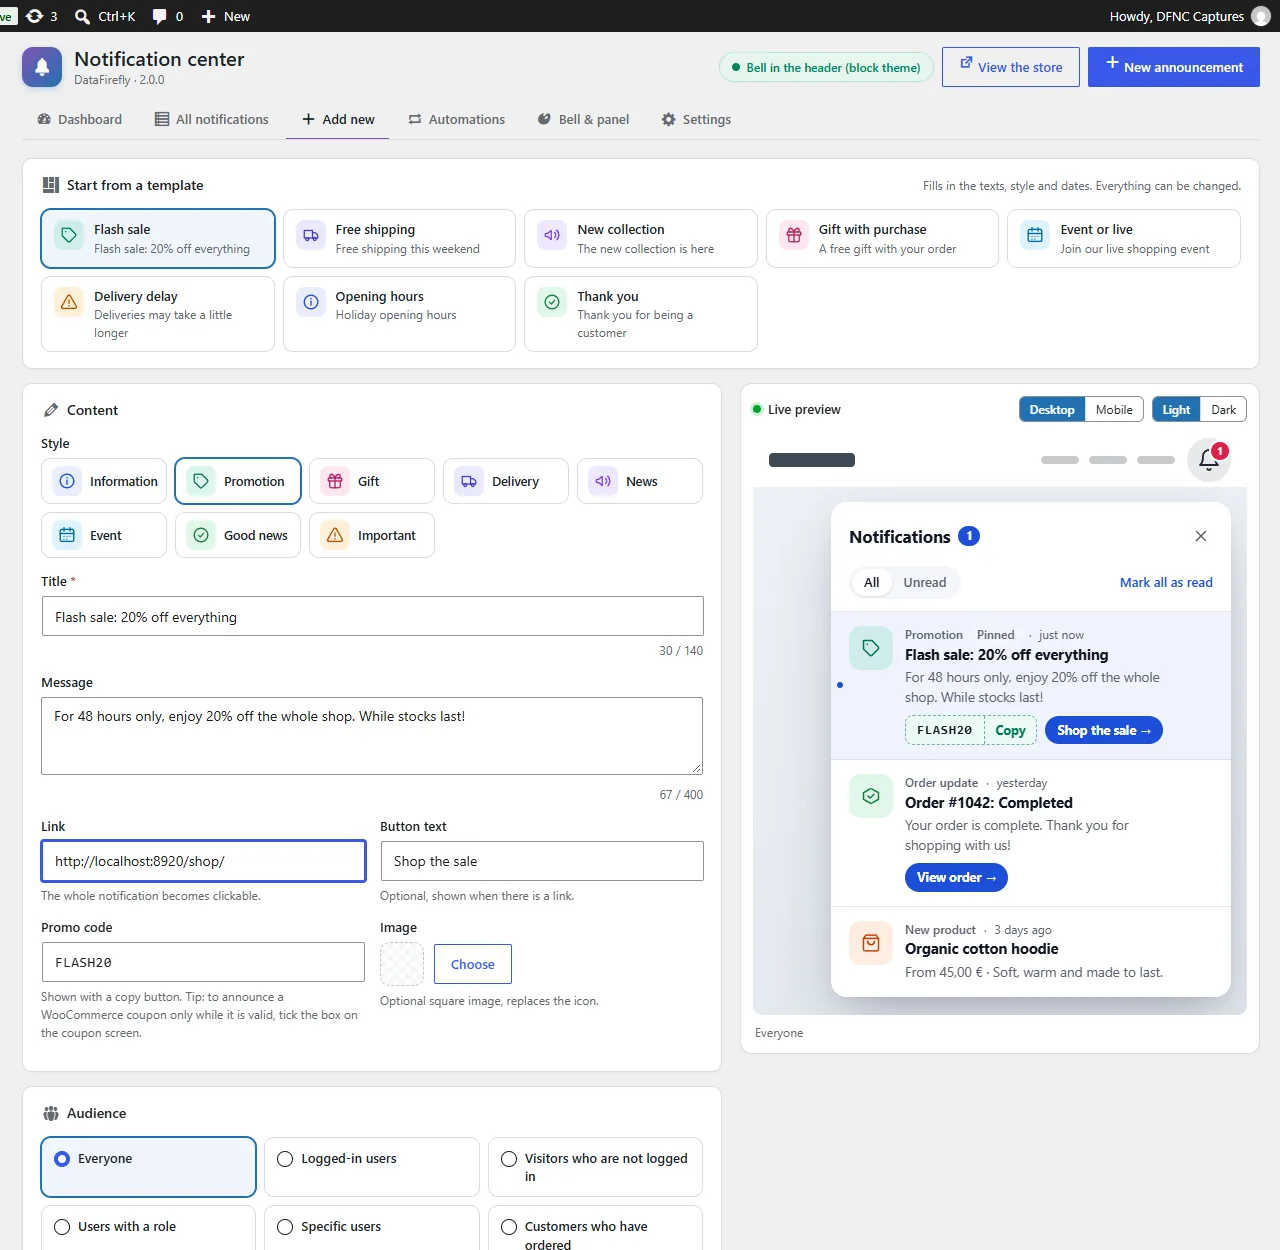
The preview shows the panel exactly as visitors will see it, on desktop or mobile, in light or dark theme. The page warns you before you leave with unsaved changes.
Managing notifications
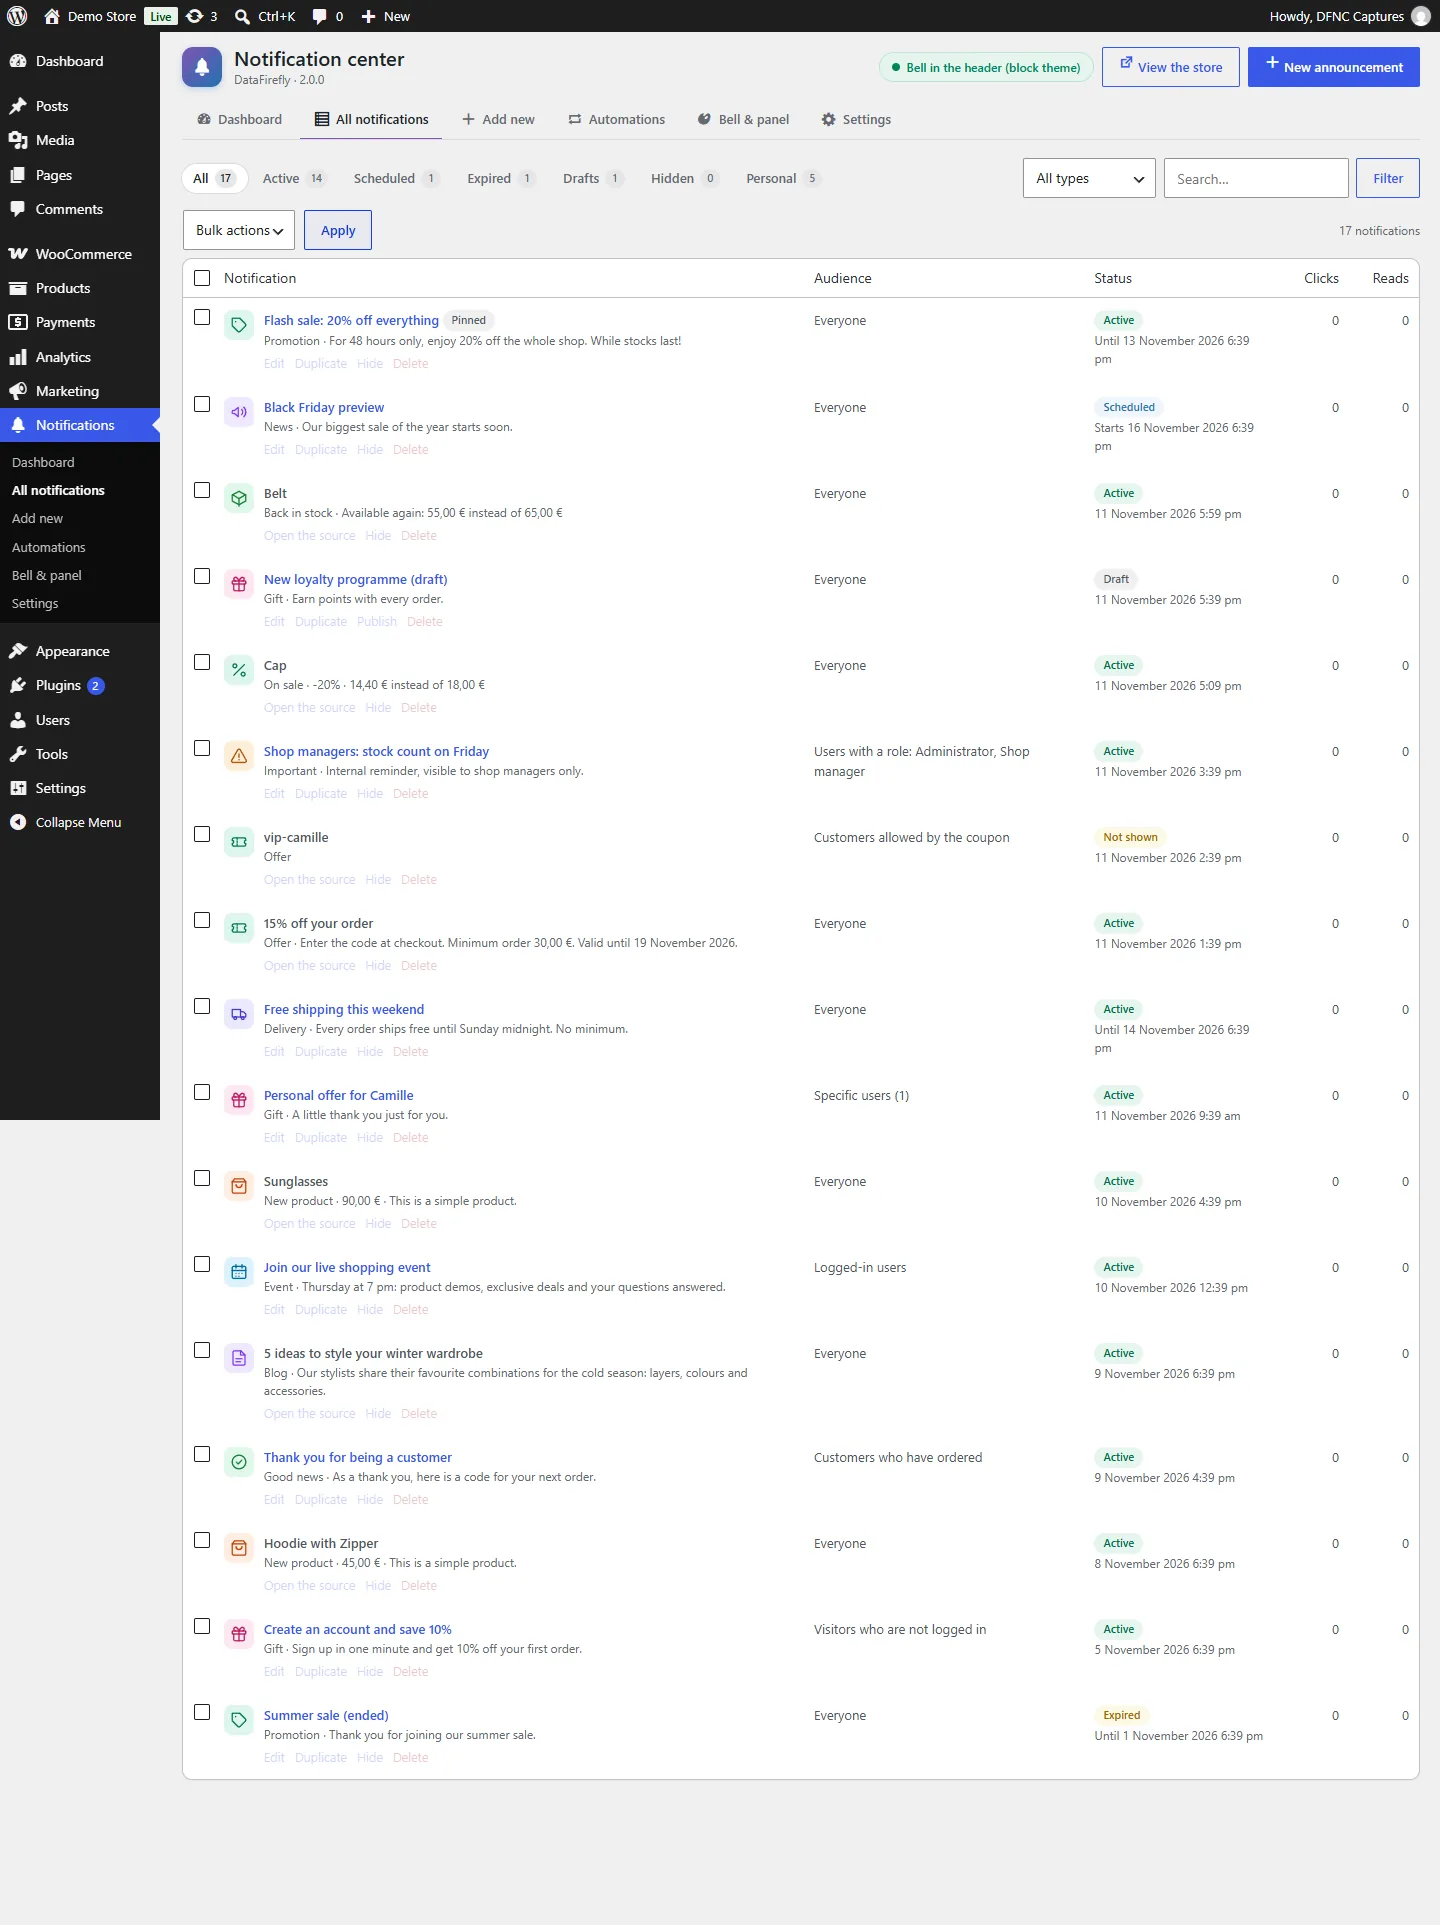
Notifications > All notifications lists every notification with its type, audience, status (active, scheduled, expired, draft, hidden, not shown), clicks and reads. Use the views, the type filter and the search; edit, duplicate, hide, show or delete from each row, or several at once with the bulk actions. Automatic notifications link to their product, coupon or post; the Personal view lists order updates and welcome messages.
Automations
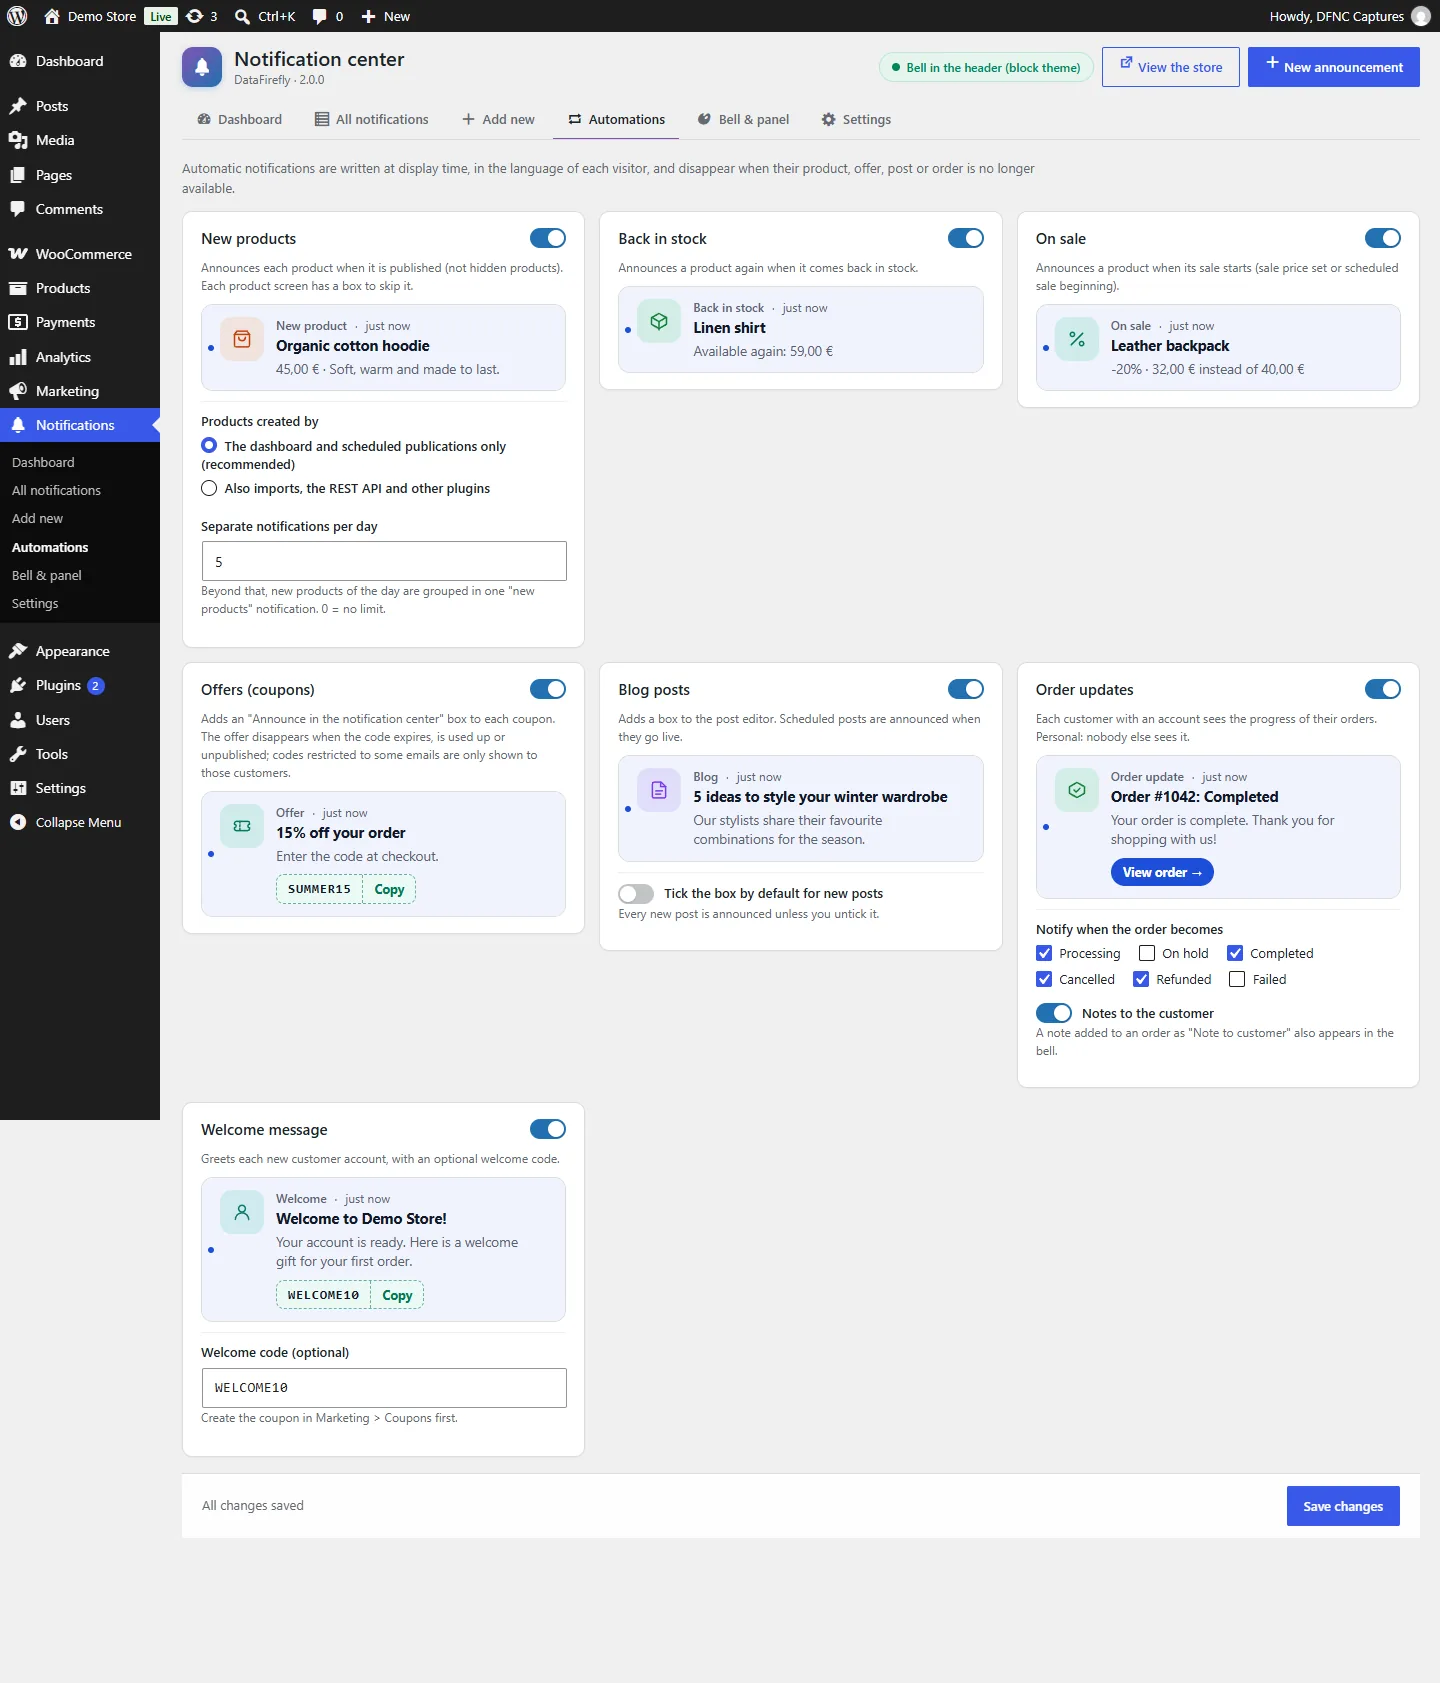
Notifications > Automations shows each automatic notification as a card with a switch and an example. Their texts are written when they are displayed, in the language of the visitor, with the current price, and they disappear when their product, offer, post or order is no longer available.
- New products: announced when they are published, never when hidden from the catalogue. By default only products published from the dashboard or on schedule (not imports, the REST API or other plugins). Beyond the daily limit (5 by default), the new products of the day are grouped in one notification. The product screen has an Announce in the notification center box.
- Back in stock and On sale: announced when a product comes back in stock or when its sale starts (including scheduled sales).
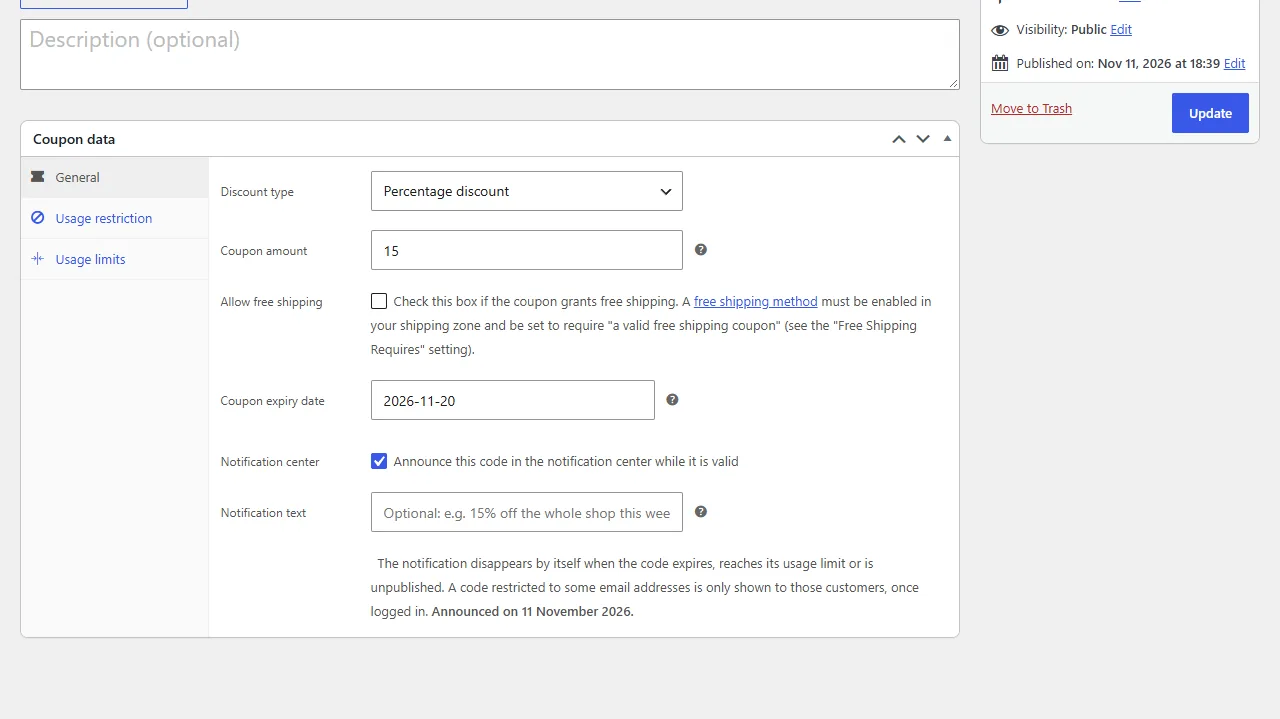
- Offers (coupons): a box on each coupon. The offer is shown while the code is valid (published, not expired, usage limit not reached); a code restricted to some email addresses is only shown to those customers, once logged in.
- Blog posts: a box in the post editor; scheduled posts are announced when they go live. Option: tick the box by default for new posts.
- Order updates, notes to the customer and welcome message: see the next section.
Personal notifications and My Account
Customers with an account receive personal notifications that nobody else sees:
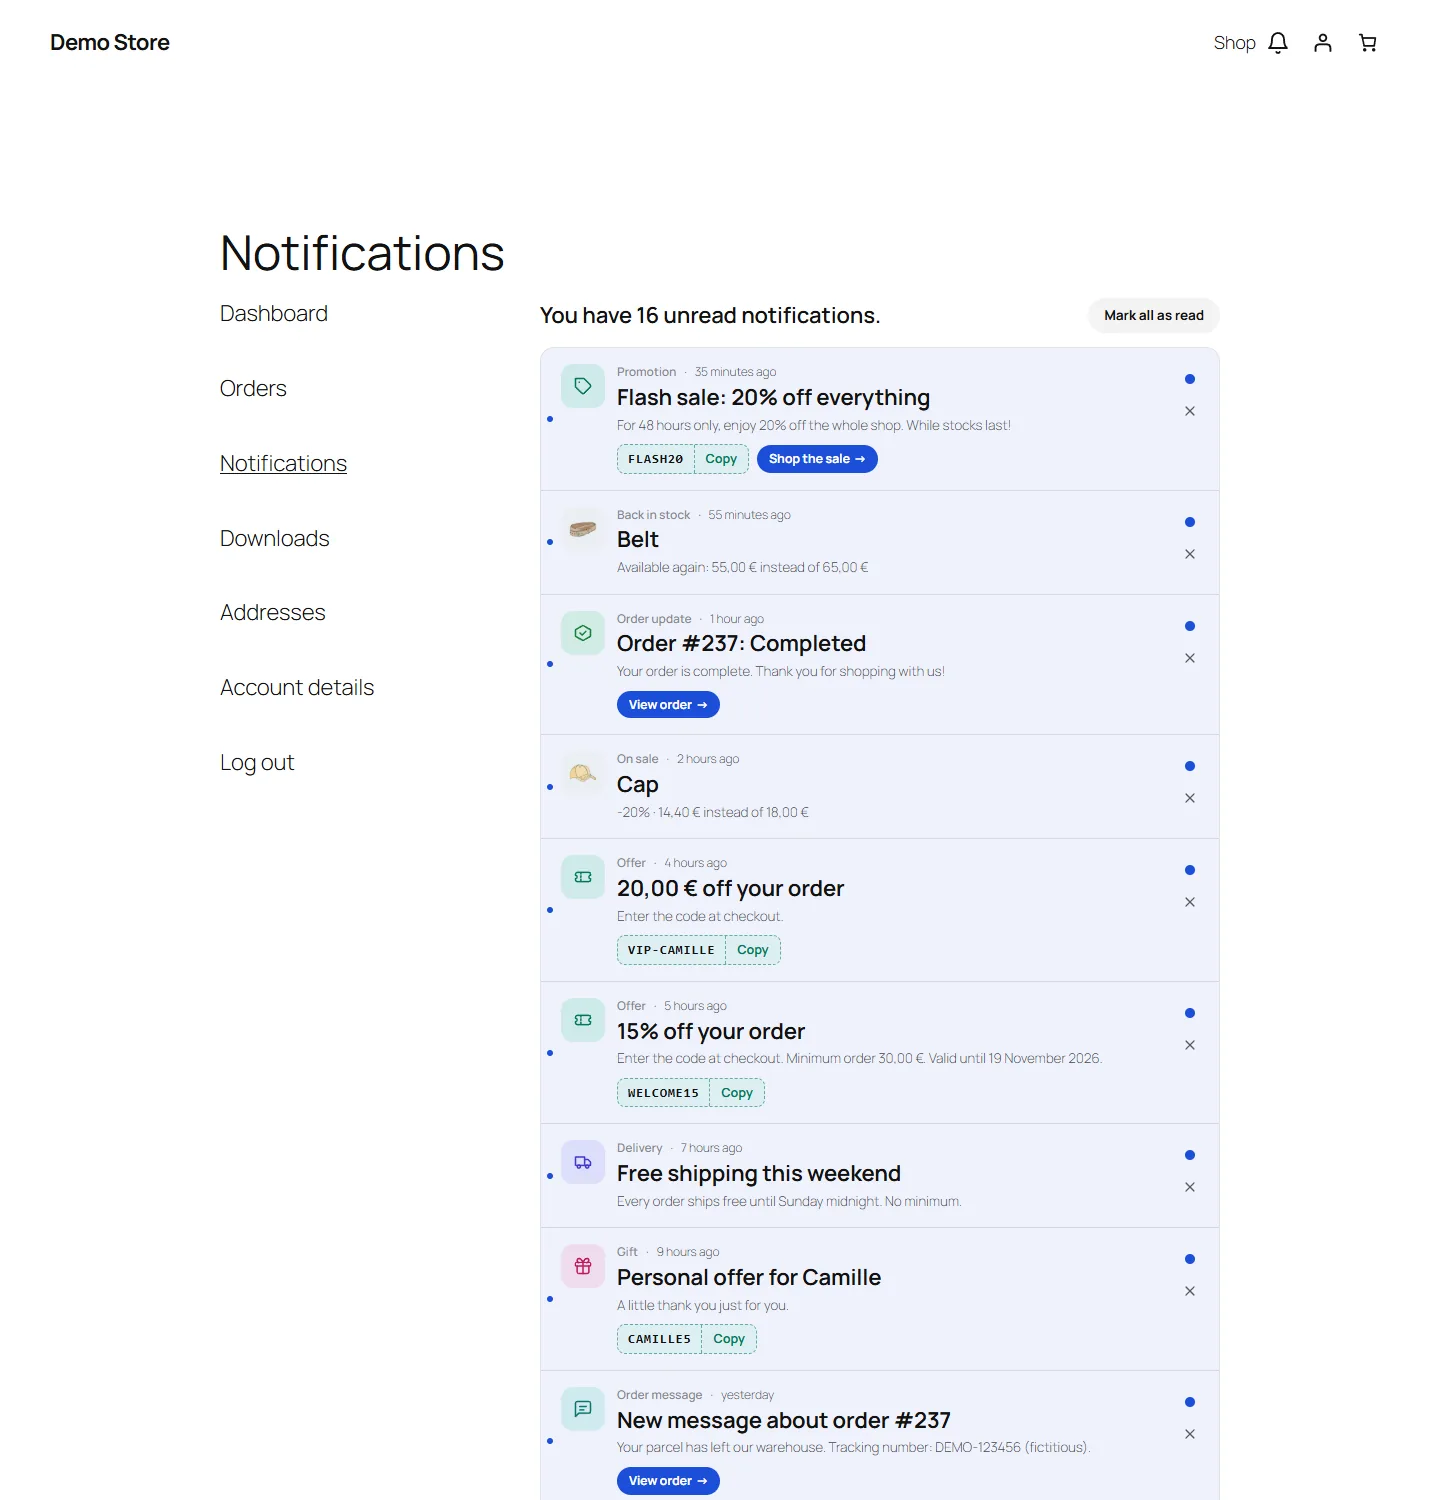
- Order updates for the statuses you choose (processing, completed, refunded, cancelled… on hold if you add it), with a View order button;
- notes to the customer added to an order;
- a welcome message for each new customer account, with an optional welcome code.
The Notifications tab of WooCommerce My Account lists all their notifications, with mark as read or unread, remove and mark all as read.
What visitors see
The badge counts what arrived since the visitor last opened the panel. In the panel, new notifications stay highlighted until they are clicked or marked as read. Visitors can filter all or unread notifications, mark all as read, mark one as read or unread, remove one (with Undo), show more and copy a promo code in one click. On phones the panel opens as a sheet from the bottom of the screen.
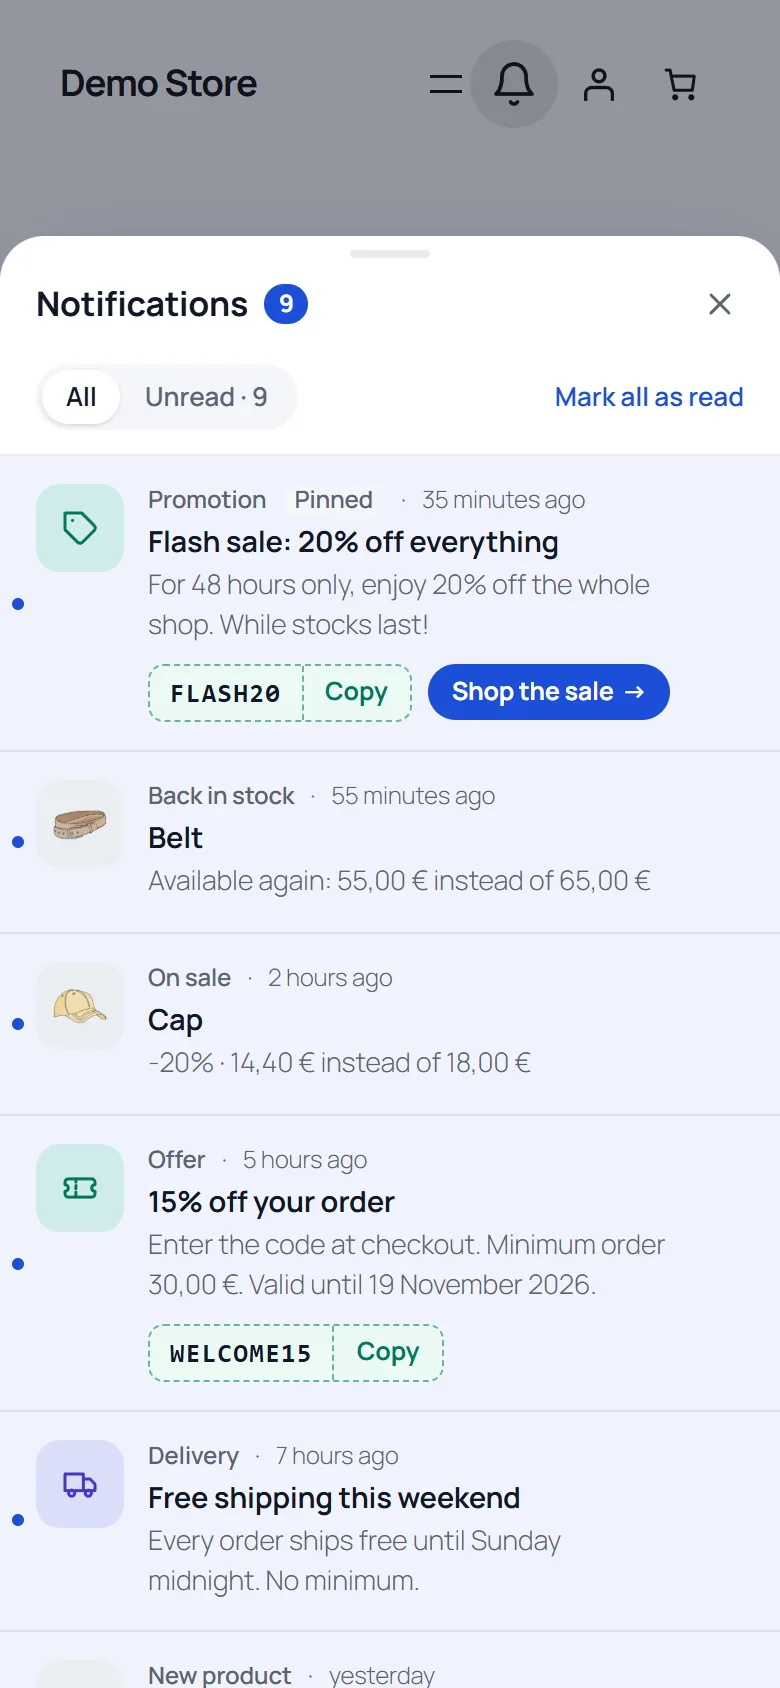
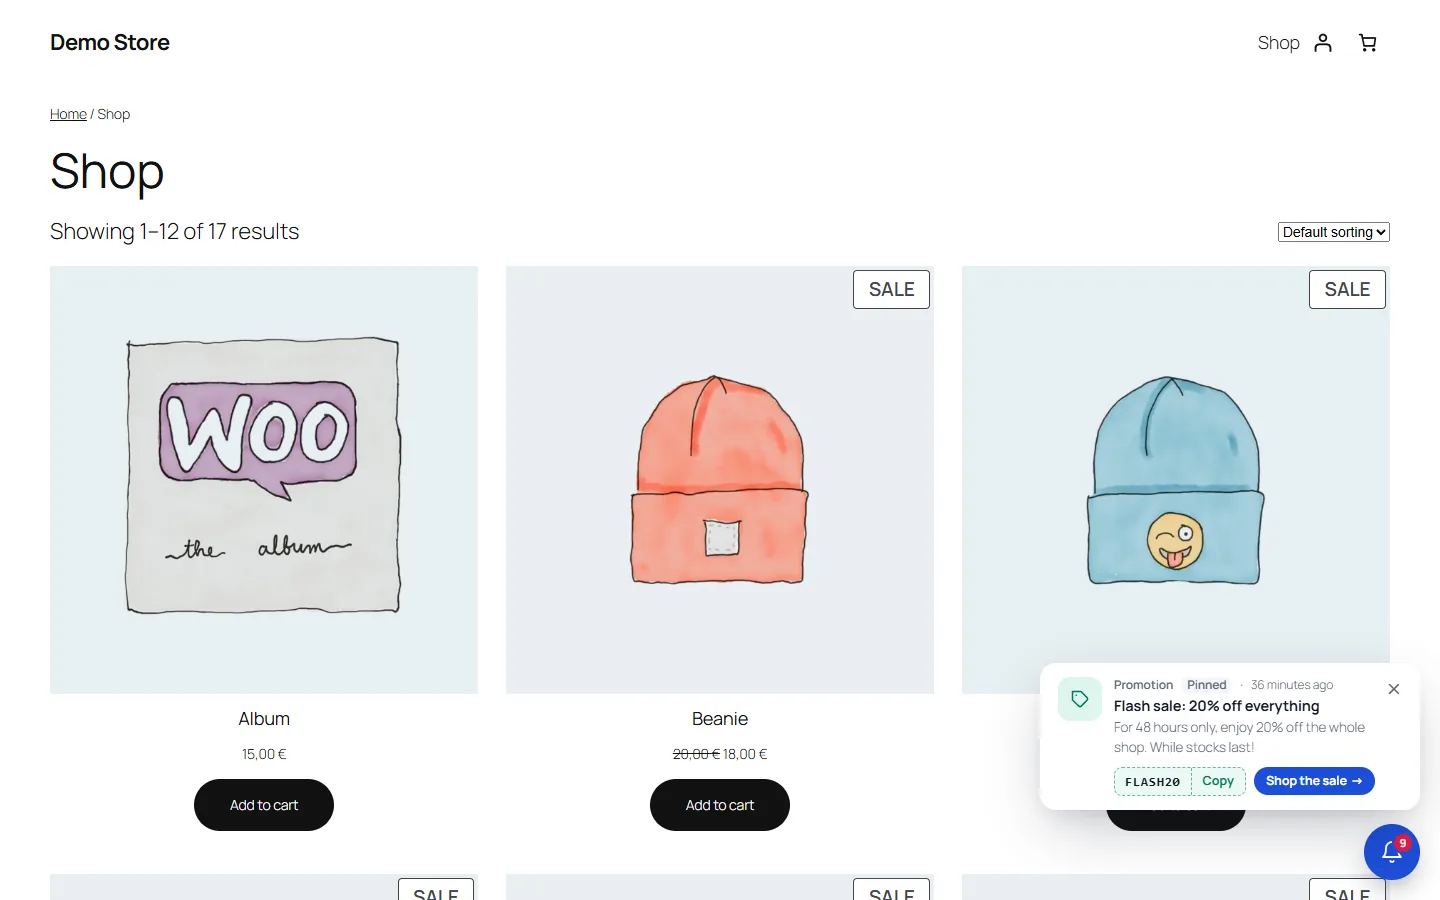
When the bell is at the bottom of the screen, the panel opens above it. With the pop-up option, a pinned or personal notification also appears once as a small card in a bottom corner.
Accessibility: the panel title receives the focus when it opens, Escape closes it and returns the focus to the bell, the number of new notifications is part of the bell’s name, actions are announced to screen readers, and animations are turned off for visitors who ask their device to reduce motion.
Blocks and shortcodes
- Notification bell block or
[df_notification_center]: the bell (option or attributelabel="yes"to show the label). - Notification feed block or
[df_notifications count="5" type=""]: an inline list of the latest notifications on any page (type: custom, coupon, product, post).
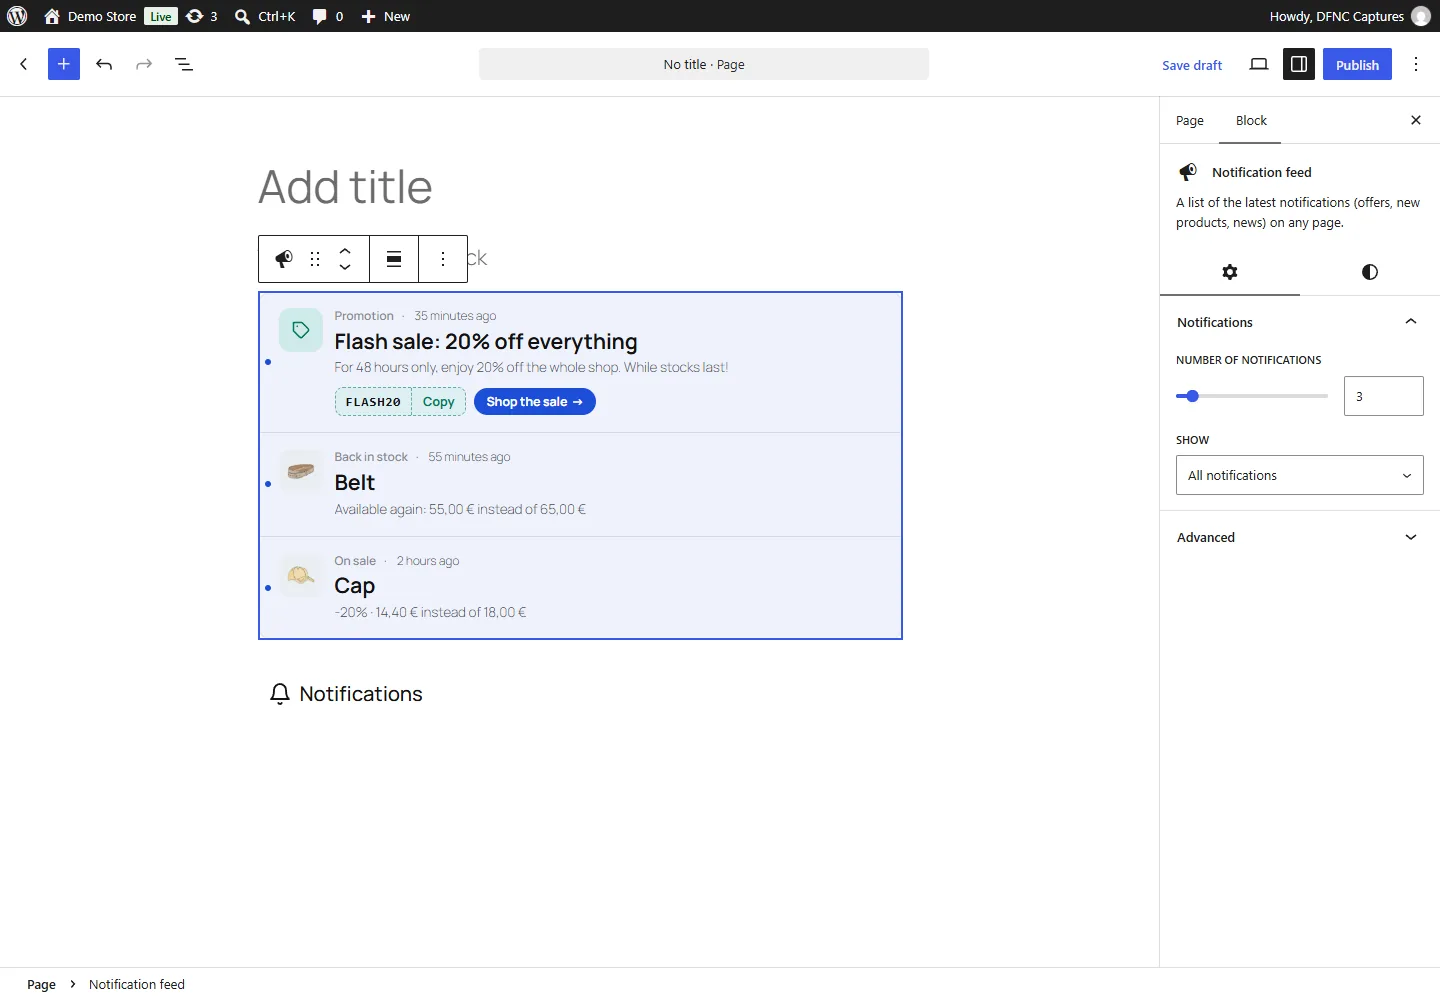
To change the HTML of the inline list, copy templates/feed.php to yourtheme/df-notification-center/feed.php.
Settings, privacy and data
- Panel: notifications per page (a “Show more” button loads the next ones), how often to check for new notifications (1 to 60 minutes).
- Customers: Notifications tab in My Account; multilingual filter (each notification only in its language with Polylang or WPML).
- Data: delete expired or hidden notifications after N days, personal notifications after N days (180 by default), delete all data when the plugin is deleted.
- Tools: clear caches, run the cleanup now.
No cookie is set and nothing is sent to third parties. Read states of logged-in users are stored on your site; visitors keep theirs in their browser. A text is suggested in Settings > Privacy, and the WordPress tools export and erase the personal notifications and read states of a user.
Performance and caching
The bell is printed by the page with no database query. The browser loads the list once from the REST API and keeps it for the refresh interval, so the following pages make no request; opening the panel checks for news if the list is older than a minute. For visitors the list is identical for everyone and can be cached one minute by a CDN; for logged-in users, an expired nonce on an old cached page is renewed automatically. Scripts have no dependency and load with defer.
Developers
REST API, namespace df-nc/v1:
GET  /wp-json/df-nc/v1/feed            what the current visitor or user can see (lang, locale)
POST /wp-json/df-nc/v1/read            ids[] or all (logged-in users, X-WP-Nonce)
POST /wp-json/df-nc/v1/unread | /dismiss | /restore | /seen
POST /wp-json/df-nc/v1/notifications/{id}/click
GET  /wp-json/df-nc/v1/notifications   1.x format (notifications, read_ids)
WP-CLI: wp df-nc status, wp df-nc list --view=active, wp df-nc create --title="…" --audience=customers --code=SPRING10, wp df-nc cleanup.
Filters: df_nc_capability (default manage_woocommerce), df_nc_show_bell, df_nc_present_item, df_nc_feed_limit, df_nc_post_types, df_nc_announce_product, df_nc_notify_order_status. Actions: df_nc_notification_created, df_nc_settings_updated.
Troubleshooting
The bell does not appear
Look at the pill at the top of the plugin screens or at the Site Health test. With “In a menu”, a menu must be assigned to the chosen location; with a block theme, choose “Automatic” or add the Notification bell block to your header. “Show on phones” may be turned off.
A notification is listed as “Not shown”
Its product is unpublished, hidden or out of stock (when your shop hides out-of-stock products), or its coupon expired, reached its usage limit or was unpublished. It will reappear by itself if the product or coupon becomes available again.
A new announcement does not show up straight away
Visitors keep the list for the refresh interval (5 minutes by default) unless they open the panel. Use Settings > Tools > Clear caches to make every visitor reload it on the next page.
Customers do not receive order updates
Turn on Order updates in Automations (it is off after an update from 1.x) and check the chosen statuses. Orders placed without an account do not create personal notifications.