
Event Tickets & Seating — Complete Guide
Install, configure and run the ticketing: general admission or reserved seating events, ticket types and capacity with no overselling, seating plan, attendee names, PDF tickets with a signed QR code sent after payment, “My tickets” page, check-in on a phone and reports.
Overview
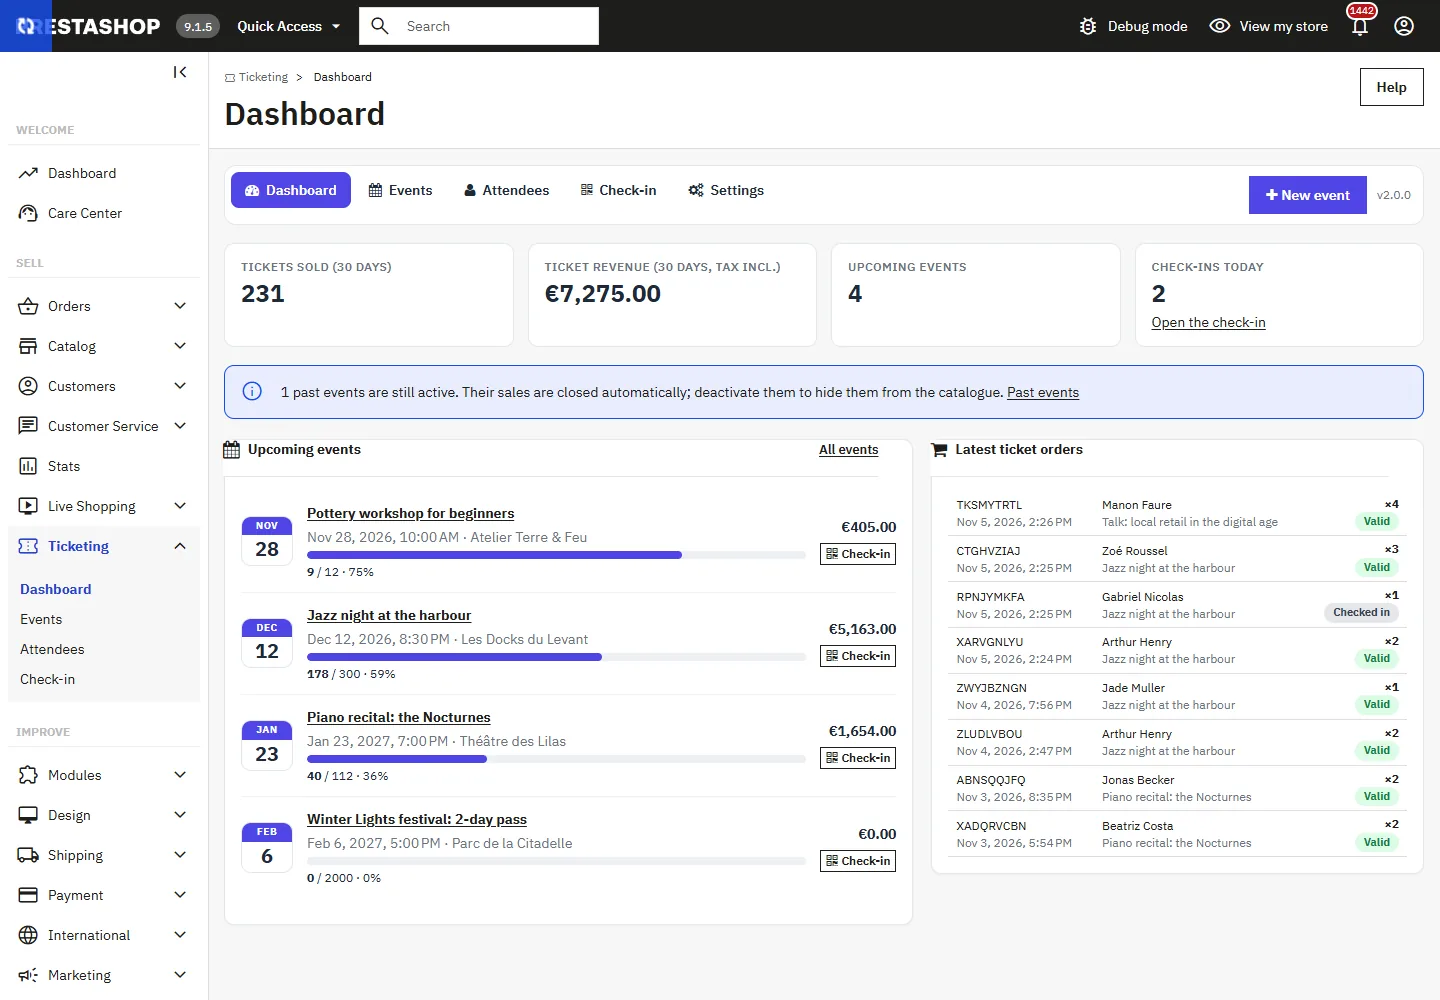
DataFirefly Event Tickets & Seating sells event tickets in PrestaShop: concerts, shows, workshops, conferences, festivals. You create an event (date, venue, capacity, ticket types), and the module creates the product, holds seats in carts so you never sell more than the capacity, sends PDF tickets with a signed QR code as soon as the order is paid, and your team checks attendees in with a phone camera.
New in 2.0.0: seat holds with no possible overselling, tickets with a signed QR code, ticket e-mail after payment, attendee names, “My tickets” page, check-in on a phone, dashboard and reports, compatibility with PrestaShop 1.7.8 to 9 and 8 languages.
Installation and update
- In the back office, open Modules > Module Manager, click Upload a module and drop
dfeventtickets-2.0.0.zip. - The module creates its tables and the Sell > Ticketing menu (dashboard, events, attendees, check-in, settings).
- On your first visit, the dashboard guides you through four steps: create an event, add the ticket types, sell a first ticket, check tickets at the entrance.
Updating from 1.0.0: simply upload the new ZIP. Existing events, seating plans and tickets are kept; old QR codes are still accepted at check-in. Tickets from orders that were never paid become “awaiting payment” and turn valid as soon as payment is received.
Compatible with PrestaShop 1.7.8, 8 and 9, Classic and Hummingbird themes (tested on PHP 7.4, 8.1 and 8.5). No external dependency, no third-party service.
Create an event
Open Ticketing > Events then New event. The form is split into four parts:
- The event: title, venue, address, description and practical information (printed on every ticket), in each language using the language selector.
- Date and time: start, end and time zone of the venue. Sales close automatically when the event starts.
- Ticketing: general admission or seating plan, capacity, maximum tickets per order, cart hold duration, attendee names (not requested, optional or required), sales opening and closing.
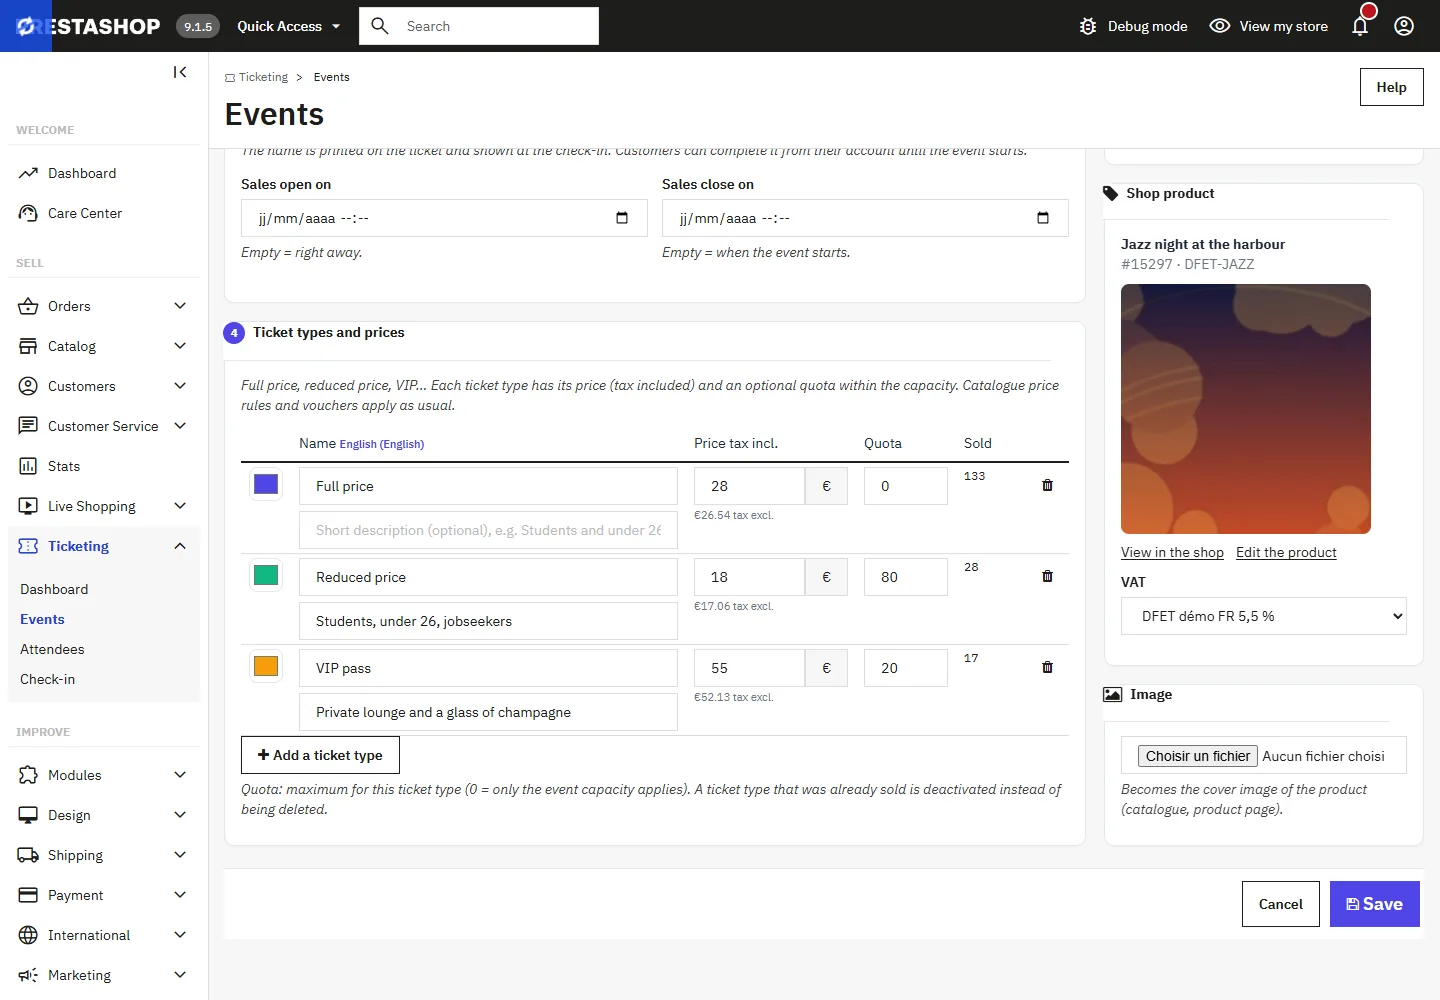
- Ticket types: full price, reduced price, VIP… each with its price incl. tax (the price excl. tax is calculated from the selected tax rule), an optional quota and a colour.
The module creates a virtual product for you (no shipping) with one combination per ticket type and the event image. You can also link an existing product. Catalog price rules and vouchers apply as usual.
Check the VAT rate that applies to your tickets in your country (reduced rate for some shows). Keep the product virtual and do not delete its combinations: they carry the ticket type prices.
Track sales live
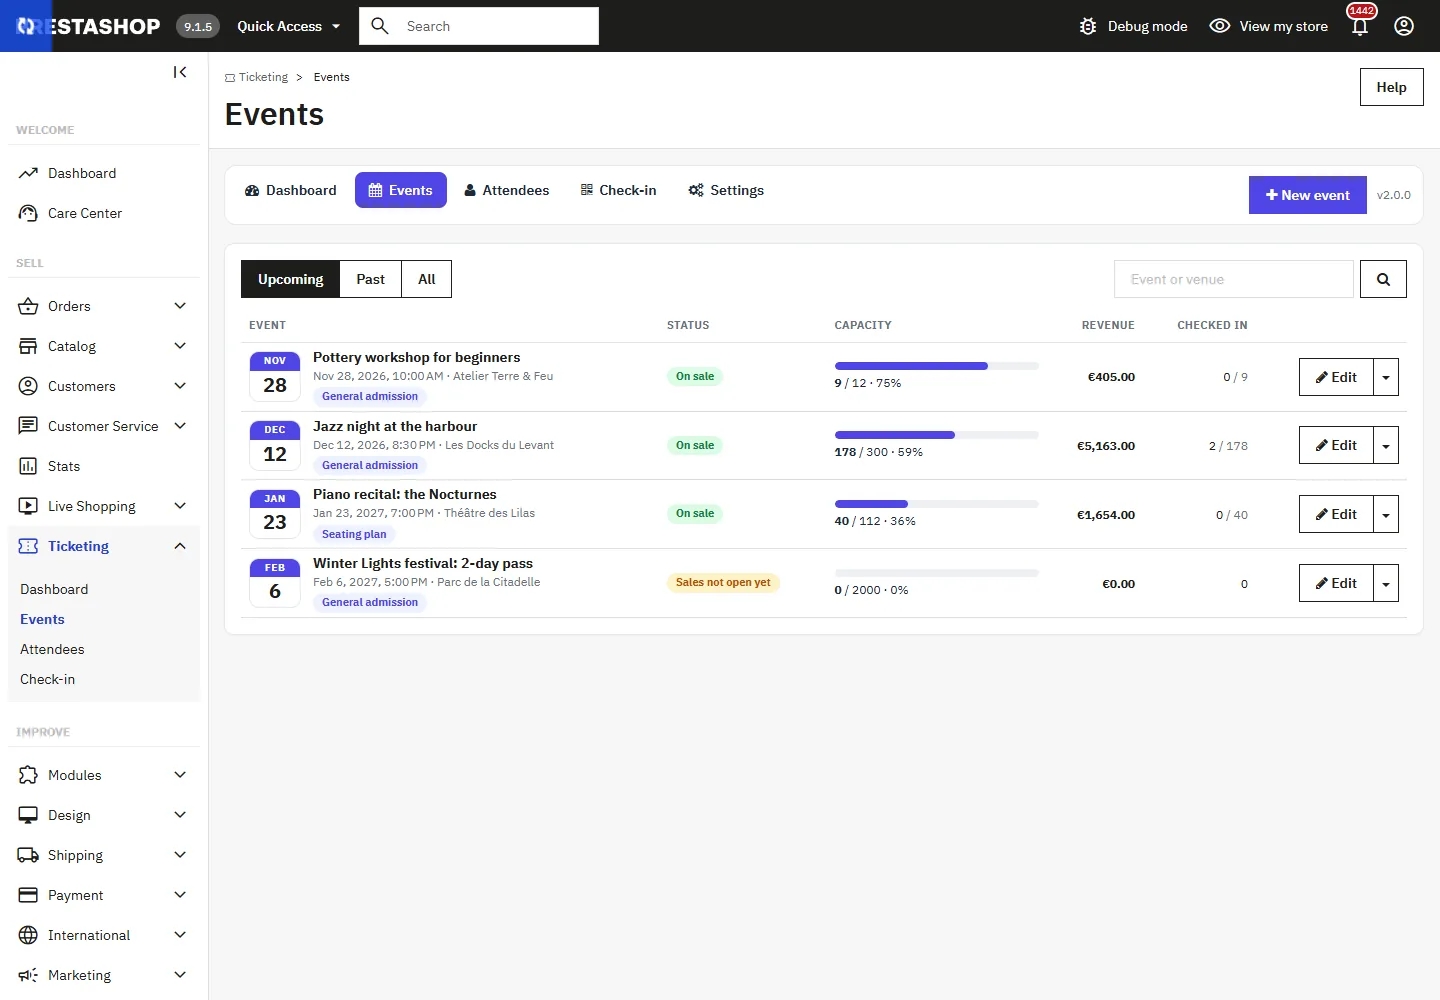
The event list shows, for each date, the sales status (on sale, sold out, sales not yet open, ended), a capacity gauge of seats sold and awaiting payment (seats currently held in carts are hatched), the revenue and the number of check-ins. The actions menu lets you open the report, the seating plan, the attendees, the check-in, view the event in the shop or duplicate it for a new date.
Draw the seating plan
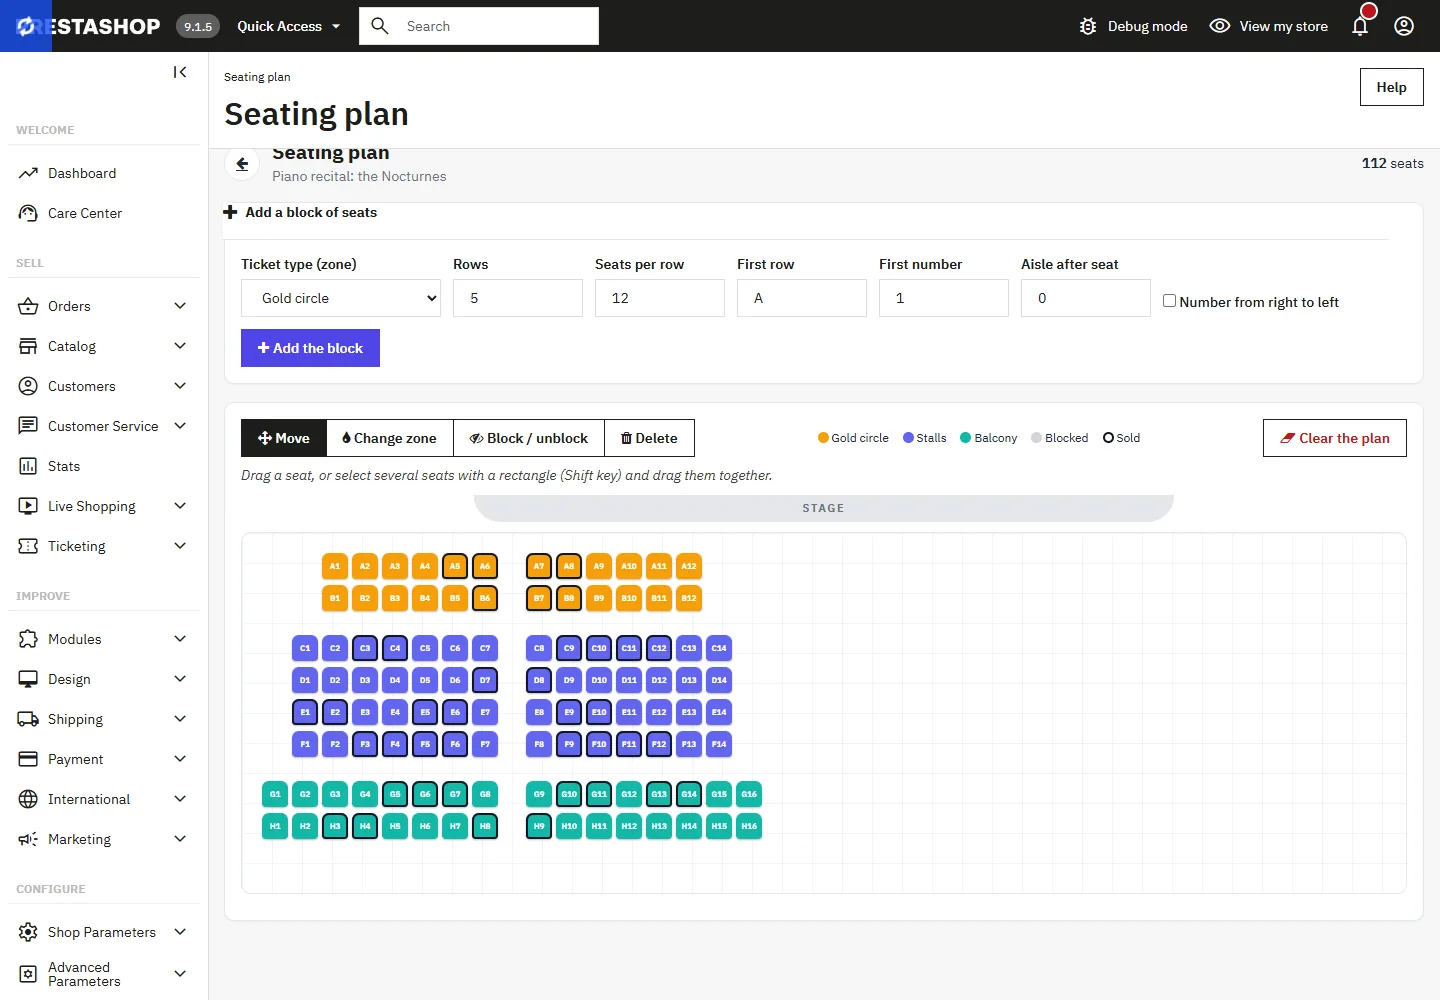
For an event with reserved seating, each ticket type is also a zone of the plan. Open Seating plan from the event:
- Add a block: zone, number of rows, seats per row, first row, first number, centre aisle and right-to-left numbering;
- Move: drag a seat, or select several with a rectangle (Shift key) and move them together (keyboard arrows for fine adjustment);
- Change zone, Block / unblock a seat (technical seat, restricted view) or Delete.
A seat that has already been sold is never deleted or moved to another zone. The plan works with a mouse, a stylus and a finger.
In the shop: choosing tickets
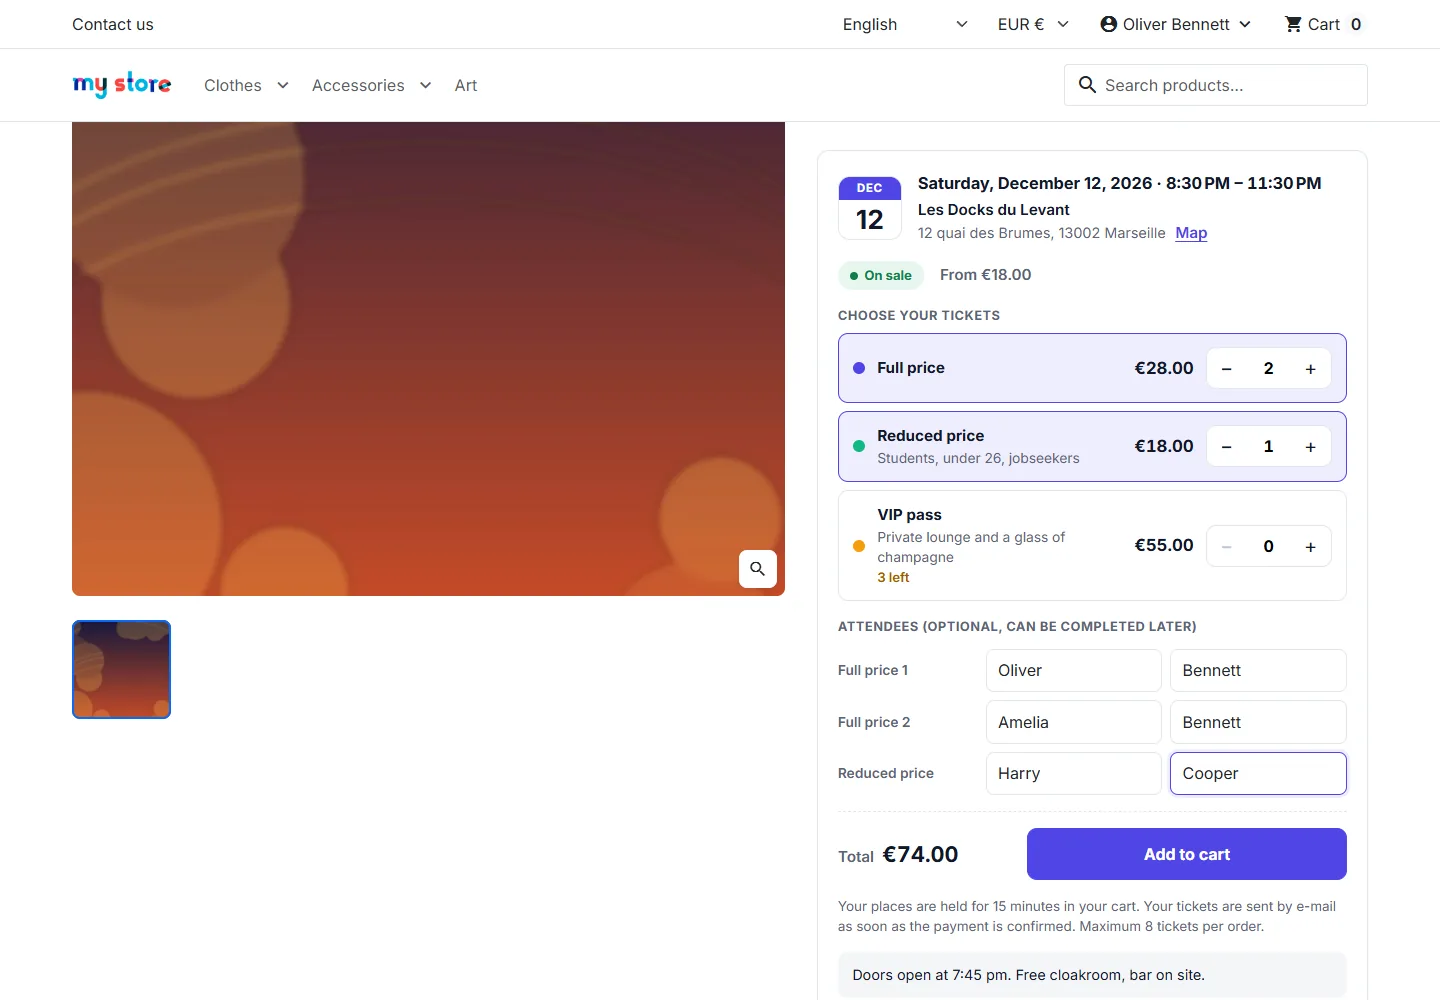
On the event page, the module replaces the purchase block with a ticketing block (Classic and Hummingbird themes): date and time, venue with a link to the map, status (on sale, “only X seats left”, sold out, sales open on…), ticket types with quantities and remaining seats, attendee names, total, and add to calendar (Apple, Outlook, Google Calendar).
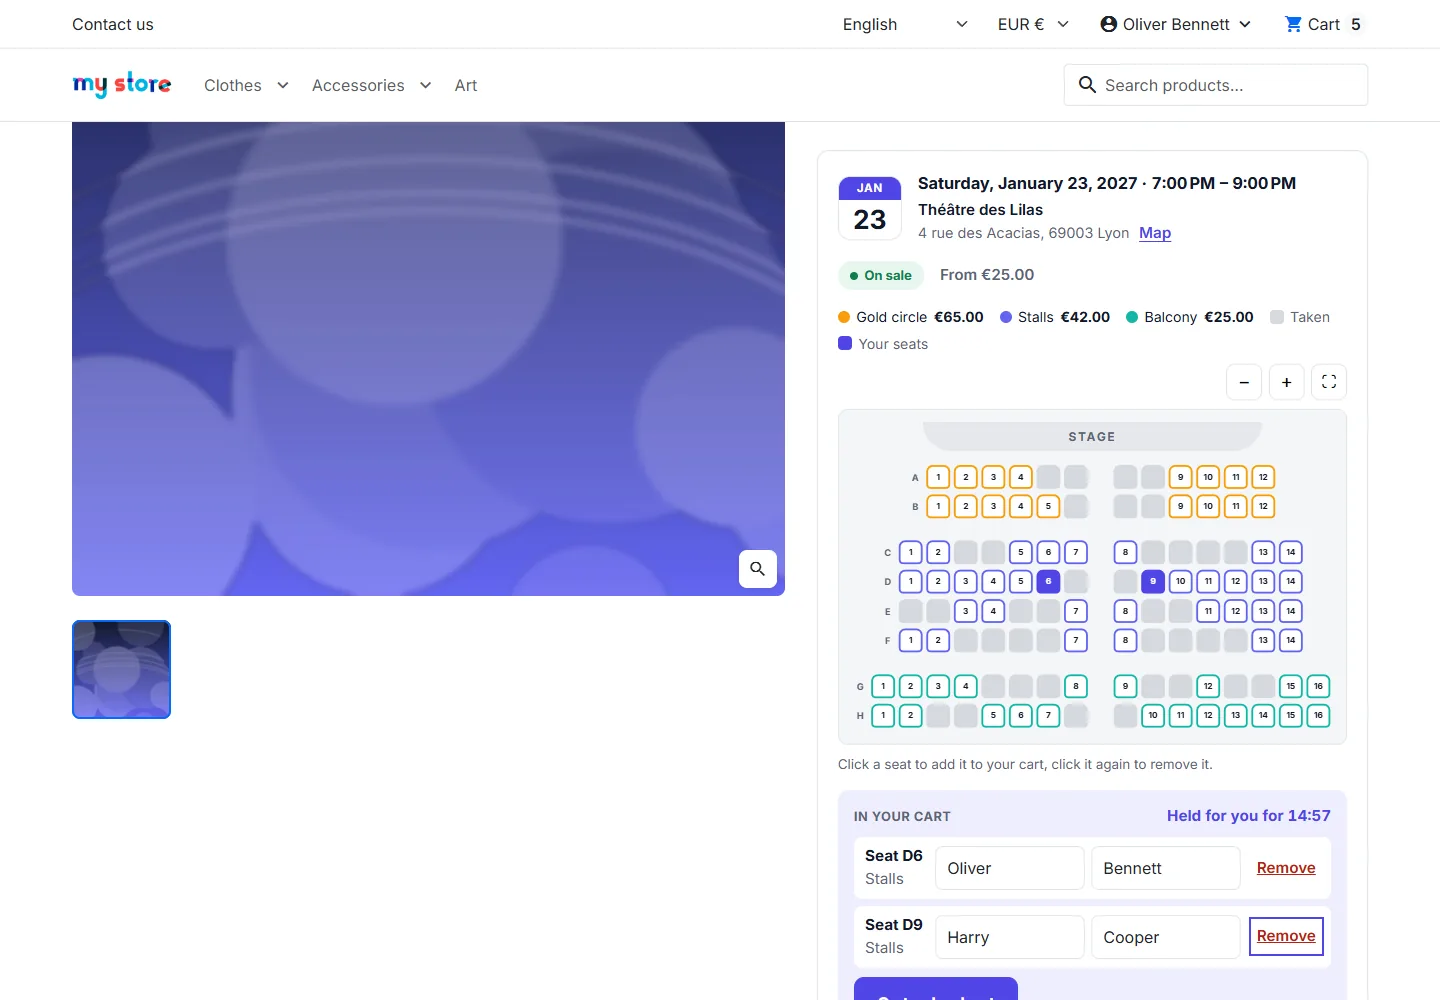
For an event with reserved seating, the customer clicks seats on the plan: coloured zones with their price, row letters, zoom and full screen. Each seat clicked is added to the cart and held, with a timer.
Cart and seat holds
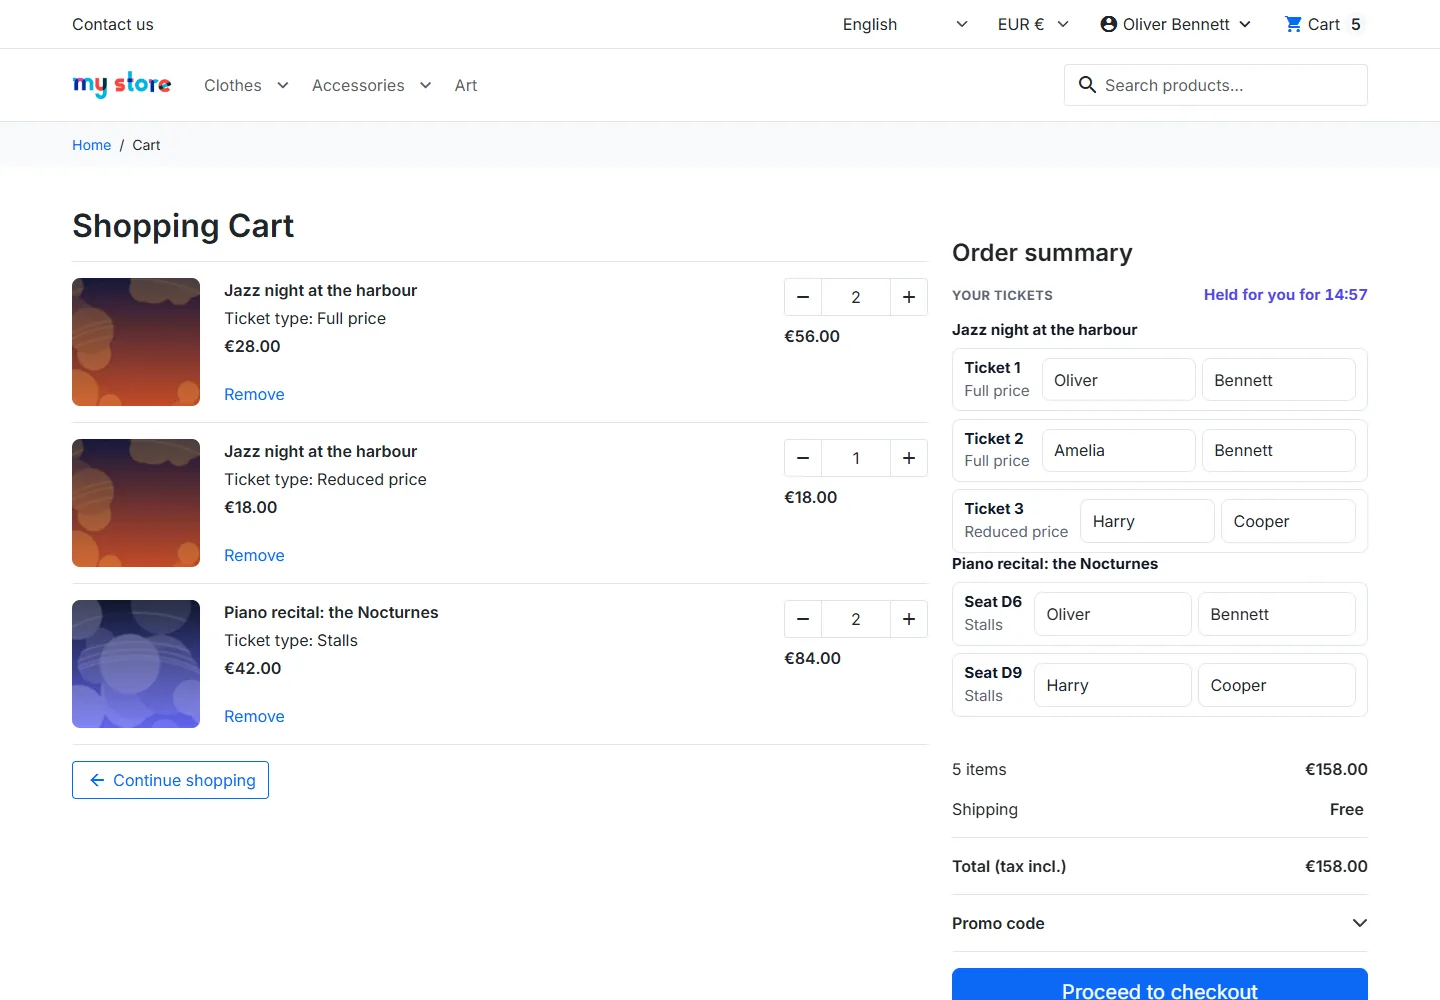
Each ticket in a cart holds a seat for the chosen duration (15 minutes by default), extended as long as the customer is in the cart or the checkout. The cart shows the tickets, the time remaining and the attendee names, which can be edited at any time.
If the customer increases a quantity while the event is almost sold out, the cart is adjusted automatically and a message explains why. No overselling is possible, even when several customers buy the last seats at the same moment.
Payment, tickets and e-mail
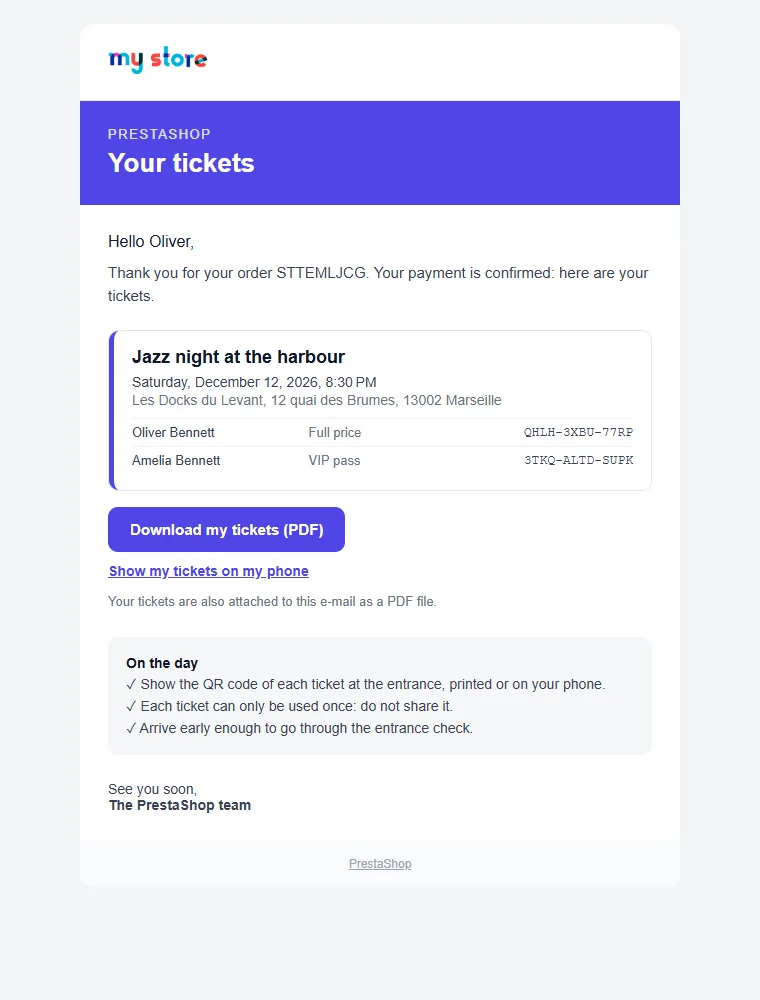
When the order is placed, the tickets are “awaiting payment”. They become valid as soon as the order moves to a paid status (payment accepted, remote payment accepted, shipped, delivered…) and the customer receives an e-mail with their PDF tickets and a link to display them on their phone. A bank transfer or a cheque therefore never produces a usable ticket before the funds are received.
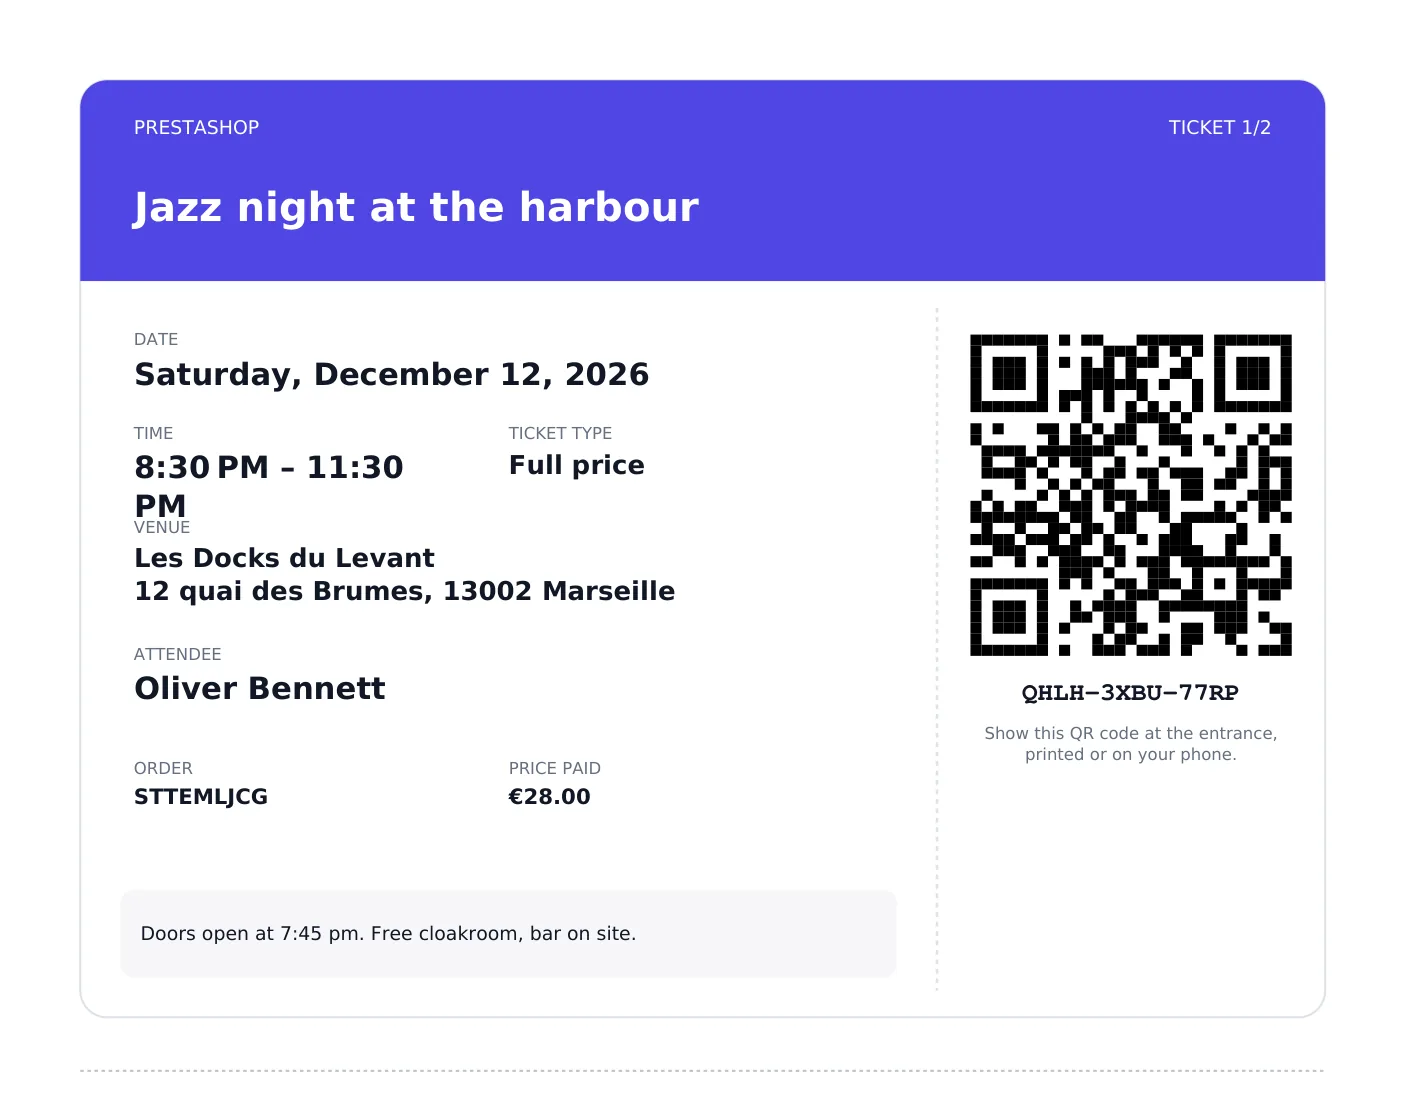
The PDF ticket (one per page) shows the event, date, time, venue, ticket type, seat, attendee name, order, price paid and a signed QR code with a backup code to type in by hand.
Order cancelled, refunded or with a payment error: the tickets are cancelled and the seats go back on sale. A partial credit slip cancels the number of tickets refunded.
“My tickets” customer area
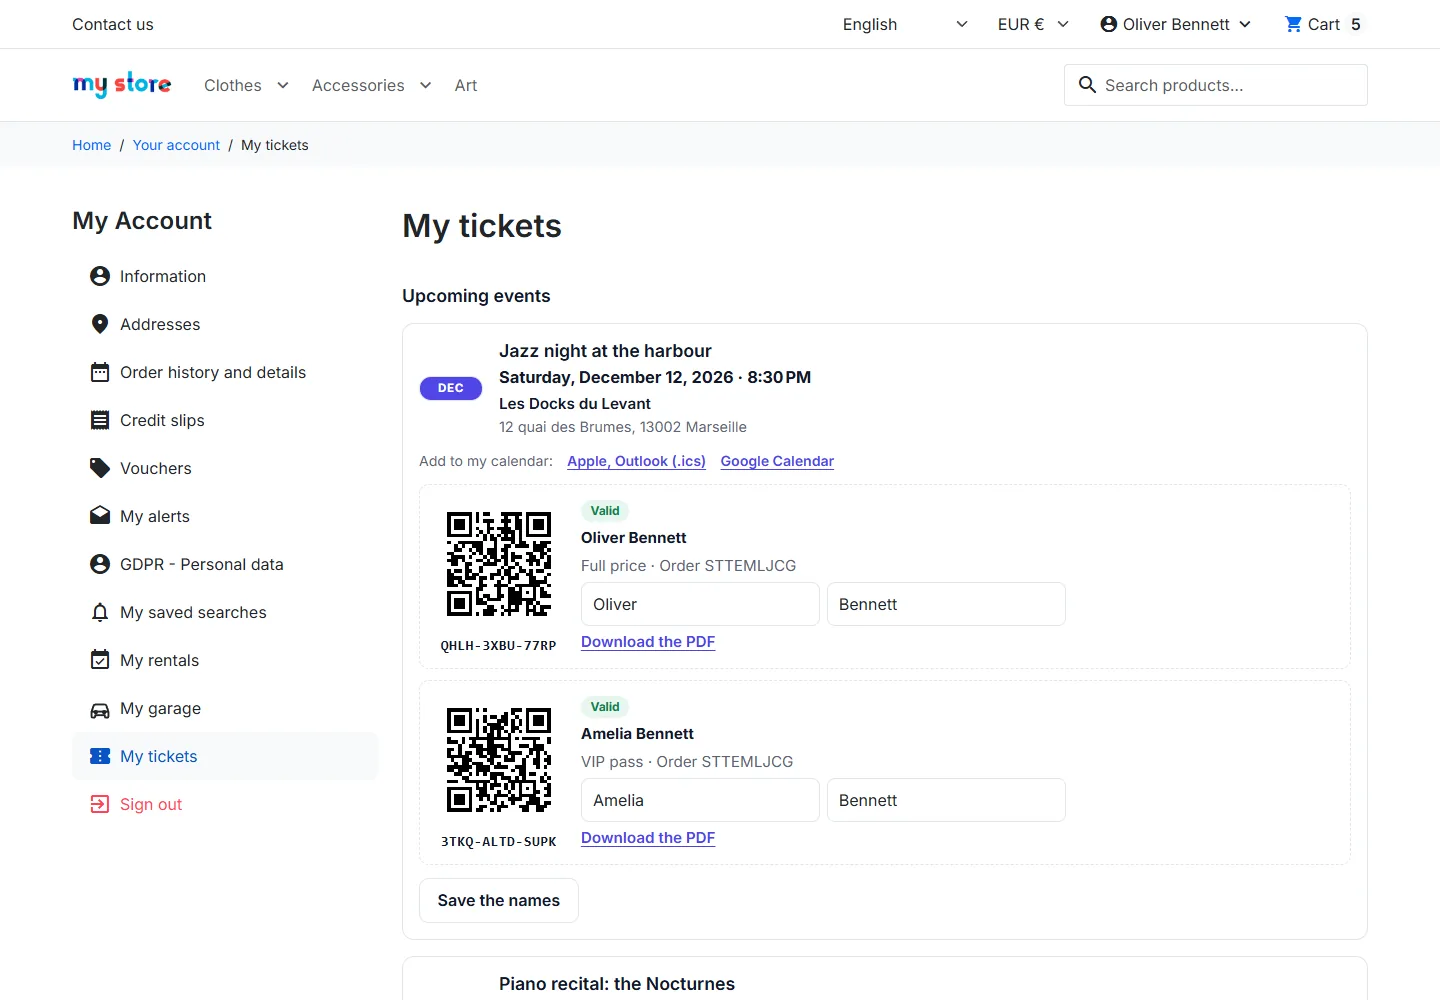
The customer account includes a My tickets page: upcoming and past events, QR code of each ticket to show at the entrance, PDF download, add to calendar, and attendee names that can be edited until the event starts. Customers without an account (guest order) access their tickets through the secure link in the e-mail.
Check-in
On the day, open Ticketing > Check-in on a phone, a tablet or a computer. Choose the event to check, then:
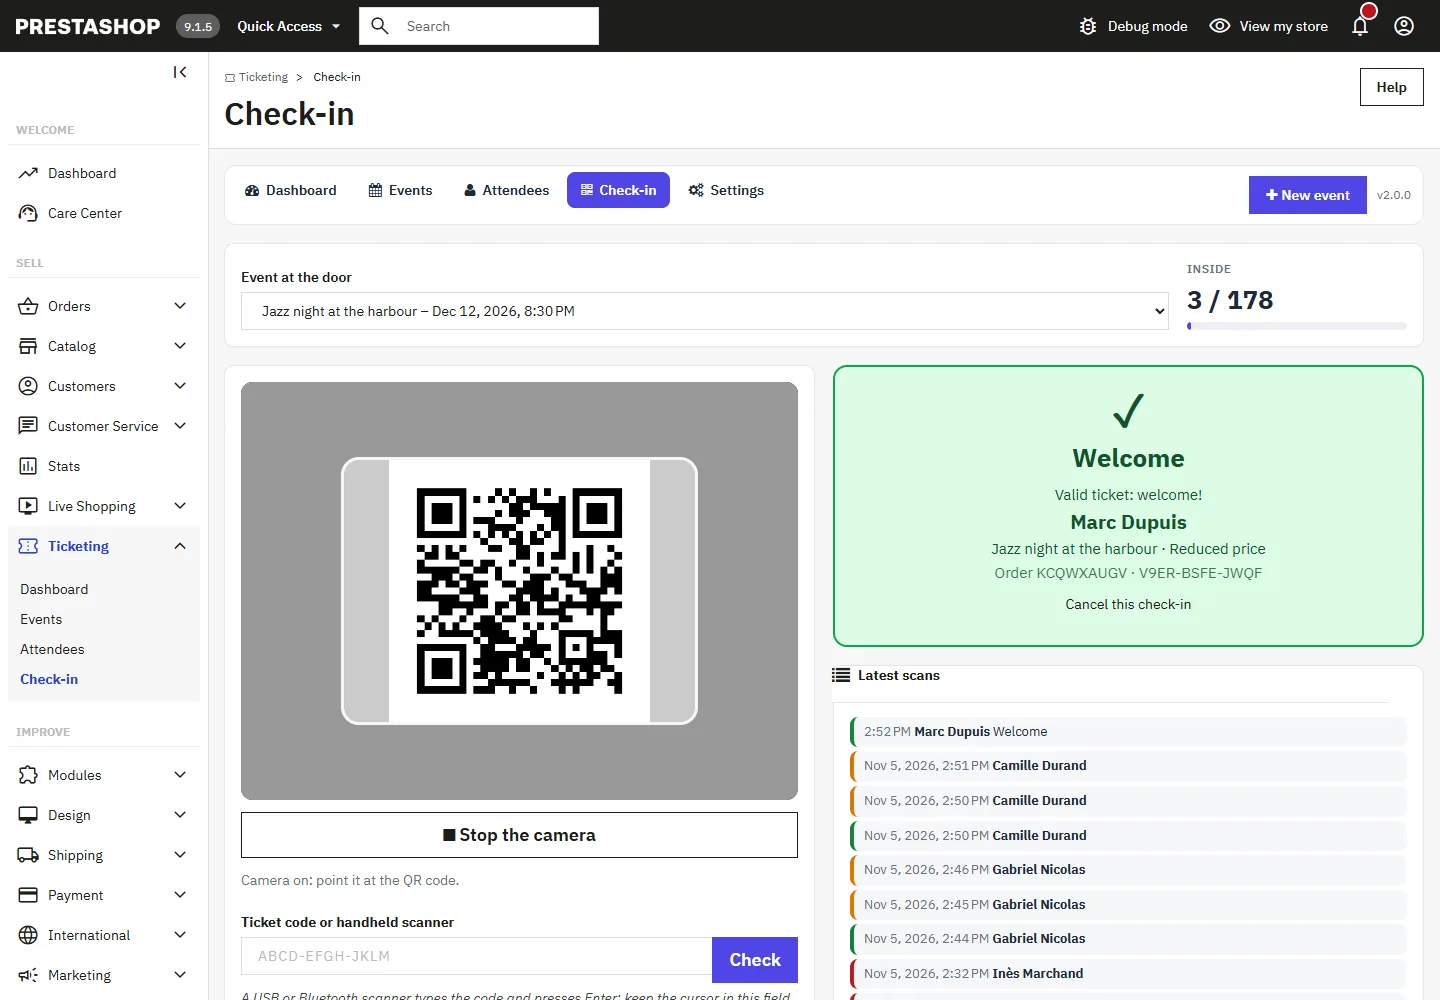
- Camera: start the camera and present the ticket QR code (paper or phone);
- Code or handheld scanner: type the ticket code, or keep the cursor in the field with a USB/Bluetooth handheld scanner.
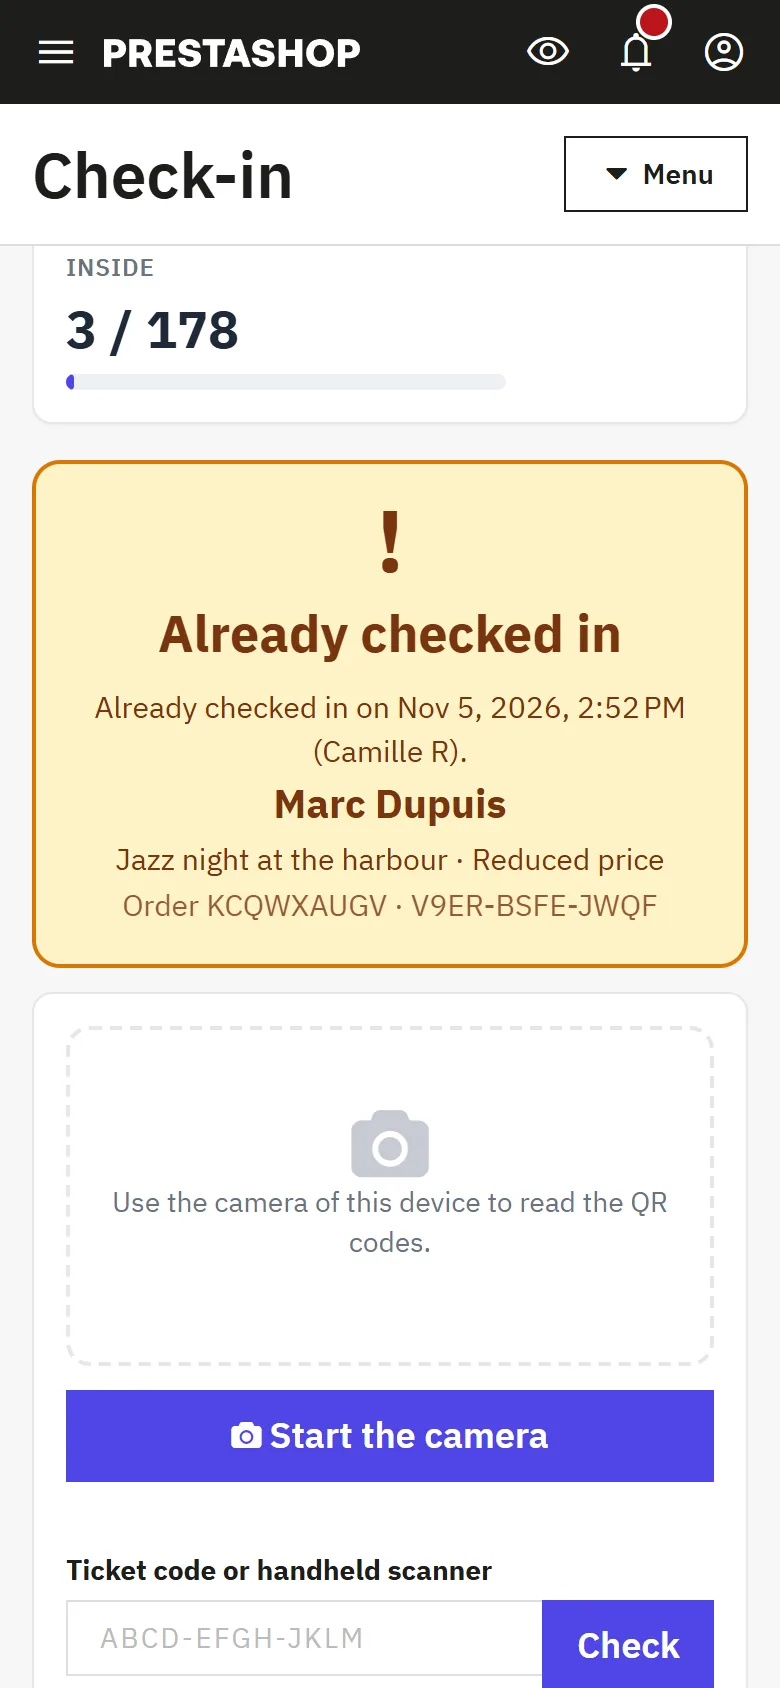
The result is displayed in large type with the attendee name, ticket type and seat: green for a valid entry, orange for a ticket already used (with the time and agent of the first scan), red for a ticket that is cancelled, unpaid, for another event or invalid. A counter shows check-ins against the number of tickets expected.
Even with several agents at several doors, a ticket can only be admitted once. An entry recorded by mistake can be cancelled.
Attendees and export
Ticketing > Attendees lists all tickets: attendee name, buyer, event, ticket type, seat, code, order and status. Filter by event or status, search for a name, an e-mail, an order or a code. For each ticket: PDF, manual check-in or check-in cancellation, resending the e-mail, editing the attendee, cancelling the ticket. The CSV export is compatible with spreadsheets and protected against formula injection.
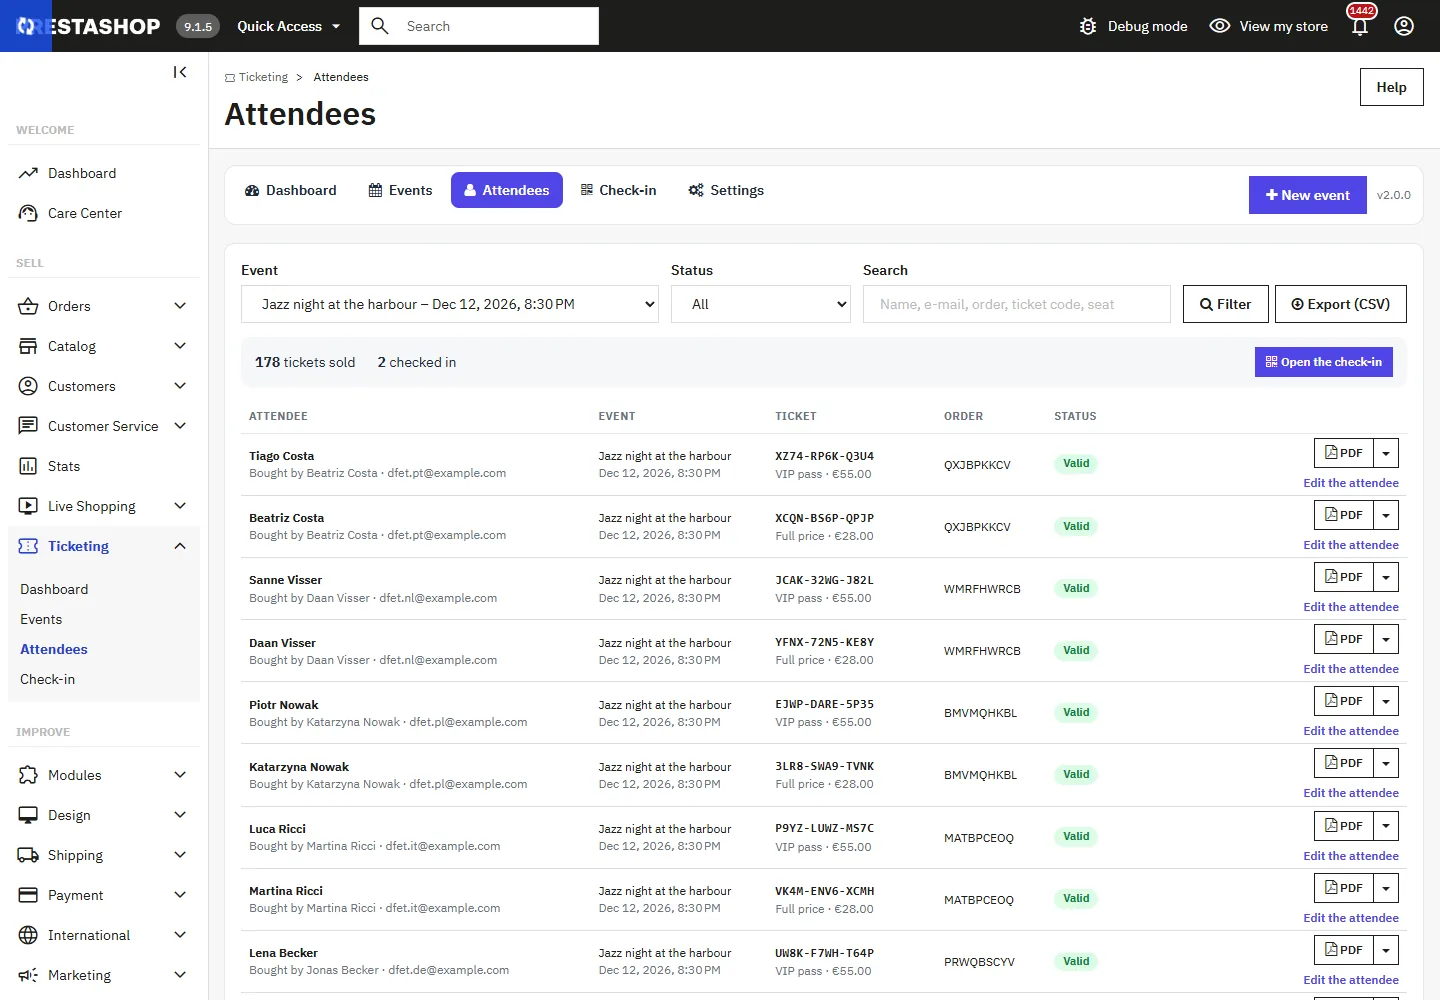
Event report
An event’s report shows the tickets sold and the capacity gauge, the revenue and the average ticket price, tickets awaiting payment, seats currently held in carts, the check-in rate, sales by ticket type, sales over the last 30 days, arrivals per quarter hour and the latest scans.
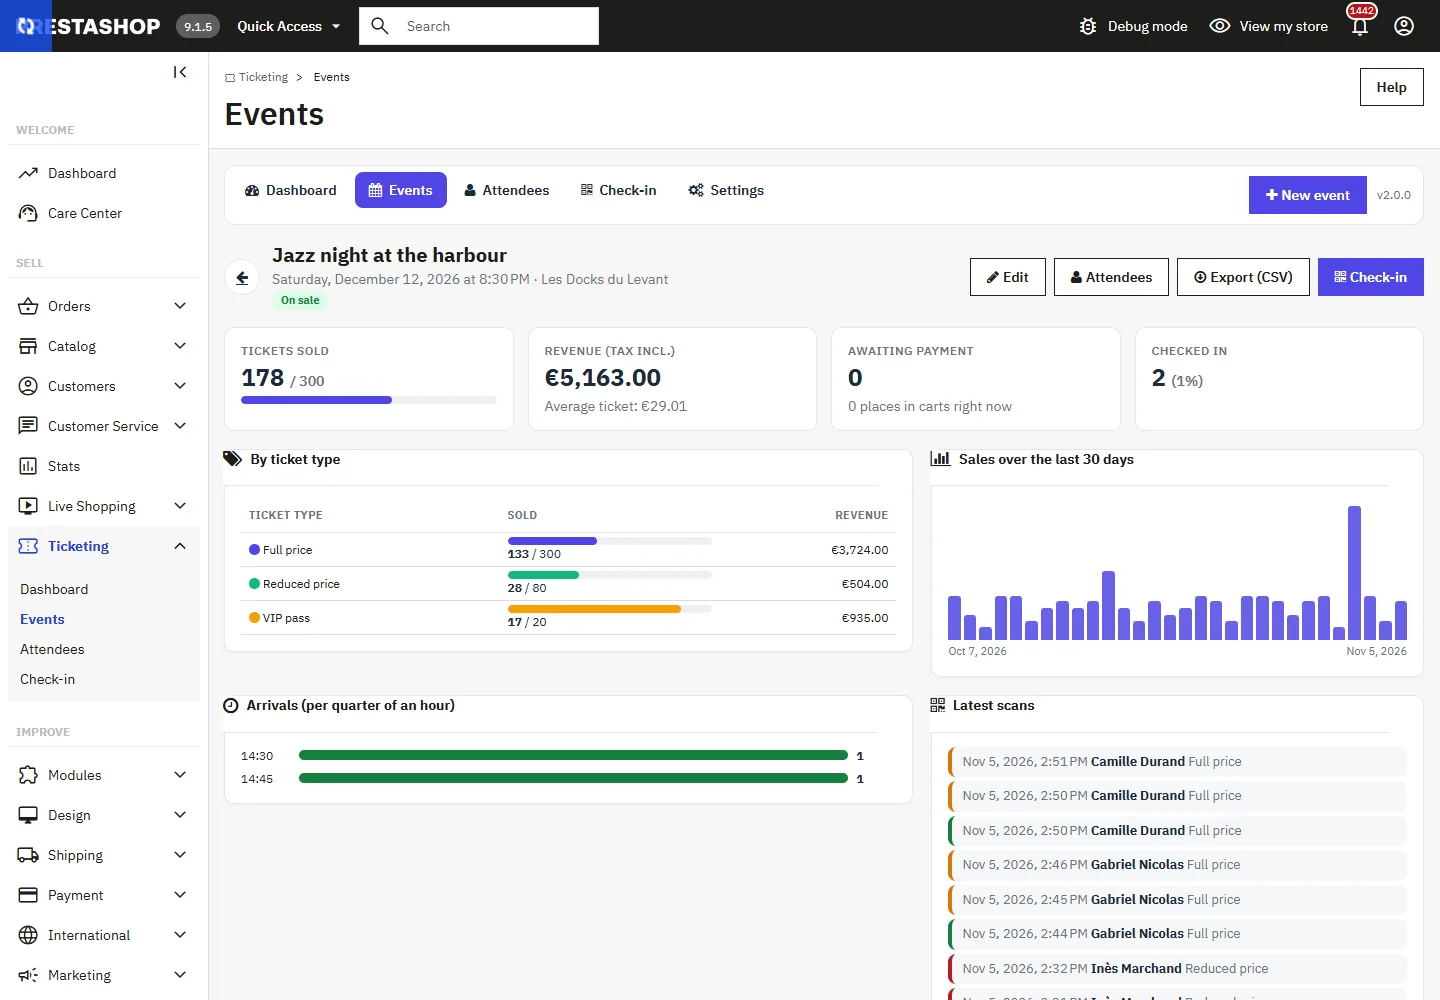
Settings
- seat hold duration in the cart and maximum tickets per order (default values);
- default attendee names and whether the customer can edit them;
- threshold for displaying “only X seats left”;
- sending the ticket e-mail and the PDF attachment;
- accent colour (ticket, e-mail, shop);
- GDPR: anonymisation of attendee names N months after the event;
- deletion of data on uninstall (disabled by default: tickets sold are kept).
Security
- Signed QR code (HMAC): a ticket cannot be forged; a modified QR code is rejected.
- A single entry per ticket, even with several scanners at the same time.
- Signed download links: a customer can never download someone else’s tickets.
- Limit on seats held per order and per connection to stop a bot from blocking a venue.
- No external service: the QR decoder of the check-in screen is built in.
GDPR and multistore
The module integrates with PrestaShop’s official GDPR module (export and erasure of a customer’s data). Attendee names can be anonymised automatically after the event. In multistore, each event belongs to one shop.
Troubleshooting
The camera does not start
The browser requires a secure connection (HTTPS) and permission to use the camera. Otherwise, type the ticket code or use a handheld scanner.
The customer did not receive their tickets
Check that the order is in a paid status. From the order page or the attendee list, use Send the tickets again.
Shipping is requested at checkout
The event product must remain virtual. A message warns you in the event form if it is not.
A ticket is marked “to be checked”
The customer paid after their hold expired while the seat had been taken in the meantime. Contact them to offer another seat or a refund, then mark the ticket as checked.