
Category Banner: complete guide
Install, configure and run category banners: position and size in the grid, mobile image, link per language, date scheduling in the shop's time, subcategories, Creative Elements, multistore and troubleshooting for PrestaShop 1.7, 8 and 9.
Overview and requirements
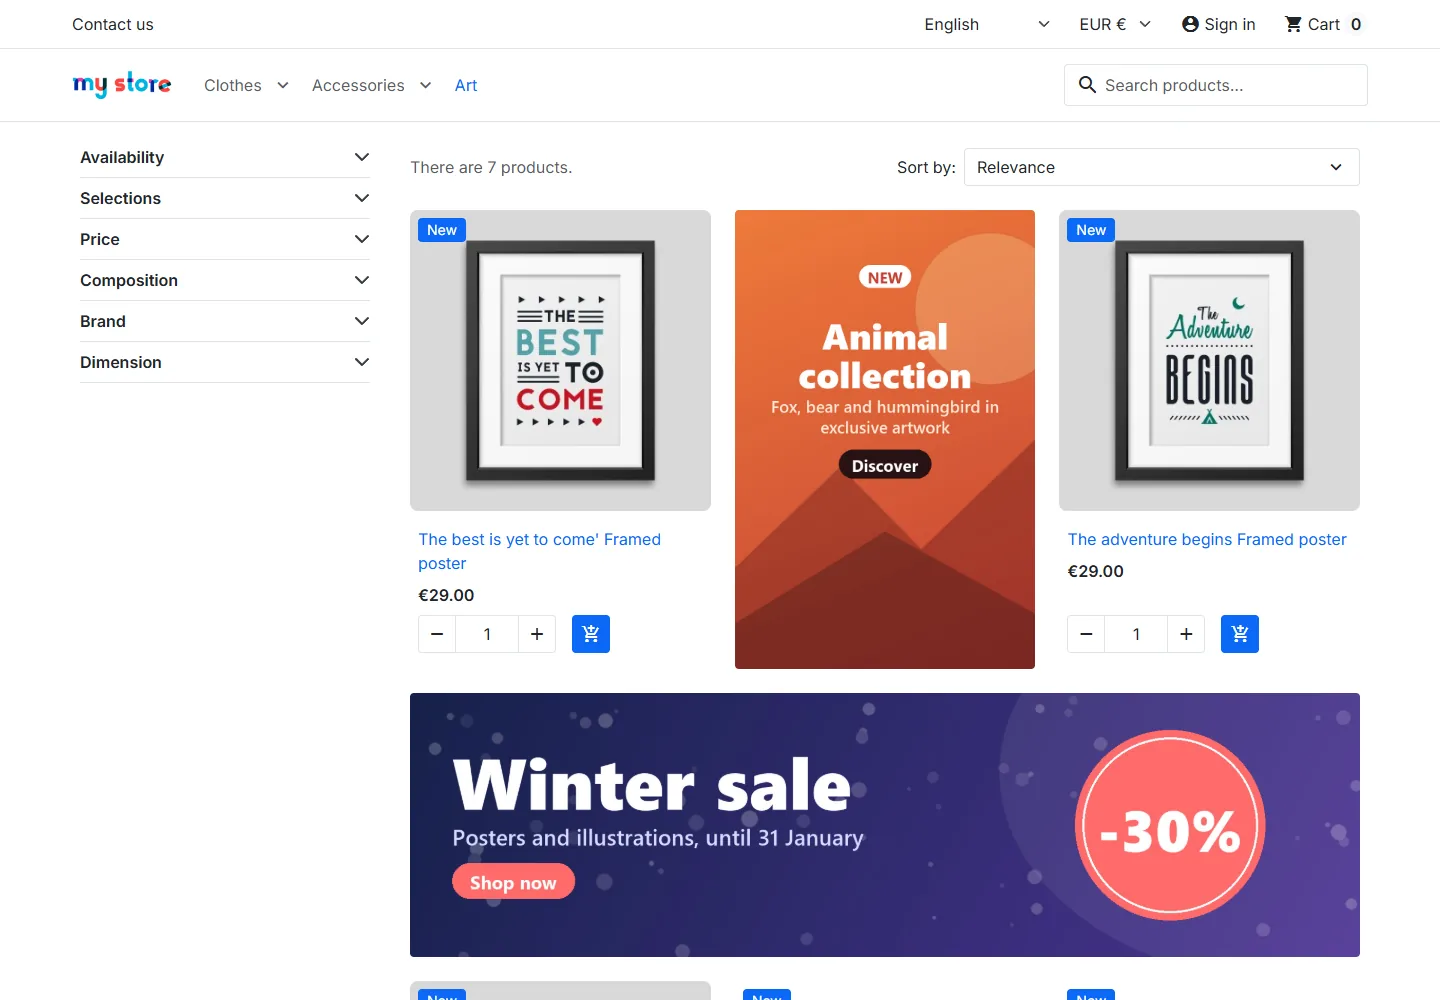
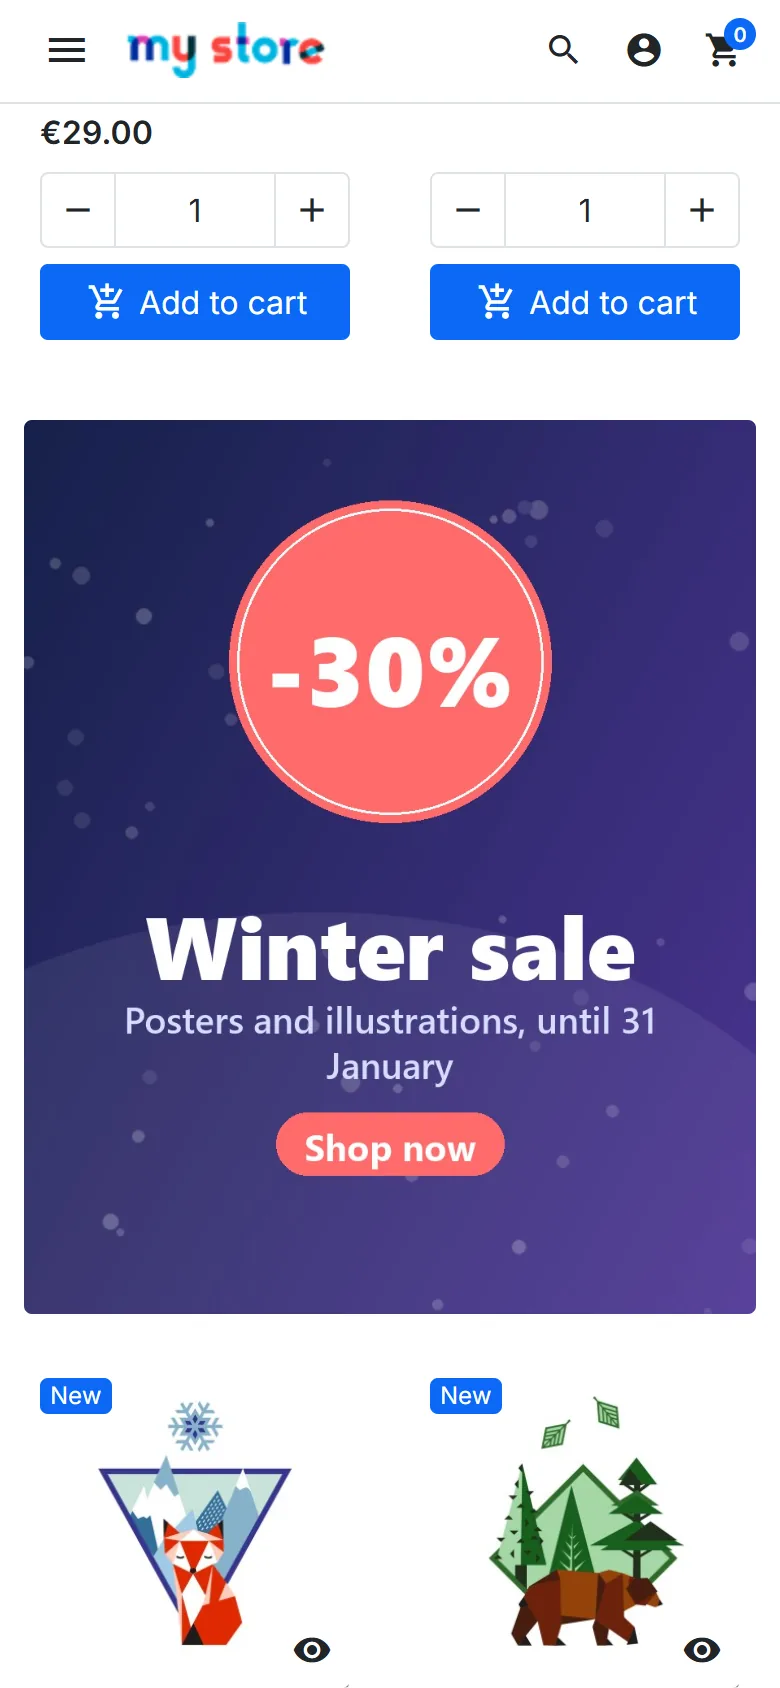
Category Banner inserts visuals into the product grid of your category pages, at the position you choose. You set the category, the product number the banner follows and the image to use for each language. The module handles the rest, including after a faceted filter or a page change.
- Compatible with PrestaShop 1.7.6 to 9.x, verified on 1.7.8, 8.2.1 and 9.1.5: Classic and Hummingbird themes, derived themes, Creative Elements listings, CSS grid themes.
- PHP 7.4 to 8.5.
- Multistore and multilingual (fr, en, es, de, it, nl, pl, pt).
- No override, no template change, no CRON task.
- The banner markup is rendered server side by a Smarty template; the JavaScript only inserts it at the right place, with no jQuery and no third-party library.
Uploaded images are stored in /img/datafireflycategorybanner/, outside the module folder. They therefore survive module updates.
Installation
- Download the
datafireflycategorybanner.ziparchive from your customer account. - In the back office, open Modules > Module Manager.
- Click Upload a module and drop the archive.
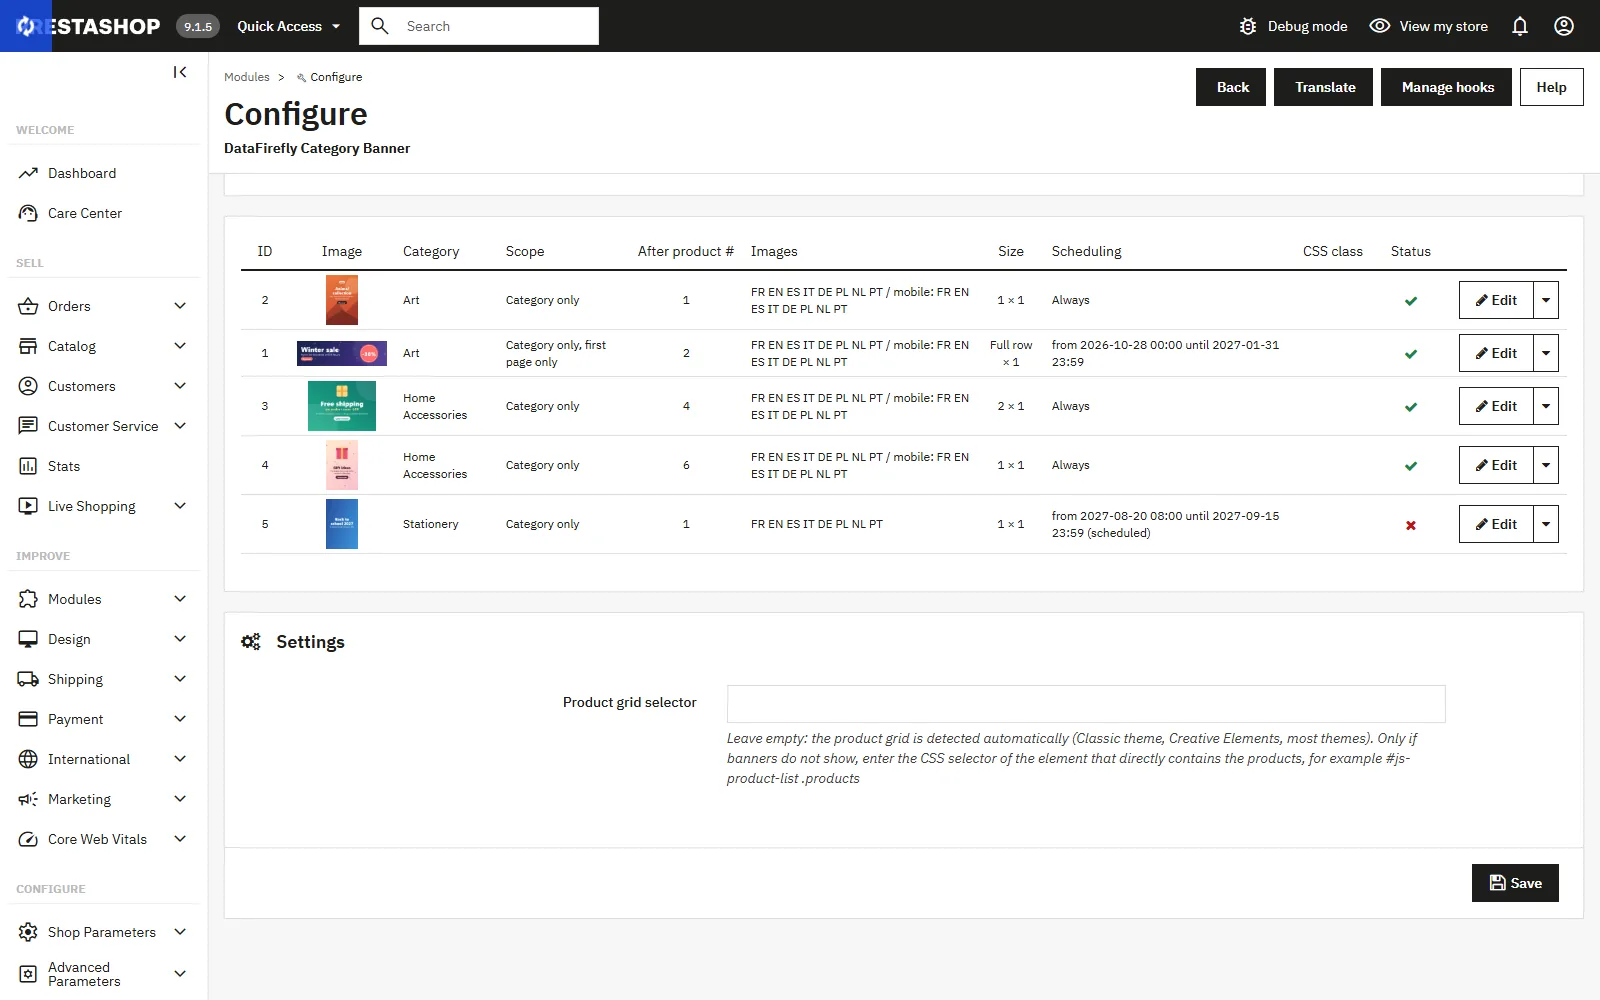
- Click Configure to reach the banner list.
On installation the module creates its three tables (banners, translations, shop association), creates the /img/datafireflycategorybanner/ folder and registers its hooks.
Creating a banner
From the configuration page, click Add new banner. The form groups the following settings.
Targeting
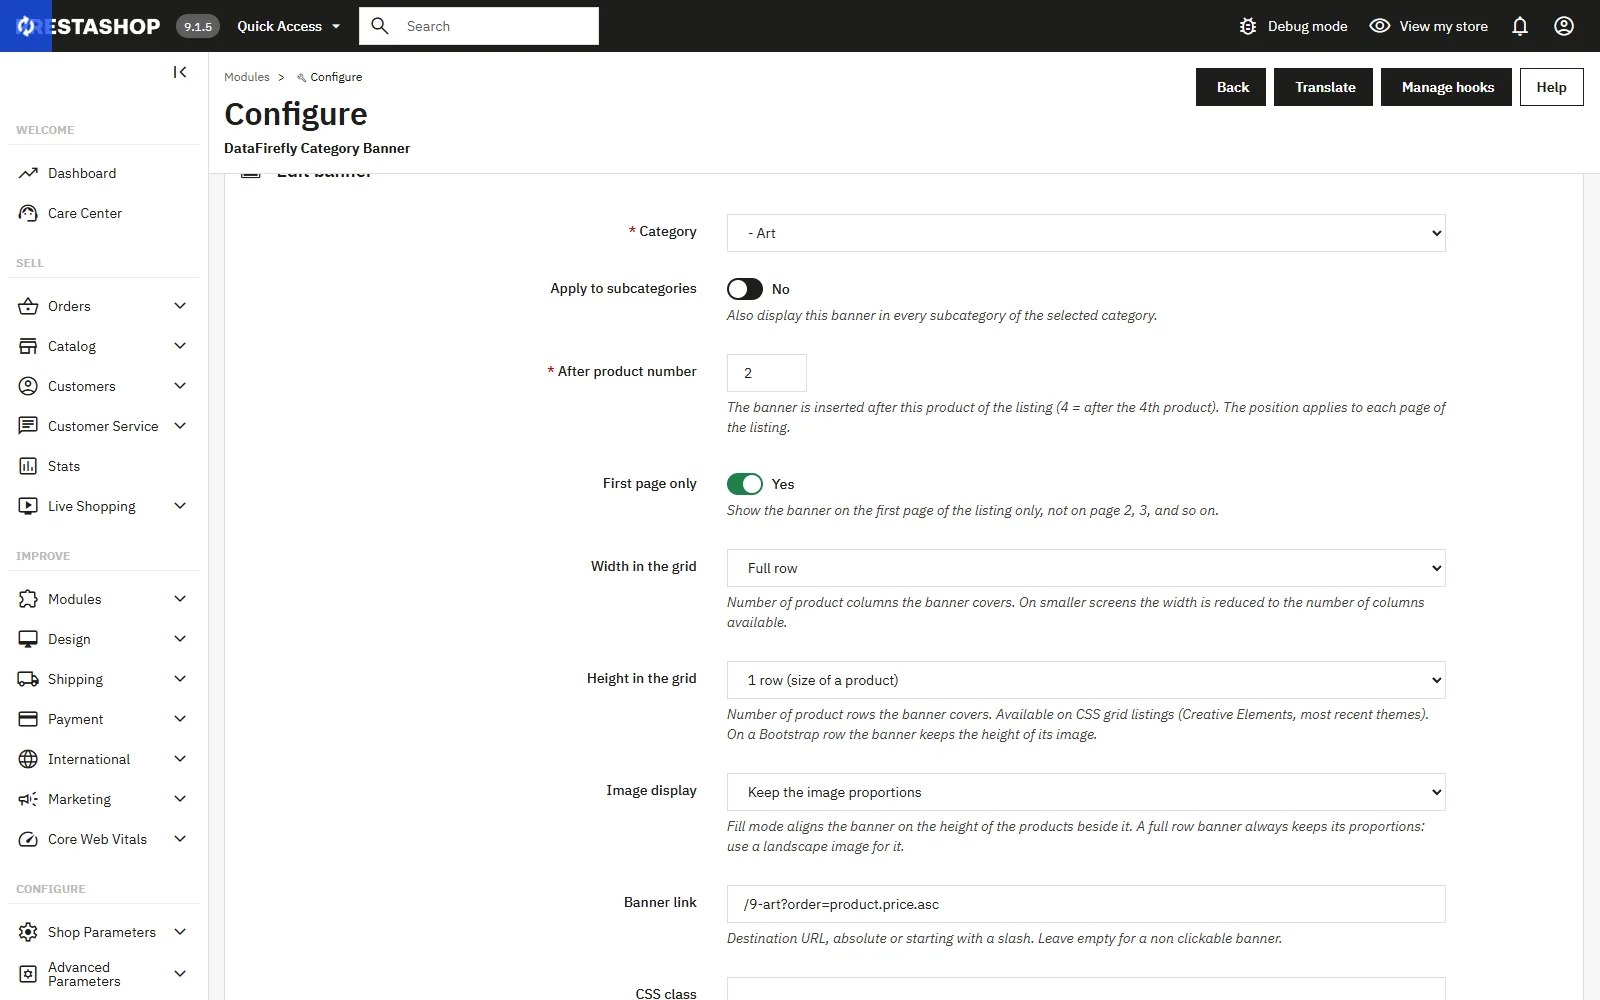
- Category: the category the banner appears in. The list mirrors the shop tree, with disabled categories flagged.
- Apply to subcategories: extends the banner to every subcategory of the chosen category, at any depth.
- After product number: the banner is inserted after this product of the listing. A value of 4 places the banner after the fourth product displayed.
- First page only: shows the banner on the first page of the listing only, without repeating it on page 2, 3 and so on.
Appearance and link
- Banner link: destination URL, absolute (
https://…) or starting with a slash (/new-arrivals). Leave empty for a non clickable banner. - Width in the grid: number of product columns the banner covers, from 1 to 4, or Full row. On screens that show fewer columns, the width is reduced automatically.
- Height in the grid: number of product rows the banner covers, from 1 to 3. Available on CSS grid listings (Creative Elements, most recent themes).
- Image display: Fill the banner area crops the image to the size of the cell, Keep the image proportions shows it in full.
- CSS class: extra classes applied to the banner cell. Leave empty to reuse the product cell classes of your theme. With a width and height of 1, a size class of your theme (for example one that sets
grid-area) still applies. - Custom CSS: declarations applied to this banner only, for example
border-radius: 12px; padding: 10px;.
Scheduling and status
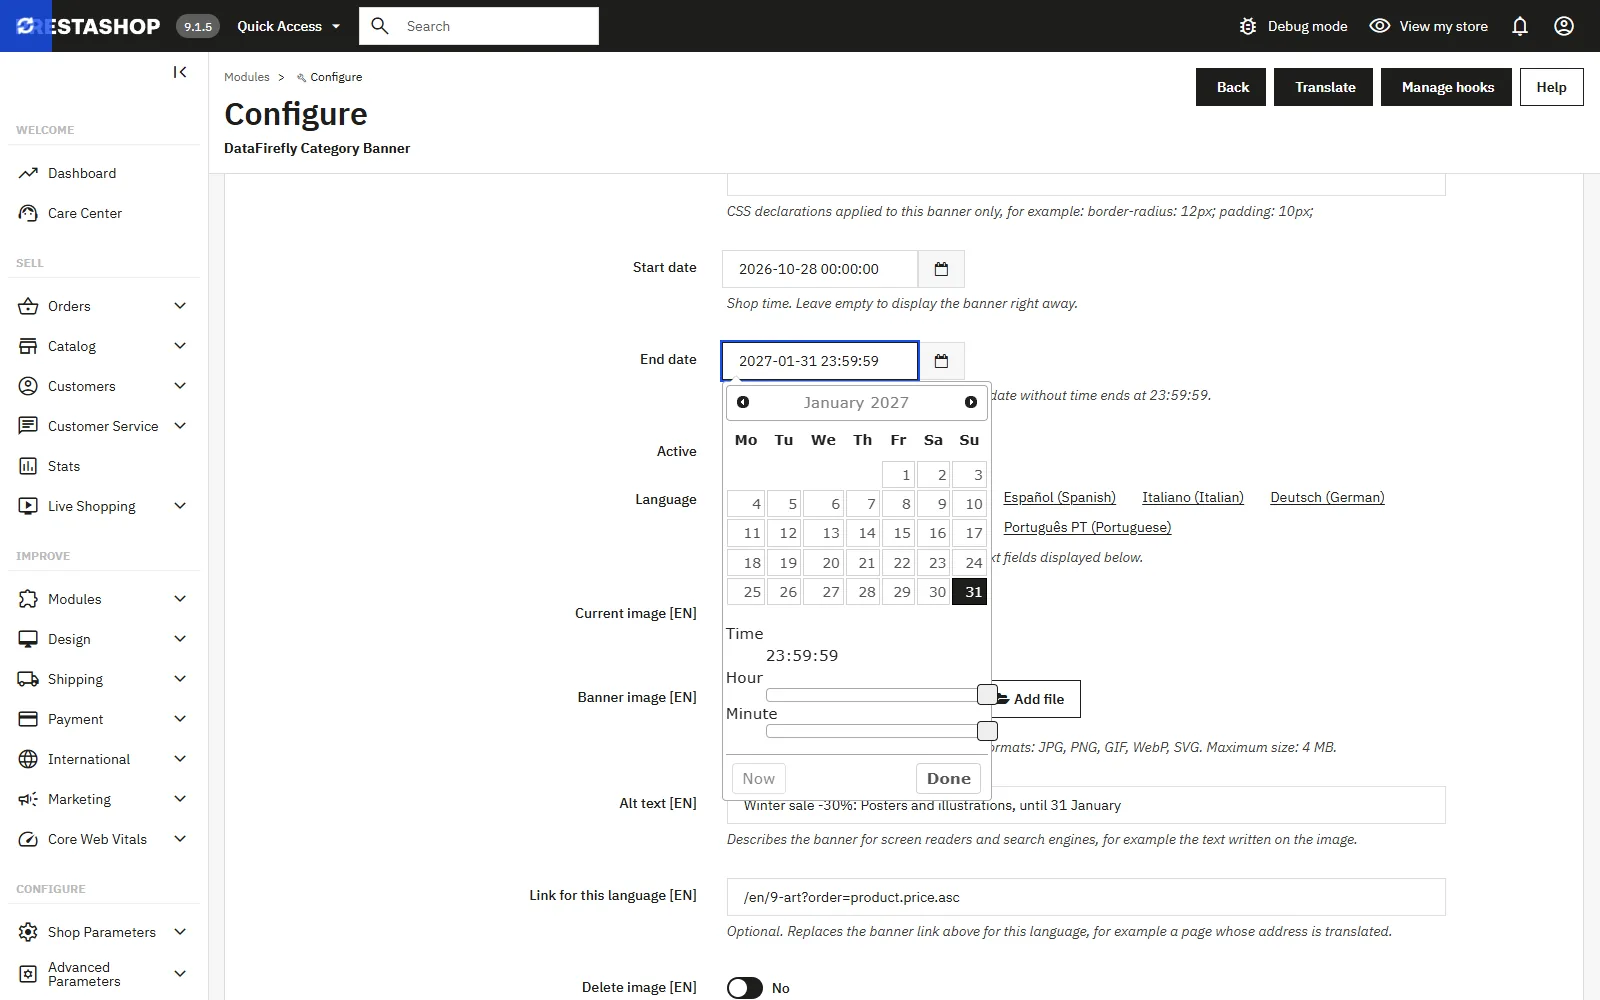
- Start date and End date: display window, in
YYYY-MM-DD HH:MM:SSformat. An empty field means no limit on that side. - Active: shows or suspends the banner without deleting it.
- Shop association: in multistore, tick the shops concerned.
Per-language images
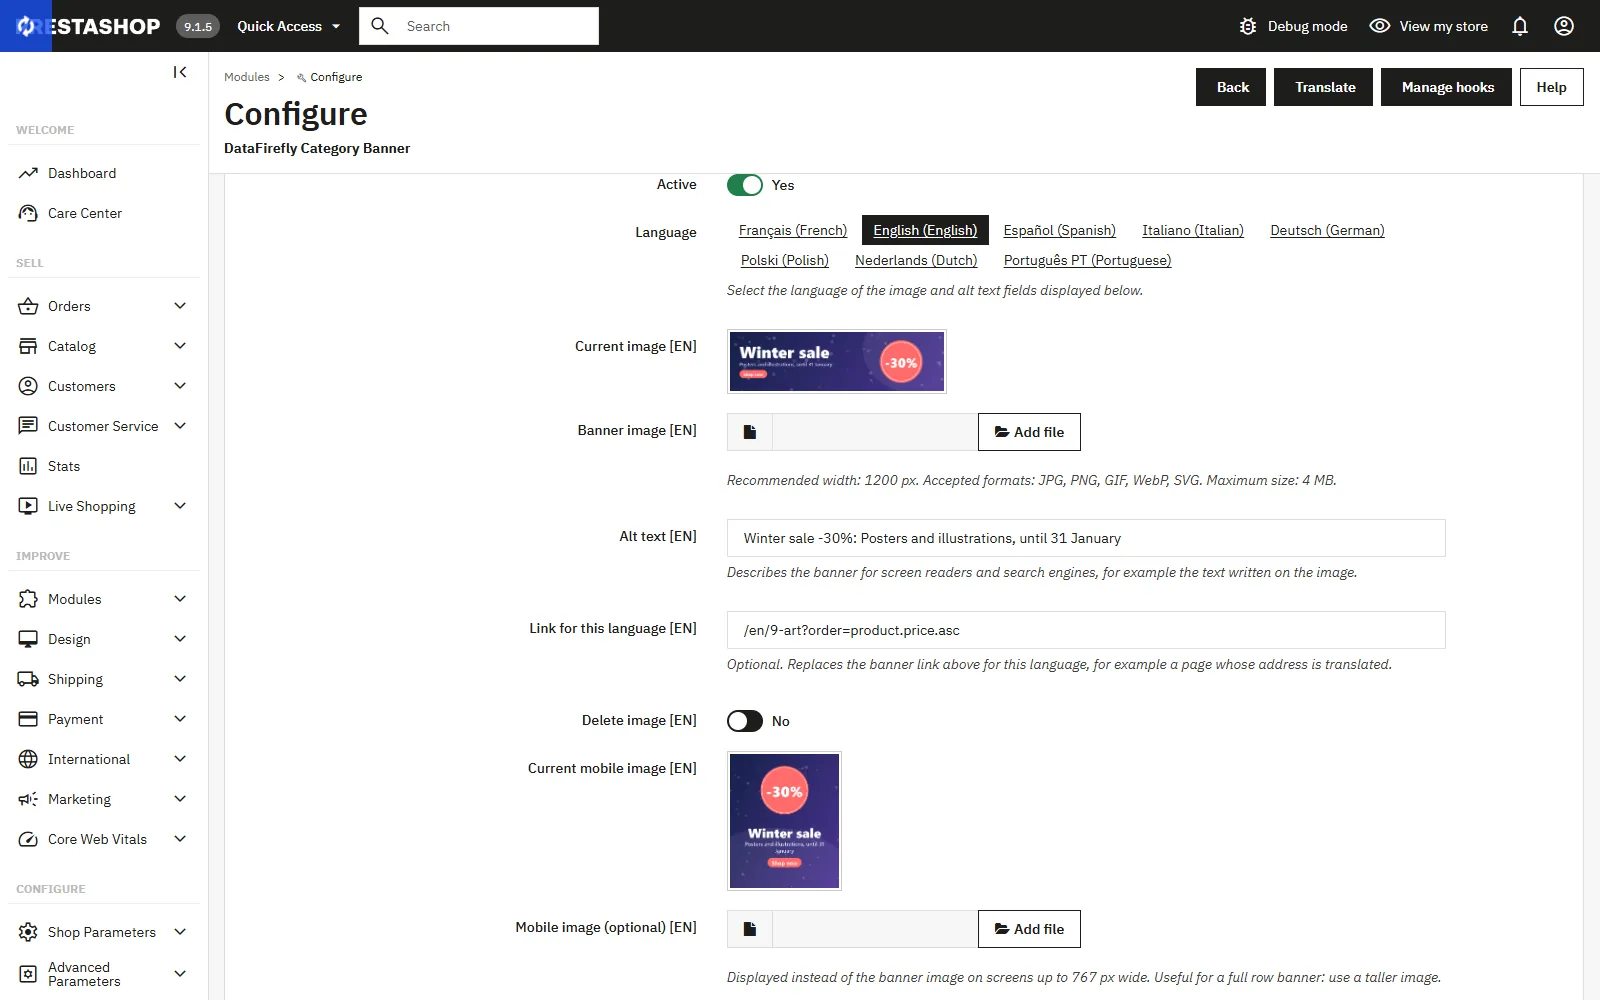
The Banner image, Mobile image, Alt text and Link for this language fields exist for every active language. The language selector just above these fields shows the fields of the selected language. When an image is already in place, a preview appears alongside a Delete image switch that only affects that language.
Accepted formats: JPG, PNG, GIF, WebP and SVG, up to 4 MB. A width of 1200 px suits most grids.
How the position is computed
The position is expressed as a number of products, and it applies to every page of the listing. A banner set to 4 appears after the fourth product of the current page, whether the visitor is on page 1 or page 3.
Several banners can target the same category, each at its own position. When two banners share the same position they are inserted one after the other, in save order. If the position exceeds the number of products displayed on the page, the banner is simply skipped for that page, without shifting the others.
By default the banner takes the place of one product cell. The Width in the grid and Height in the grid fields enlarge it, as explained below.
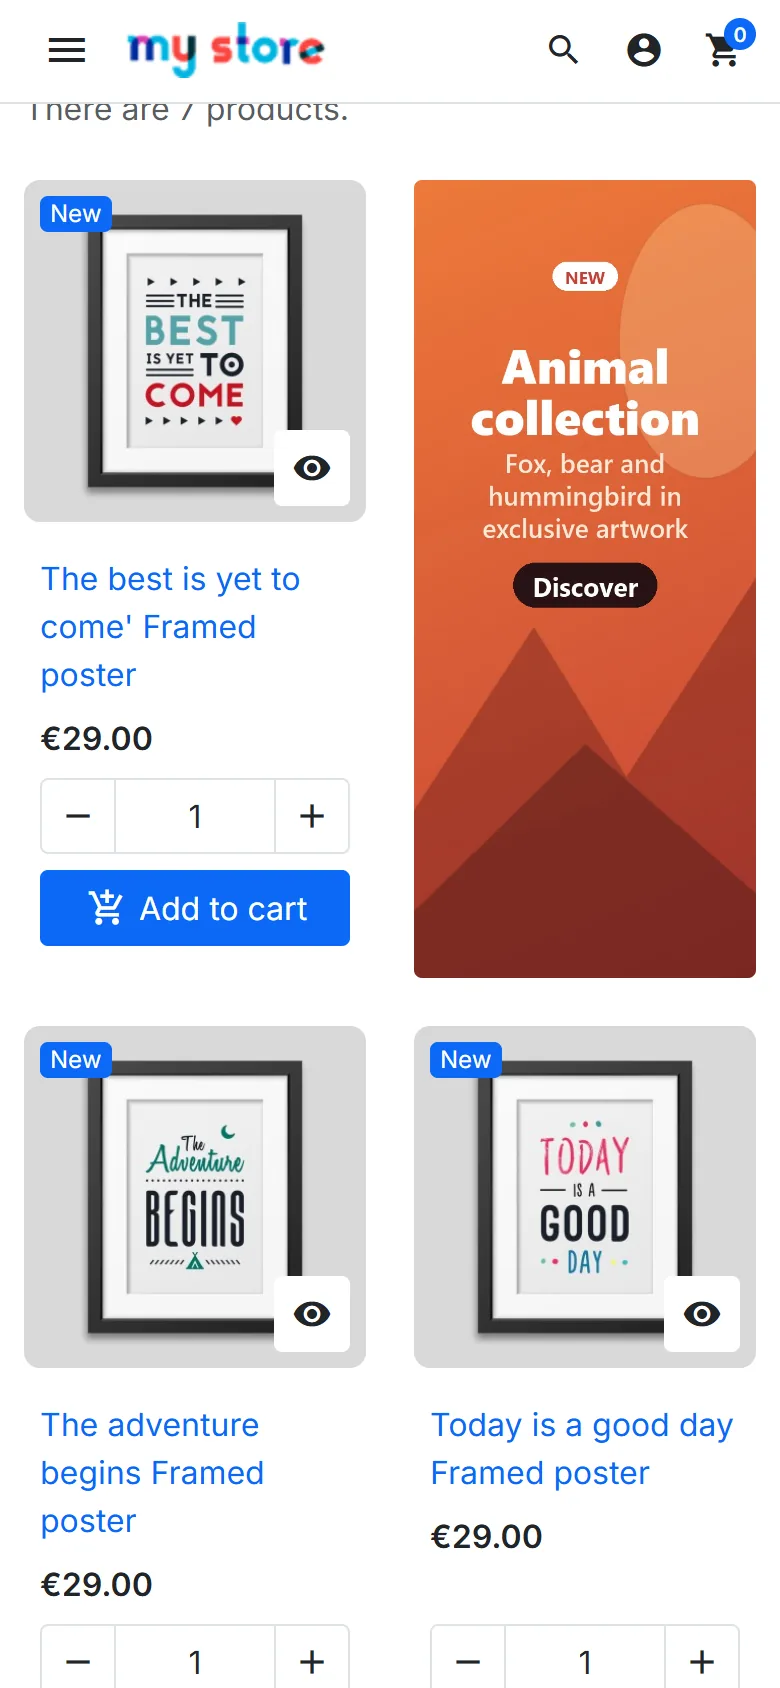
Banner size in the grid
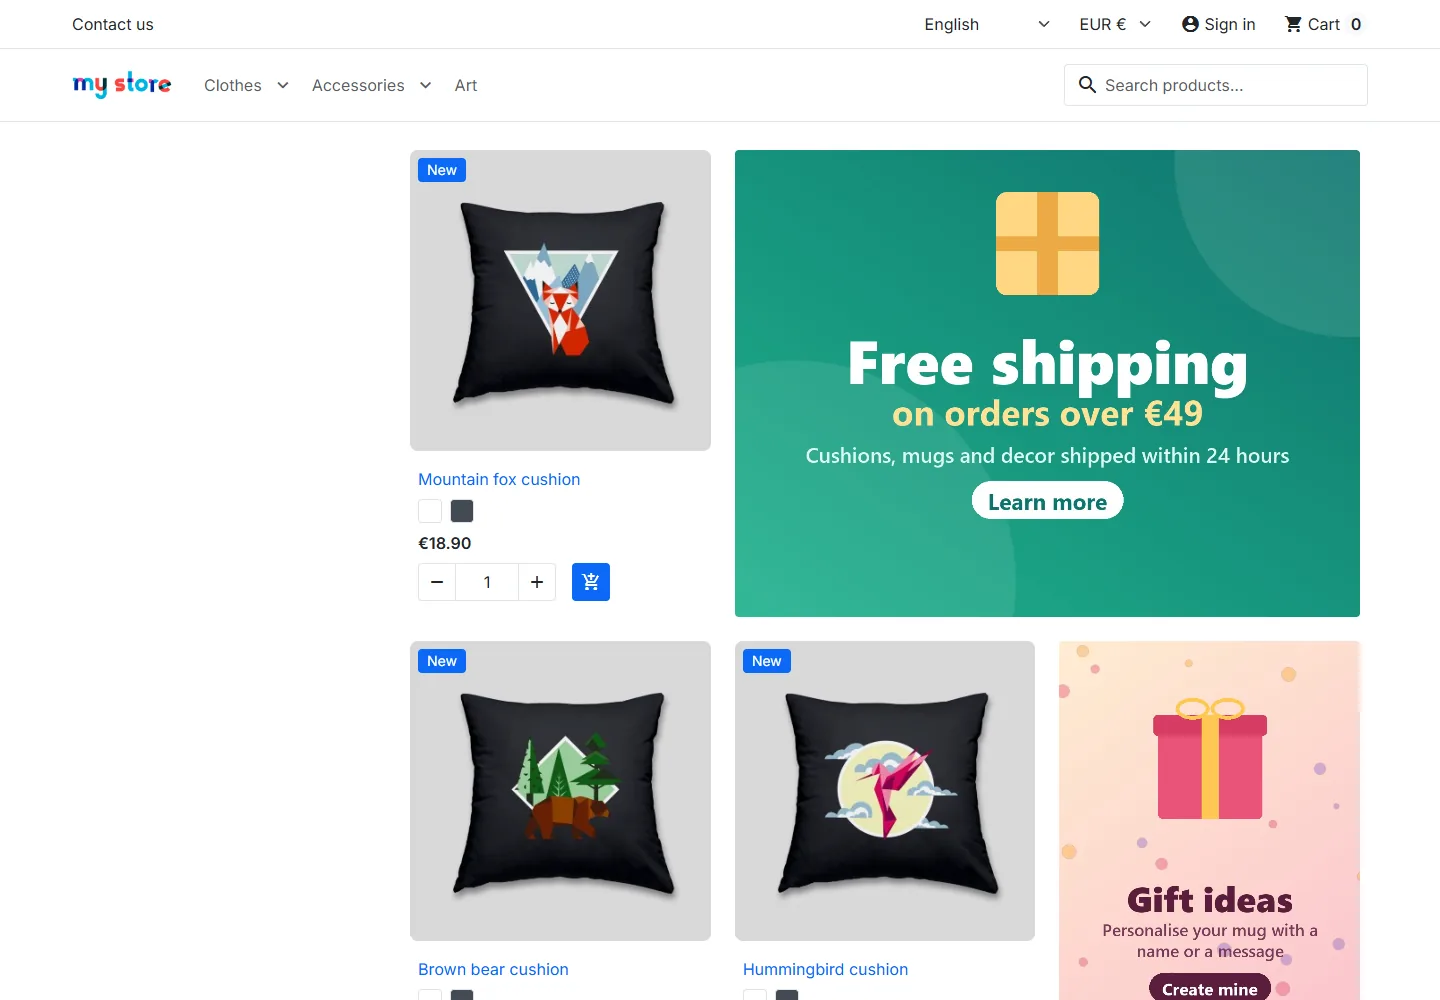
Each banner covers a block of product cells: 1 × 1 by default, up to 4 columns by 3 rows, or the full row. The products after the banner fill the cells left free, so the grid keeps no hole.
- CSS grid listings (Creative Elements, most recent themes): width and height both apply. A 2 × 2 banner placed after the 4th product of a four-column grid takes the first two columns of rows 2 and 3, and products 5 to 8 sit beside it.
- Bootstrap rows (Classic theme): the width applies, as a share of the row. The height follows the image.
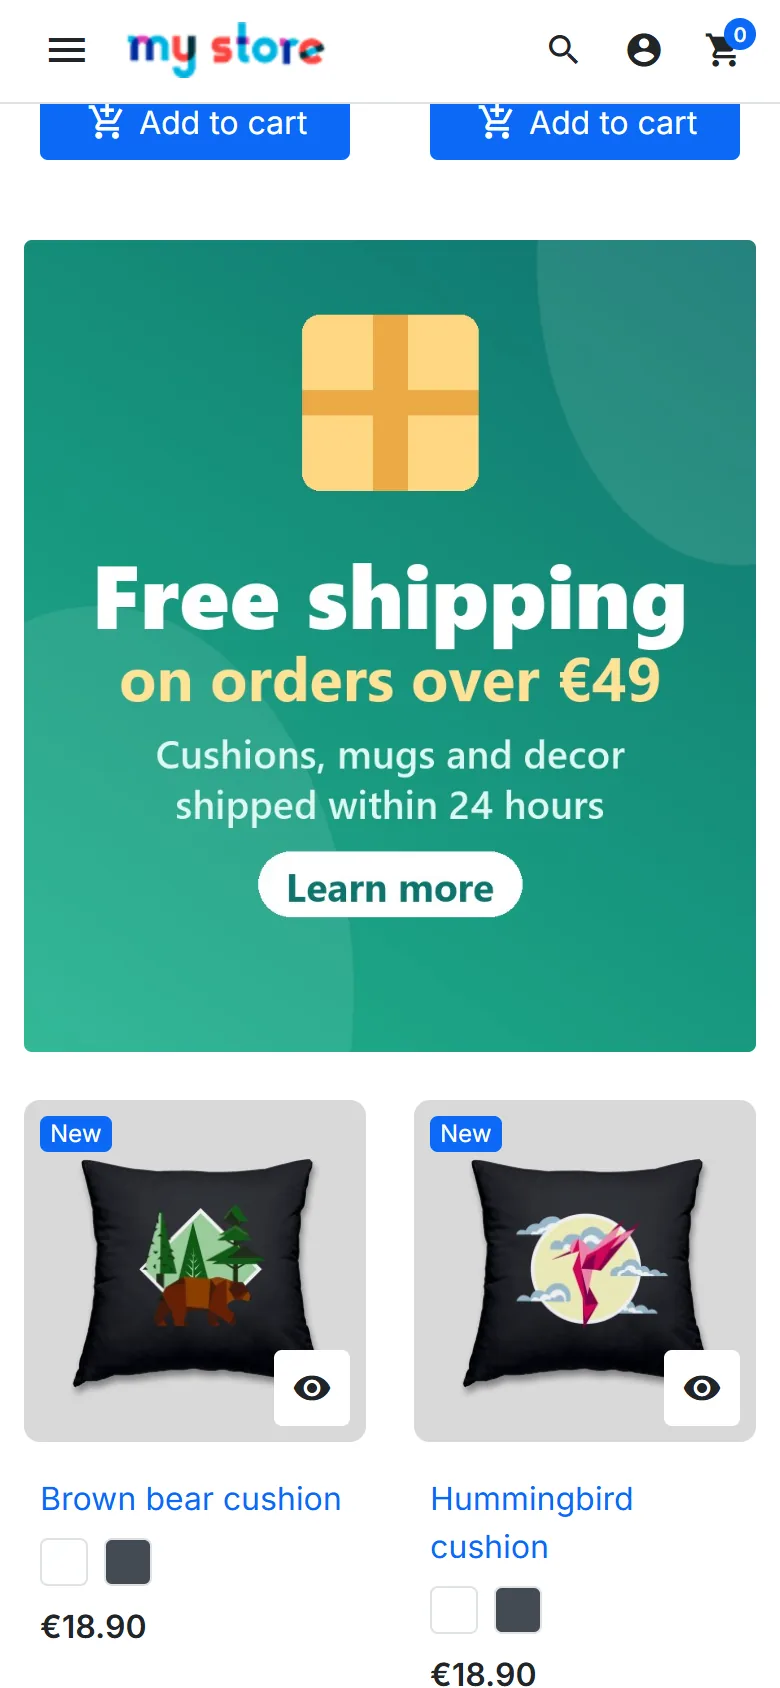
- Small screens: the width is capped at the number of columns displayed. A four-column banner on a two-column mobile grid becomes a full-row banner.
In fill mode the image covers the whole area, takes the height of the neighbouring products and is cropped from the centre. A full-row banner always keeps its proportions, since no product sits beside it to give it a height: use a landscape image for it.
For a 2 × 2 banner in fill mode, prepare an image slightly taller than wide and keep the key message in the centre, as the edges may be cropped.
Scheduling a campaign
Set a start date and an end date so a banner appears and disappears on its own. This is the right tool to prepare sales, Black Friday or a year-end campaign weeks in advance.
- Start date only: the banner appears on that date and stays visible afterwards.
- End date only: the banner shows immediately and stops on that date.
- Both dates: the banner is visible only within that window.
- No date: the banner is permanent.
Dates are entered and compared in the shop’s time, based on the time zone set in International > Localization, not in the visitor’s time. An end date entered without a time ends at 23:59:59.
Covering a whole category tree
The Apply to subcategories option saves you from recreating the same banner in every aisle. Set on a parent category, the banner shows in that category and in all of its descendants.
Resolution relies on PrestaShop’s native nested tree (nleft and nright columns), so it costs no extra query per page. If you move categories around, PrestaShop recomputes those values and the scope follows automatically.
Images and languages
Each banner accepts artwork and alt text per language, which lets you adapt a message or a price to the market. When a language has not received its own artwork, the module displays the one from the shop’s default language rather than hiding the banner. The language’s own alt text is kept when it is filled in.
An optional mobile image can complement each artwork: it is served to screens up to 767 px wide, with its own dimensions. Prepare it in portrait format for a full row banner.
Image dimensions are read on upload and written into the HTML width and height attributes, which avoids layout shift on load. The banner visible when the page opens is loaded first (fetchpriority="high"), the others are deferred (loading="lazy"). Files are renamed with a random suffix and stored in /img/datafireflycategorybanner/.
Alt text is read by search engines and screen readers. Describe what the artwork shows rather than repeating the category name.
Multistore
When the multistore feature is active, the form shows a Shop association block. A banner only appears in the shops you tick, and the back office list only shows the banners visible in the current shop context.
If no shop is ticked, the module associates the banner with the current context so that it never creates an orphan banner.
Faceted filters, sorting and pagination
On PrestaShop 8 and 9, faceted filters, sorting and pagination reload the product list over AJAX without reloading the page. The module watches the listing: as soon as new product cells appear, after a filter, a page change, a load more button or infinite scroll, it puts the banners back at the right positions. It also listens to PrestaShop’s updateProductList event.
The product grid is found from the products themselves (data-id-product and product-miniature markers), not from the classes of a given theme. This covers the Classic theme, Creative Elements listings and most custom themes.
CSS and JavaScript are loaded on category pages only, and only when the current category has at least one active and displayable banner.
Settings: product grid selector
Below the banner list, the Settings panel holds a single field, Product grid selector. Leave it empty: the grid is detected automatically.
Only if banners never show on a theme with an unusual structure, enter the CSS selector of the element that directly contains the product cells, for example #js-product-list .products or .ce-products. When the grid cannot be found, the module prints a [DataFirefly Category Banner] warning in the browser console.
What’s new in version 1.3.0
Version 1.3.0 fixes several issues found during a full review on PrestaShop 1.7.8, 8.2.1 and 9.1.5, and adds a few settings.
- Mobile image: each language accepts a second image, displayed on screens up to 767 px wide. This helps with a full row banner, which is hard to read in landscape format on a phone.
- Link per language: an optional link per language replaces the common link, so you can point to a page whose address is translated, for example
/en/content/1-delivery. - First page only: the banner is no longer repeated on page 2, 3 and so on of the listing. It shows again as soon as the visitor returns to page 1 or applies a filter.
- Date picker: the calendar in the form now fills in the right format. An end date entered without a time ends at 23:59:59.
- Shop time: dates are compared against the shop’s time. Previously the MySQL server clock, often set to UTC, shifted the start and end by one to two hours.
- Core Web Vitals: banners are inserted right after the product grid (
displayFooterCategoryhook), before the first render, which removes layout shift (CLS). The banner visible when the page opens is loaded first, the following ones are deferred. - Image security: SVG files that contain a script, an event handler or external content are rejected, and the
/img/datafireflycategorybanner/folder gets its own.htaccess(images only, SVG isolated). A rejected image no longer creates an empty banner. - WebP on PrestaShop 1.7: WebP images are accepted and served correctly.
- Back office list: an Images column shows the languages that have artwork, and ended or scheduled banners are flagged.
To upgrade, install the 1.3.0 archive over the current version from the module manager. Your banners and images are kept. Then clear the PrestaShop cache and the cache of any performance module.
Upgrading to version 1.2.0
Install the 1.2.0 archive over the previous version from the module manager. The upgrade script adds the size and image display columns, plus the grid selector setting. Existing banners keep their current look: 1 × 1, image proportions kept. Edit a banner to give it another size or switch it to fill mode.
The front script changes in this version. After the upgrade, clear the PrestaShop cache and the cache of any performance module (CCC, page cache, minification), otherwise the previous script keeps being served.
Upgrading from version 1.0.0
Simply install the new archive over the old one from the module manager. The upgrade script takes care of:
- adding the scope, scheduling and image dimension columns;
- creating the shop association table and carrying over the original shop of each banner;
- moving existing images from
views/img/banners/to/img/datafireflycategorybanner/and reading their dimensions; - removing a hook that is no longer needed.
Your banners, their positions and their artwork are preserved.
FAQ and troubleshooting
The banner does not show on the category page
Check in order: the banner is active; today’s date falls within the scheduling window; the targeted category is the one being browsed, or the subcategory scope is on; the displayed language has an image, or the default language has one; in multistore, the current shop is ticked. Finally, clear the PrestaShop cache.
On a listing built with Creative Elements or another page builder, check that the module runs version 1.2.0 or later: earlier versions only recognised the Classic theme grid. Then open the browser console: a [DataFirefly Category Banner] warning means the grid was not found, see the Settings section.
The banner appears in the wrong place
The position counts the products of the current page. If your listing shows 12 products per page, a banner at position 20 will never appear. Lower the value or raise the number of products per page.
The banner breaks the grid layout
Set the size with the Width in the grid and Height in the grid fields rather than with grid classes, and empty the CSS class field unless your theme provides a size class. Avoid mixing classes from different grid systems.
The banner disappears after filtering
Since version 1.2.0 the module re-inserts the banners as soon as new product cells appear in the listing, whatever the filter module. If the banner still disappears, open the browser console: a [DataFirefly Category Banner] warning means the grid was not found after the refresh. Enter the grid selector in the Settings panel, and contact support if the problem persists.
The image refuses to upload
The module accepts JPG, PNG, GIF, WebP and SVG files up to 4 MB. Also check that /img/datafireflycategorybanner/ is writable and that the PHP upload_max_filesize and post_max_size directives are larger than the file.
The banner link is rejected
Only URLs starting with http://, https:// or a slash are accepted. This guards against javascript: and data: injection.
What happens on uninstall?
The module drops its tables and removes the /img/datafireflycategorybanner/ folder together with the artwork it holds. Back up your images if you plan to reinstall later.