
Birthday coupon email: PrestaShop module documentation
Install the module, set up the birthday campaigns, schedule the daily run and read the revenue generated.
Overview
The module automatically sends your customers a personal discount code for three occasions: their birthday, the anniversary of their first valid order and the anniversary of their account creation. Each code is a native PrestaShop cart rule, reserved for the customer and usable once. The module then measures the revenue of the orders placed with these codes.
Compatibility: PrestaShop 1.7.8 to 9.x (PHP 7.4 to 8.5), Classic and Hummingbird themes, multistore, 8 languages (English, French, Spanish, German, Italian, Dutch, Polish, Portuguese).
New in version 2.0.2: email message formatted with the PrestaShop editor, or written directly in HTML.
New in version 2.0.1: choice of the products each campaign applies to (whole catalogue, only some products and categories, or all except some), shown to the customer in the email.
What’s new in version 2.0.0: setup assistant, key dates calendar, real email preview (desktop and mobile), simulation of any day, pause of the sending, choice of the test email address, unsubscribe link without login in every email, deletion of the date of birth by the customer, dates written out in the customer’s language, PrestaShop 1.7.8 and Hummingbird support. 2.0.0 also fixes the saving of the back-office settings and the filters on PrestaShop 9.
Installation
- In Modules > Module Manager, click Upload a module and send the ZIP file.
- The module creates two tables, registers its hooks, generates the scheduled task token and copies the email templates for each installed language.
- A new Birthdays and key dates tab appears in the Customers menu. The module’s Configure button also leads there.
To move from a 1.x version to 2.0.2, simply upload the new ZIP. Your campaigns, texts, code history and statistics are kept; a store that had never saved its campaigns keeps the birthday and first order campaigns enabled, as in 1.x.
The setup assistant
On a new installation, no campaign is active: nothing is sent to your customers until you click Activate my campaigns. The dashboard shows a three-step assistant: choose the occasions and their discount, choose the automation (scheduled task and fallback on store visits, date of birth request after the order), then enter the test email address and activate. The Skip, I will configure it myself link goes straight to the Campaigns tab.
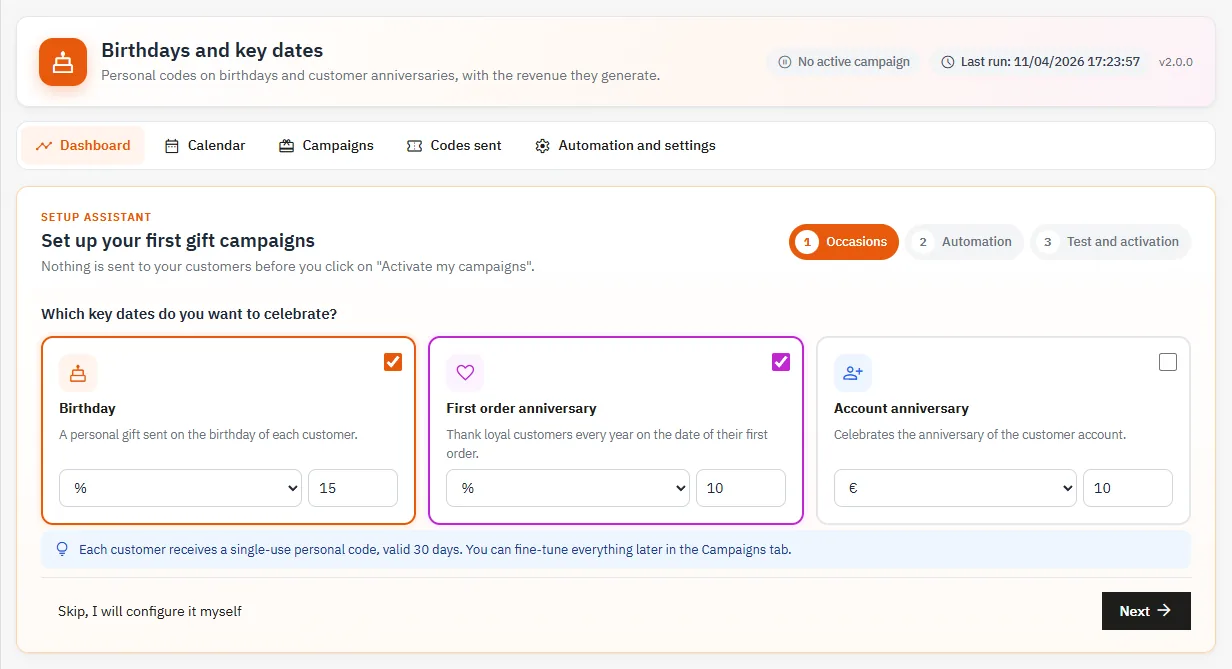
Then the dashboard shows a “Getting started” checklist until the four key steps are done: enable a campaign, send yourself a test email, schedule the daily task and collect dates of birth.
Setting up the campaigns
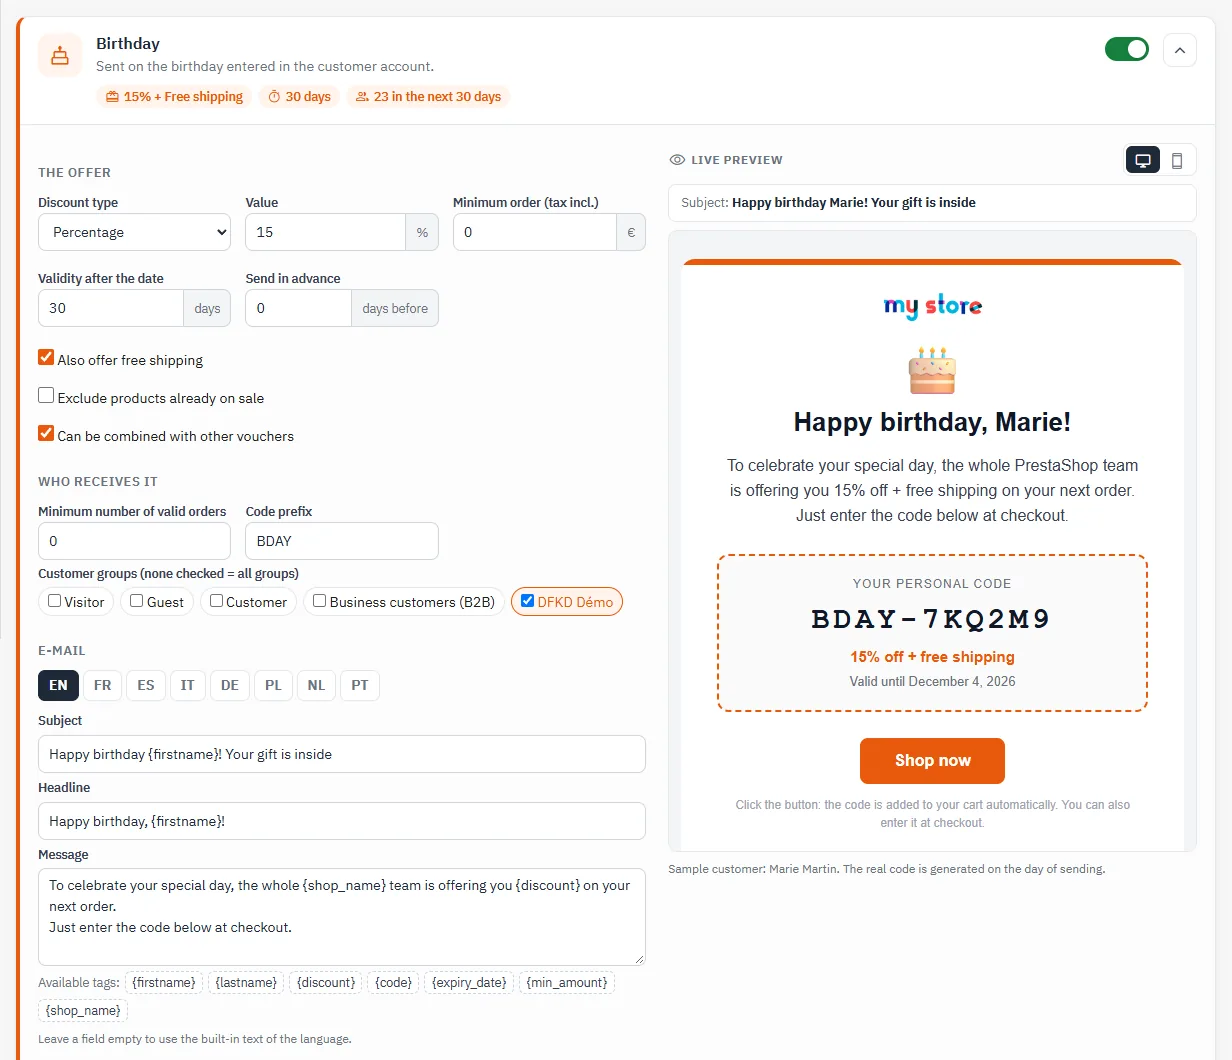
The Campaigns tab has one card per occasion. Turn it on with the switch at the top right: the settings and the email preview appear.
The offer
- Discount type: percentage, fixed amount (in the default currency) or free shipping.
- Value and Also offer free shipping on top of a percentage or amount.
- Minimum order (tax incl.): 0 for no minimum.
- Validity after the date: how many days the code stays valid after the date of the occasion.
- Send in advance: number of days before the date. 0 sends on the day itself.
- Increase per extra year and Maximum value (order and account anniversaries): for example 10% the first year, +2 per year, capped at 20%.
- Exclude products already on sale and Can be combined with other vouchers.
Products the code applies to
By default, the code is valid on the Whole catalogue. Choose Only some products or All except some products, then add categories (subcategories included) and products by searching for their name, reference or ID. The number of products covered is shown under the selection, and the email tells the customer which products the code is valid on.
- Percentage: the discount only applies to the products covered; the other products of the cart keep their price.
- Fixed amount or free shipping: the code is accepted as soon as the cart contains at least one product covered.
- With All except some products, or with both categories and products, the list of products is set when the code is sent: a product added to the catalogue later is not covered by codes already sent.
On PrestaShop 1.7, the percentage of a selection is computed on the price before the product’s own discounts. Tick Exclude products already on sale so that a product on sale does not get both discounts.
Who receives it
- Minimum number of valid orders: 0 for the birthday includes customers who have never ordered.
- Code prefix: for example BDAY gives codes such as BDAY-7KQ2M9.
- Customer groups: none checked means all groups.
The email
Edit the subject, headline and message for each language using the language tabs. The preview on the right shows the real email template, as the customer will receive it, with the actual discount; it updates while you type and switches to mobile width with the phone icon. The tag buttons insert the tag at the cursor position. Available tags: {firstname}, {lastname}, {discount}, {code}, {expiry_date}, {min_amount}, {years} (except birthday) and {shop_name}. An empty field uses the default text of the language.
The Save and send a test button sends the email, in the employee’s language, to the address entered in the Test e-mails are sent to field at the top of the tab (by default, the logged-in employee’s address).
The Message is written with the PrestaShop editor: bold, colours, lists, links, tables, headings and images from the file manager. The <> button lets you write or paste HTML. When saving, the module removes what is risky in an email (scripts, forms, embedded frames, javascript: links), makes links and images absolute and generates the text version of the email. Tags are inserted at the cursor and also work in HTML. A message saved before 2.0.2 stays in plain text and is sent as before.
The key dates calendar
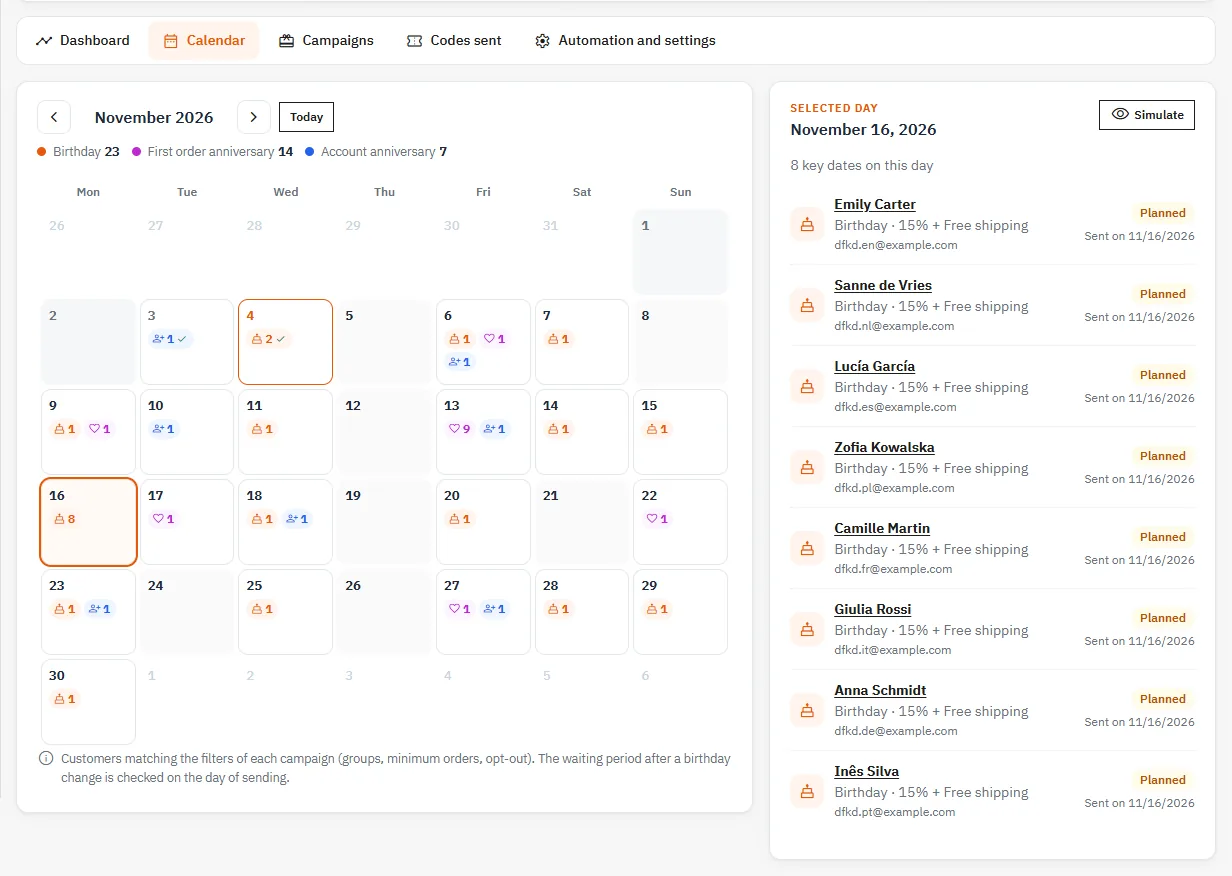
The Calendar tab shows the month with, for each day, the number of customers celebrating a birthday, a first order anniversary or an account anniversary. It applies the same filters as the sending: groups, minimum number of orders, guests, newsletter subscribers and unsubscribed customers. Click a day to see the list of customers with their offer and the status of the code: planned (with the sending date if codes are sent in advance), code sent, used or not sent. The Simulate button runs the simulation of that day. The waiting period after a change of the date of birth is checked on the day of sending.
Scheduling the daily run
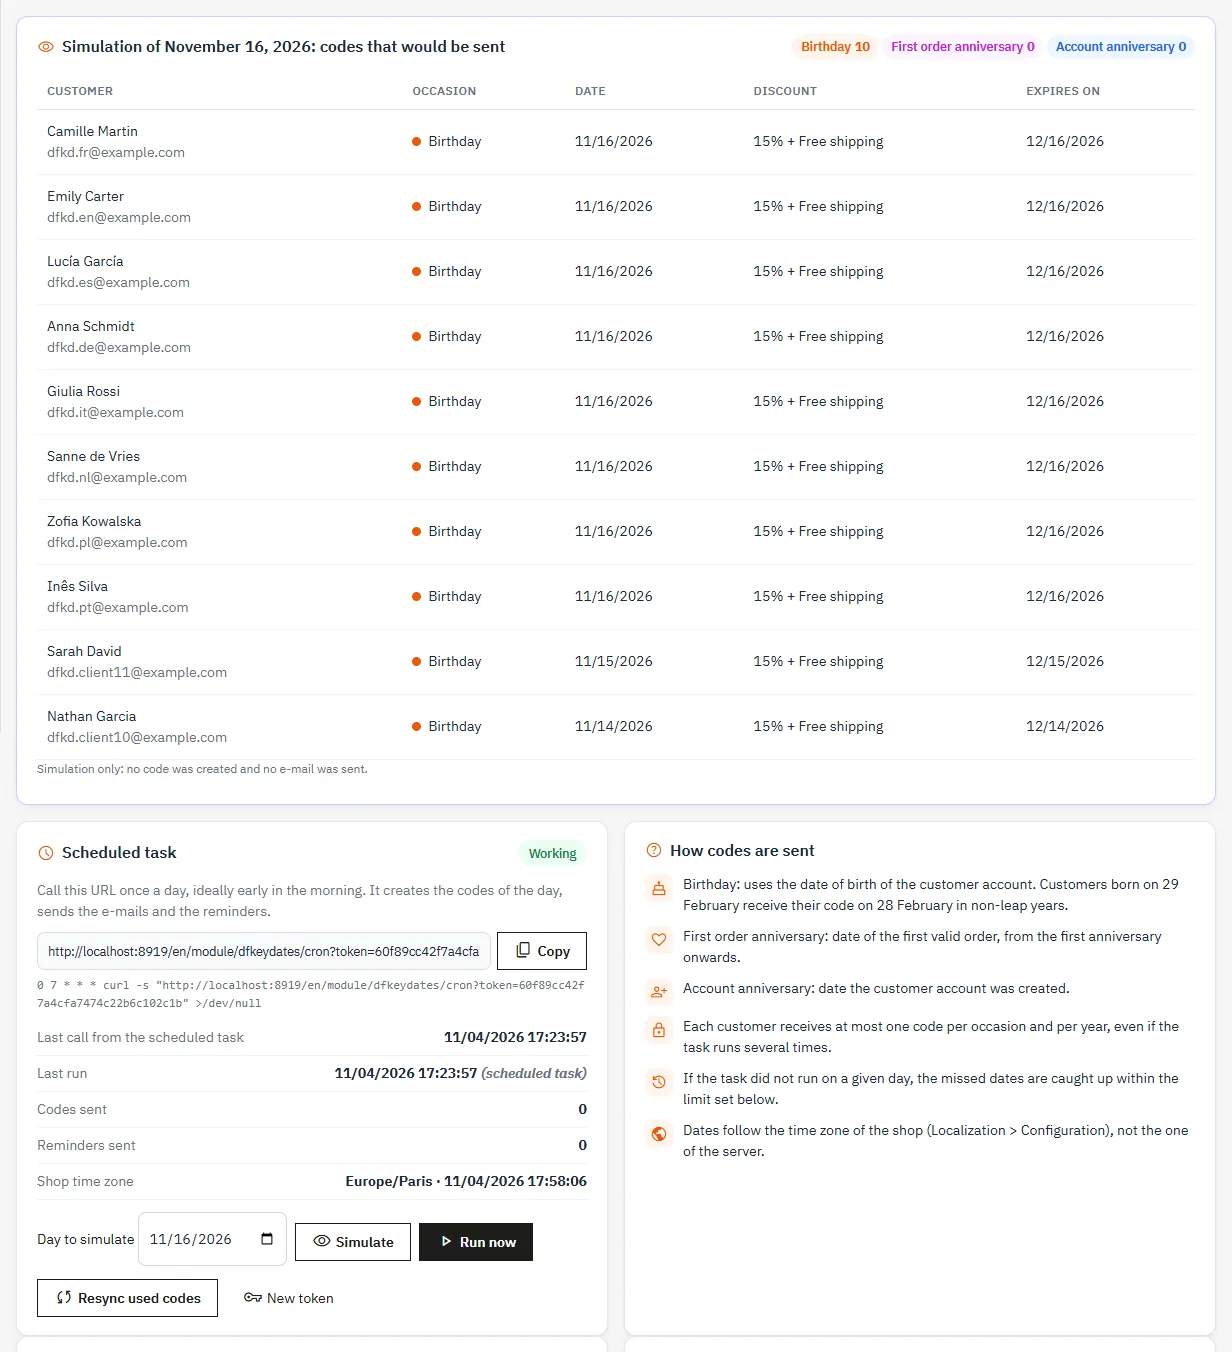
In Automation and settings, copy the scheduled task URL and call it once a day, ideally early in the morning. Example cron line:
0 7 * * * curl -s "https://your-store.com/module/dfkeydates/cron?token=YOUR_TOKEN" >/dev/nullEach run creates the codes of the day, sends the emails and reminders, links used codes to their order and deletes expired unused codes.
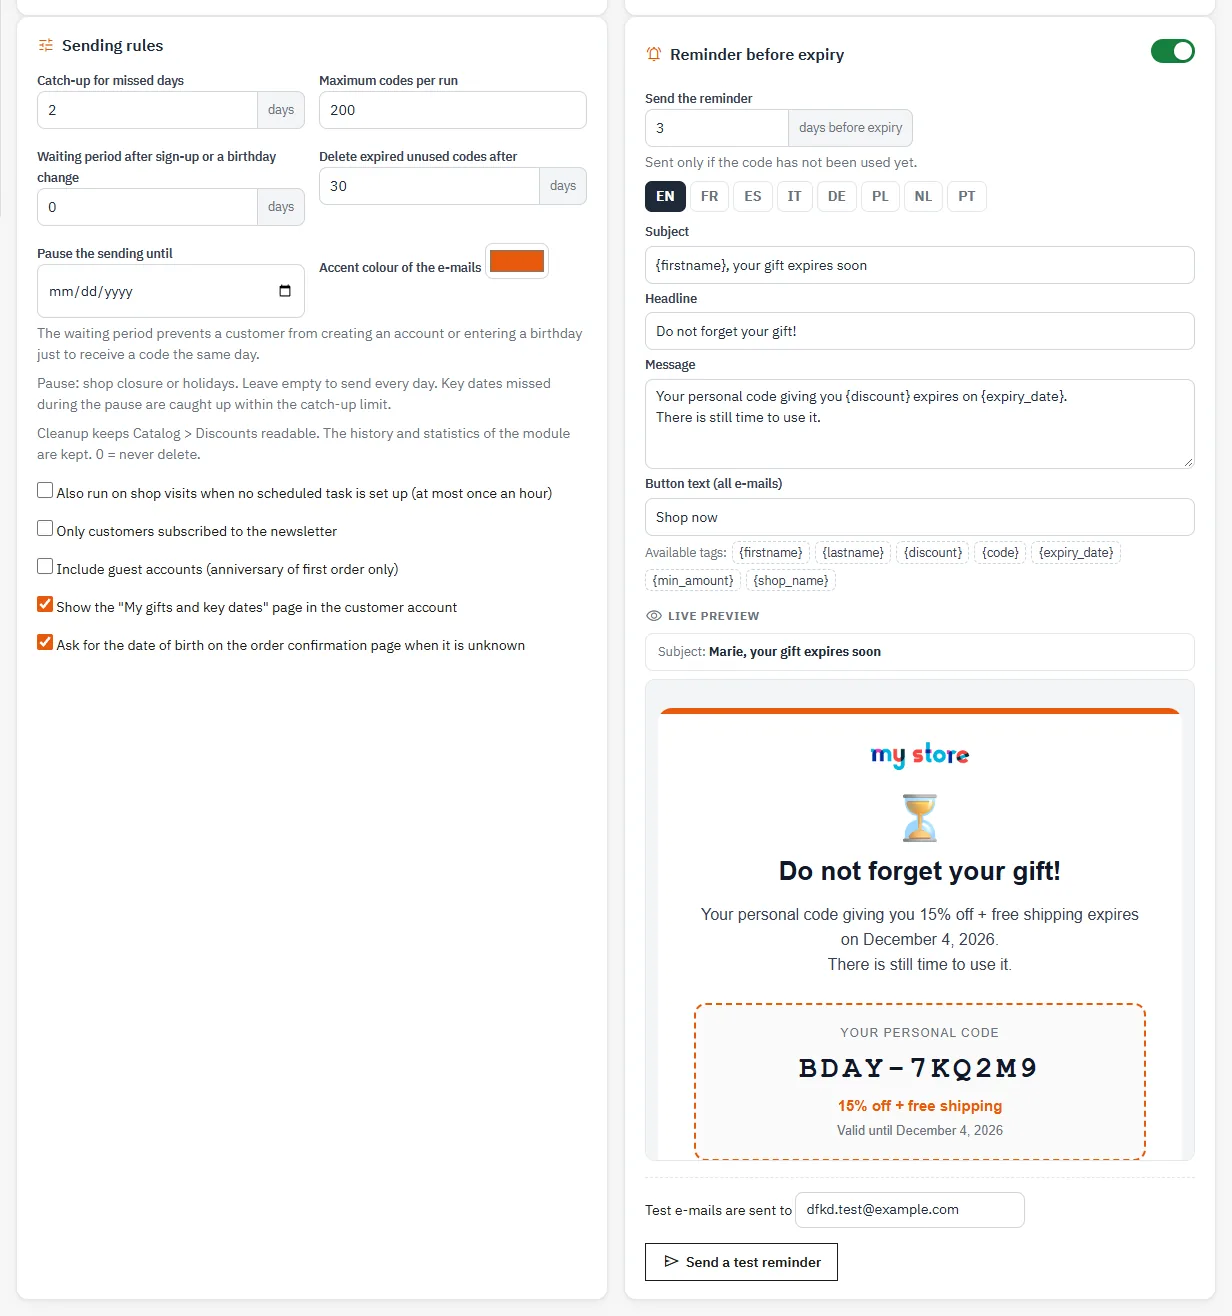
- Catch-up for missed days (2 by default): if the task did not run, the dates of the previous days are processed.
- Maximum codes per run (200 by default): the rest is sent at the next run.
- Also run on shop visits: without cron, the module runs on store visits, at most once an hour, after the page has been sent. It stops as soon as a real cron has been called within the last 26 hours.
On the same page, Simulate lists the codes that would go out on the day chosen in the Day to simulate field, without creating or sending anything. The Run now, Resync used codes and New token buttons complete the card, which also shows whether the scheduled task has been detected and the store time zone: dates follow the time zone set in International > Localization, not the server’s.
Pause the sending until stops the sending during a closure or holidays. A banner reminds you of it on every tab. Key dates missed during the pause are caught up within the catch-up limit.
Each customer receives at most one code per occasion and per year. You can therefore run the task several times without any risk of duplicates.
Anti-abuse and date of birth collection
The waiting period after sign-up or a birthday change (30 days by default) blocks the birthday code for an account that is too recent or whose date has just been entered or changed in the store. Changes made by an employee in the back office do not trigger this period.
Dates of birth come from the native field of the customer account (Customers > Settings > Birth date). If this field is disabled, the module collects them itself:
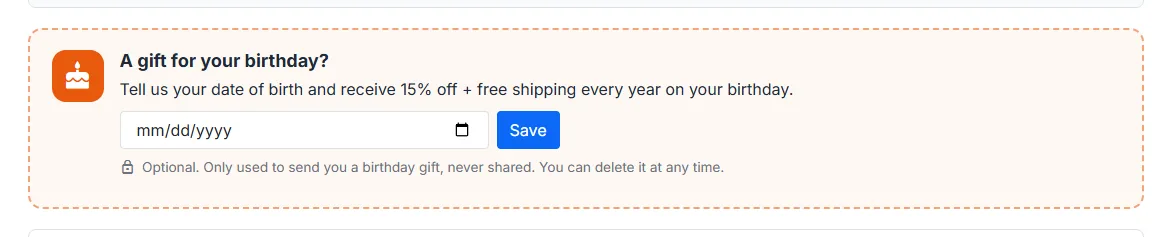
- on the order confirmation page, when the date is unknown (option Ask for the date of birth on the order confirmation page when it is unknown);
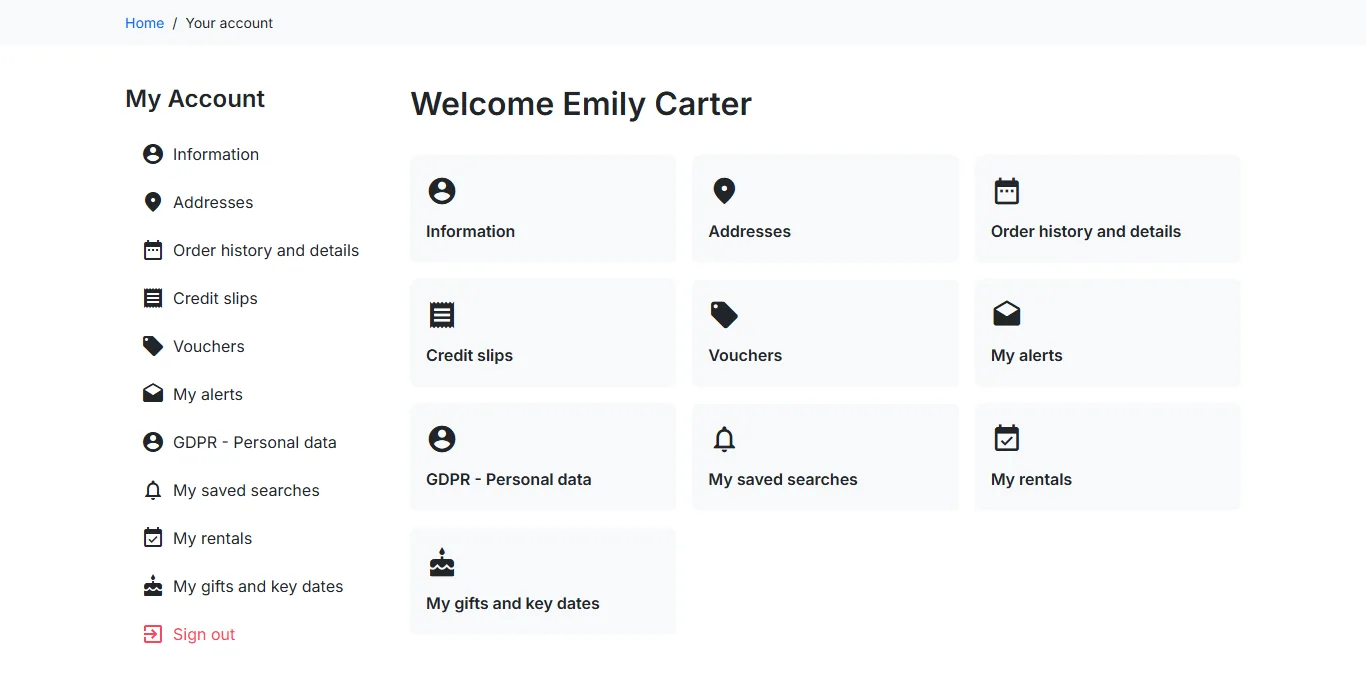
- on the My gifts and key dates page of the customer account.
The dashboard shows the percentage of accounts with a known date. On the order confirmation page, the date is saved without leaving the page; the request states that it is optional and only used for the birthday gift. It is not shown to a customer who has unsubscribed from these emails.
Reminder before expiry
Enable the reminder and choose how many days before expiry it goes out. It is only sent if the code has not been used. The reminder texts and the button text of all emails are set per language. The Send a test reminder button saves the settings and sends you an example.
One-click code
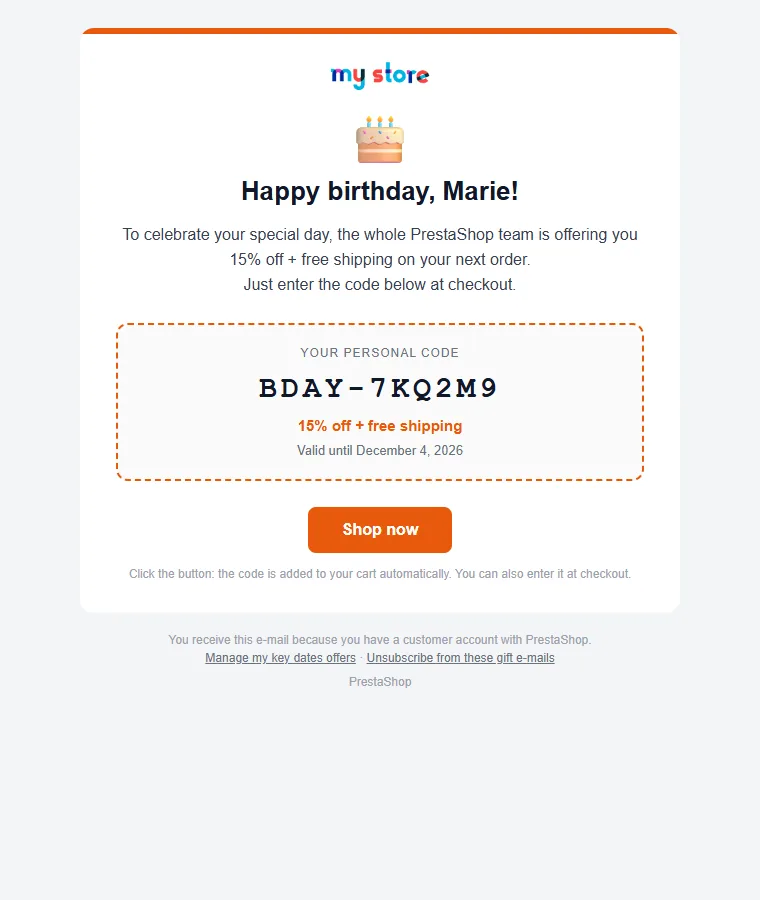
The button in each email points to a signed link specific to the code. The module remembers the code and adds it to the cart as soon as the customer is logged in and the cart contains products. If the customer is not logged in, they are sent to the login page. If the minimum order is not reached, the code waits and applies as soon as it is. A code that has expired, has already been used or belongs to another customer is refused with a message.
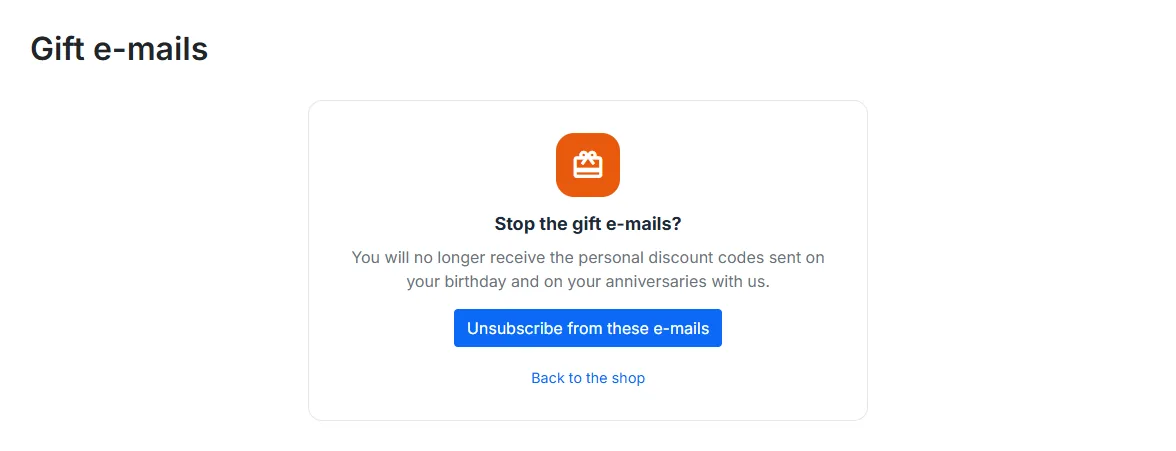
Dates in the emails are written out in the customer’s language (for example “December 4, 2026”). Each email contains a Manage my key dates offers link and an Unsubscribe from these gift e-mails link that works without logging in.
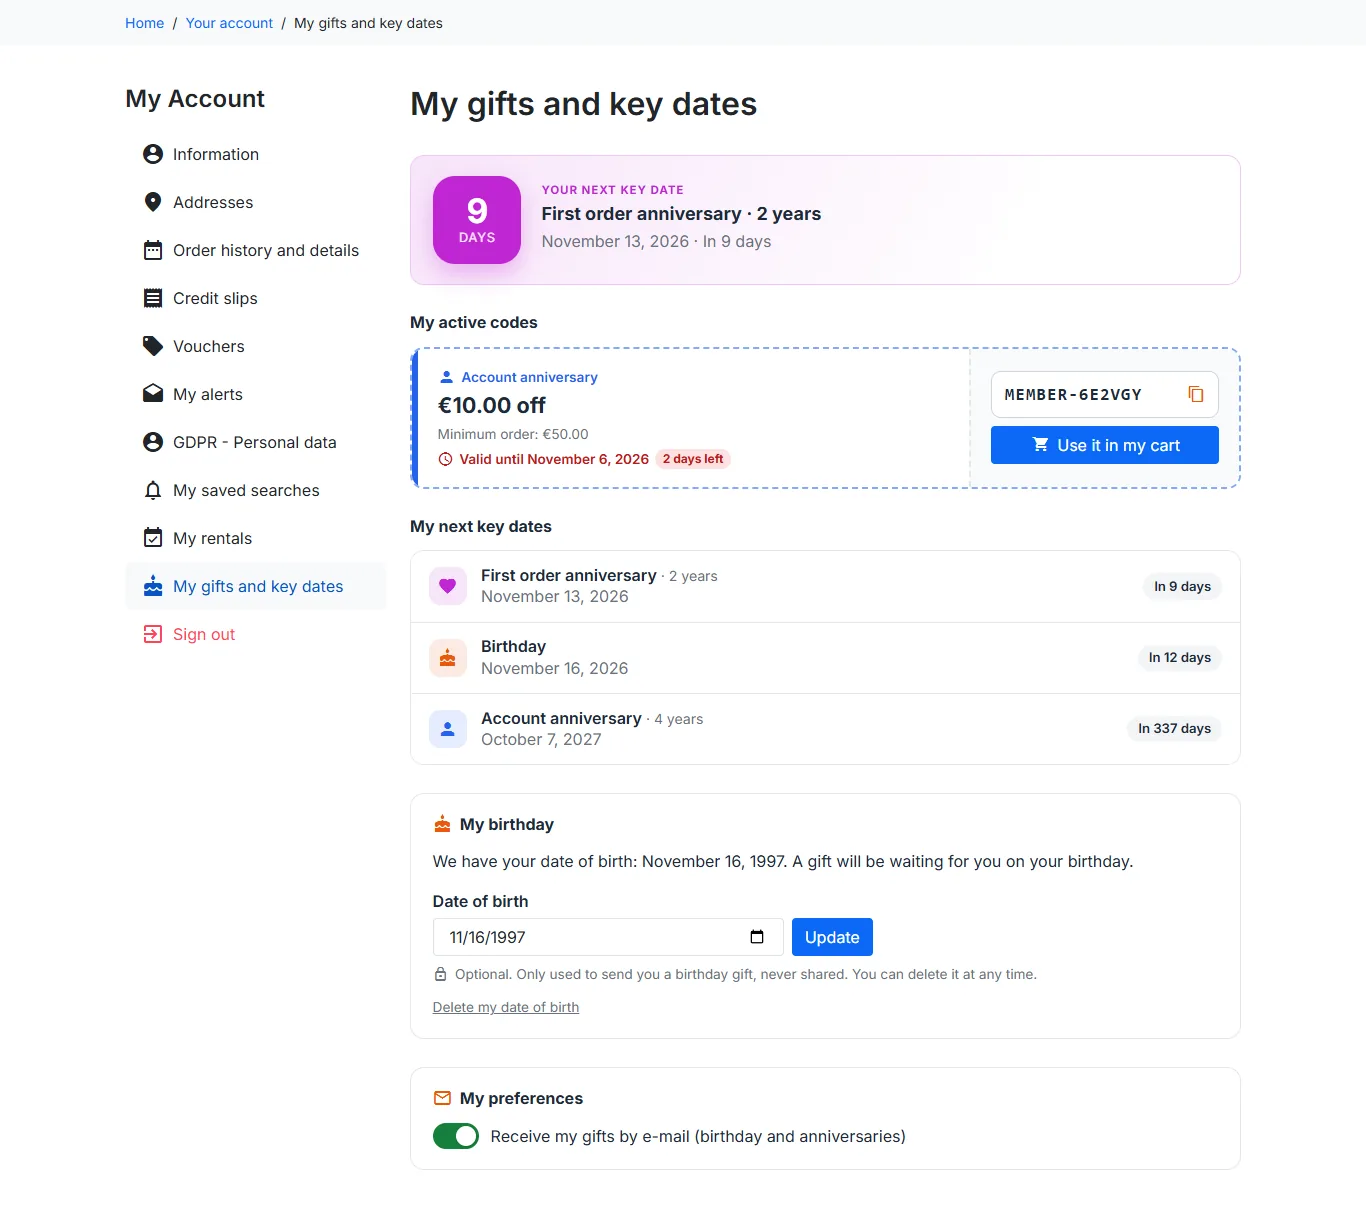
The “My gifts and key dates” customer page
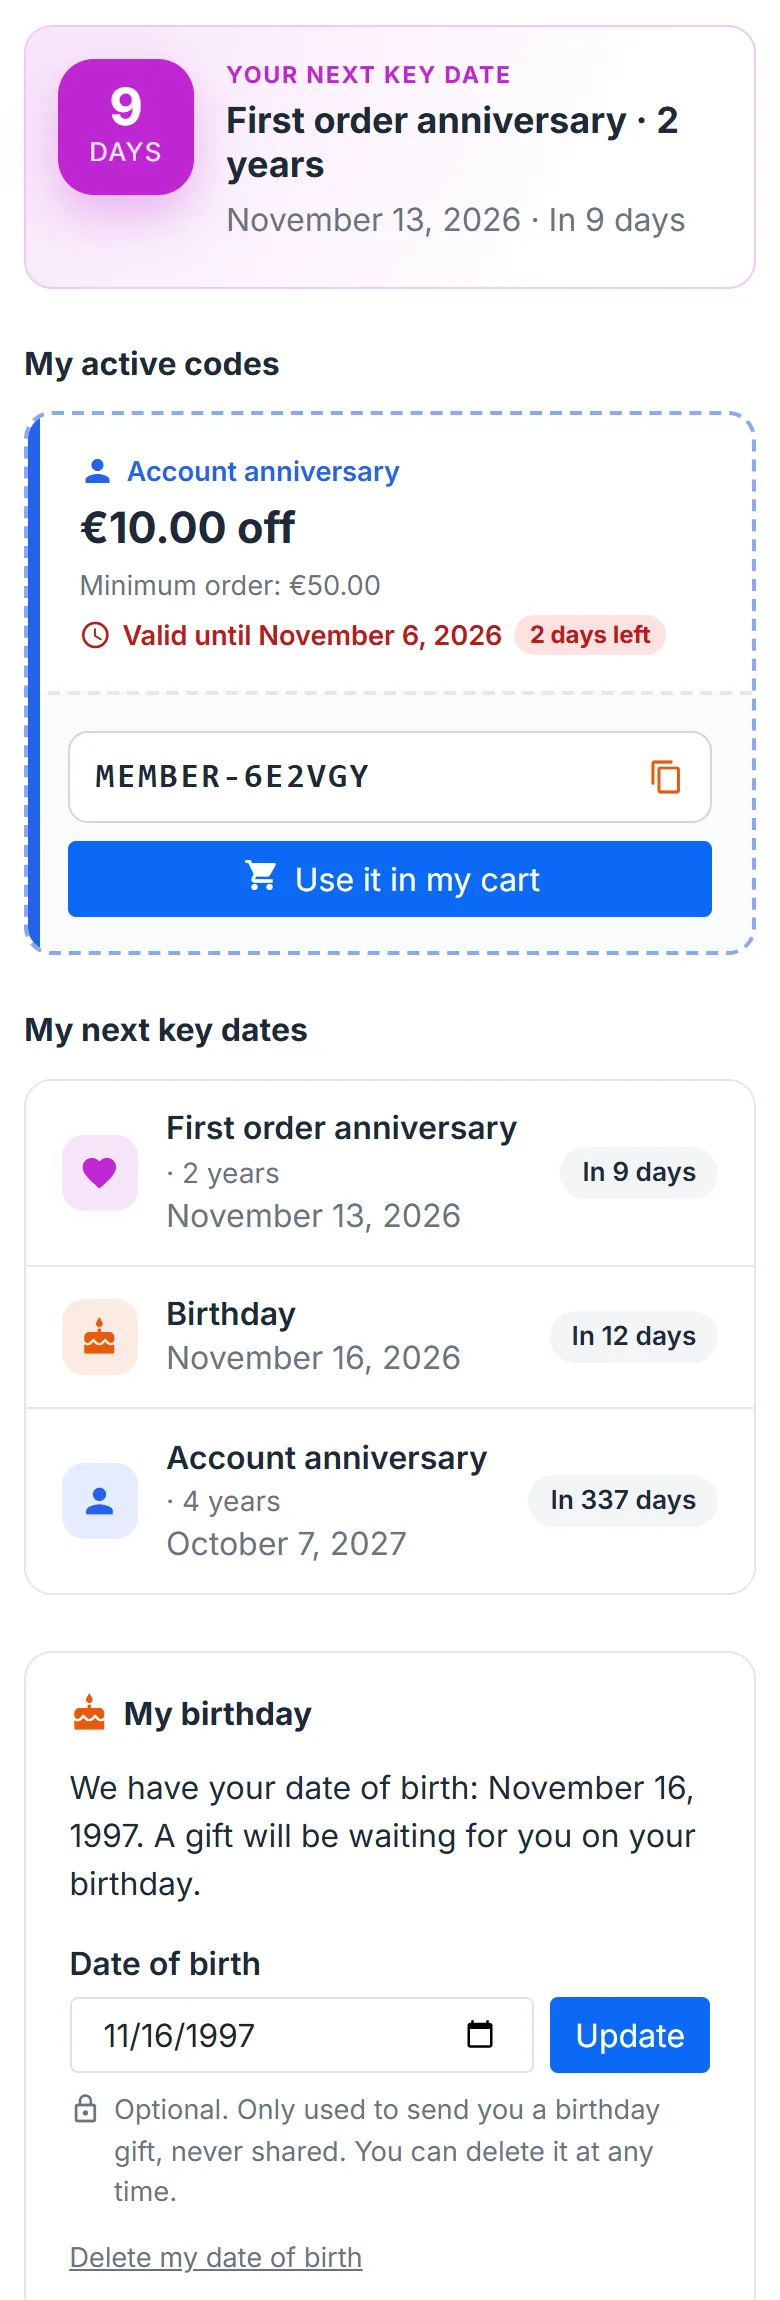
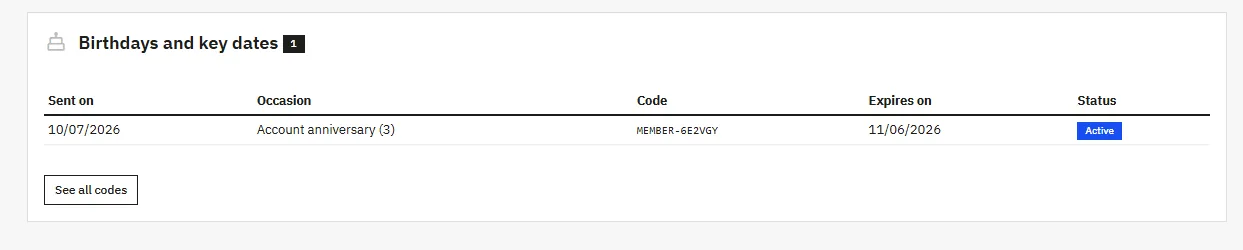
Available from My account, it shows the active codes with a copy button and a Use it in my cart button, the customer’s upcoming key dates with a countdown, the date of birth form with a Delete my date of birth link, previous gifts and a switch to receive these emails or not. A code that expires in less than 3 days is flagged. The page adapts to the Classic and Hummingbird themes and to mobile. You can hide it in the settings; the link only appears in My account when at least one campaign is active.
Statistics and revenue tracking
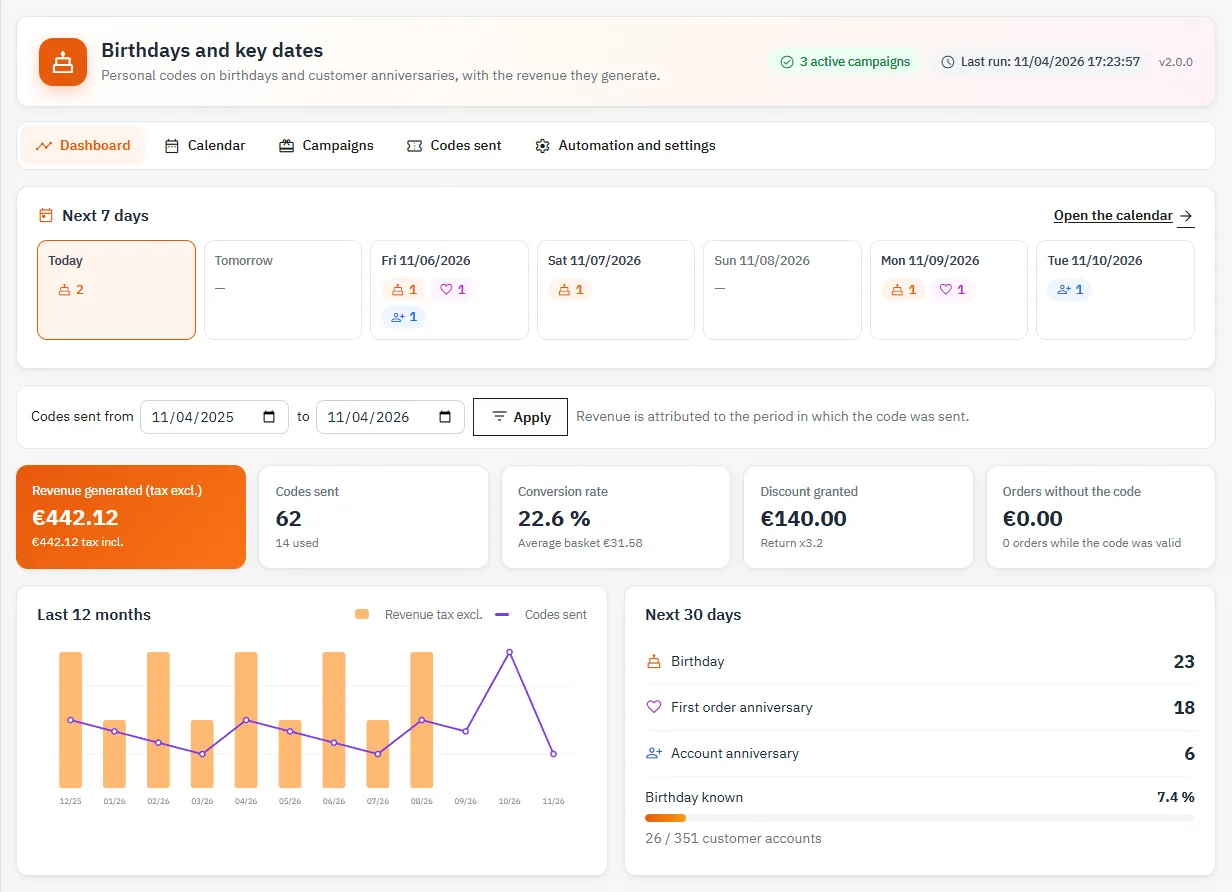
The Dashboard tab shows, for the selected period:
- the revenue generated excluding and including tax, calculated on valid orders that used a code, converted into the default currency;
- the codes sent and used, the conversion rate and the average basket;
- the discount granted and the return (revenue divided by discount);
- the orders without the code placed while a code was valid;
- a 12-month chart, performance by occasion, the sends of the next 30 days and the latest orders with a code.
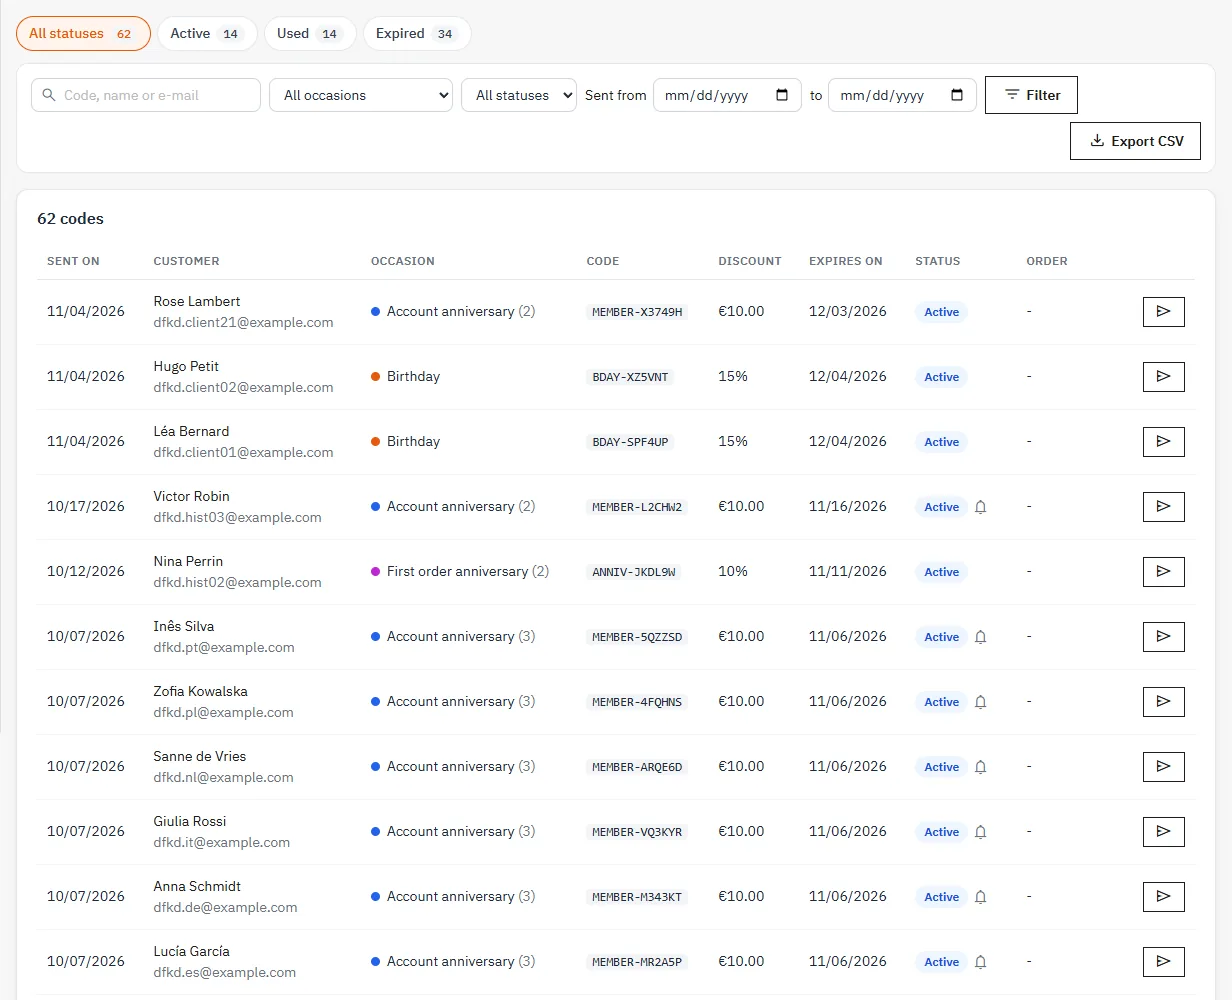
Revenue is attributed to the period in which the code was sent. The Codes sent tab lists all codes with search, filters by occasion, status and date, email resend for an active code and CSV export. The back-office customer page also shows the codes sent to that customer.
The dashboard also shows the next 7 days: each day gives the number of customers concerned per occasion and leads to the calendar. In the Codes sent tab, the quick filters by status (active, used, expired) show their number of codes.
Cleanup of expired codes
The Delete expired unused codes after setting (30 days by default) deletes the matching cart rules to keep Catalog > Discounts readable. The module history and statistics are kept. Set 0 to never delete.
GDPR
The module registers with PrestaShop’s official GDPR module. Exporting a customer’s data includes their codes and preferences, deletion erases the module history for that customer. Each customer can unsubscribe from these emails in their account or, without logging in, through the link in every email: the link opens a confirmation page, so software that follows email links does not unsubscribe anyone. Customers can also delete their date of birth from the “My gifts and key dates” page.
Multistore
Campaigns and settings are specific to each store. Select a store in the multistore menu to edit them. The codes created are restricted to the store concerned.
FAQ and troubleshooting
No code is sent
Check that at least one campaign is enabled and that no pause is in progress, then open the Calendar or use Simulate. If the list is empty, no customer matches today’s criteria: unknown date, anti-abuse waiting period, group not targeted, not enough orders or unsubscribed customer.
Emails do not arrive
Send a test email from a campaign. If it does not arrive, check PrestaShop’s email configuration in Advanced Parameters > E-mail. A code whose email failed is flagged in the code list and can be resent.
An order is missing from the statistics
Only valid orders are counted. If an order was created in the back office by an employee without permission on the module, click Resync used codes; the daily task also does it automatically.